
Note:
You must create an intent before you can populate it with training samples.
You can create training samples manually, one at a time, in the Smart Intents UI.
Alternatively, you can create many training samples in a bulk operation, by editing and then importing a CSV file.
See these articles:
To create a training sample, follow the steps below:
- Log into your Helpshift account as an administrator.
- On the Helpshift toolbar, click the Helpshift AI button.
- On the Helpshift AI page, look for the Smart Intents card.
- Click MANAGE ➔ on the Smart Intents card.
This will open the Smart Intents page with the Intents tab active by default.
You’ll see a card for each intent group you’ve created.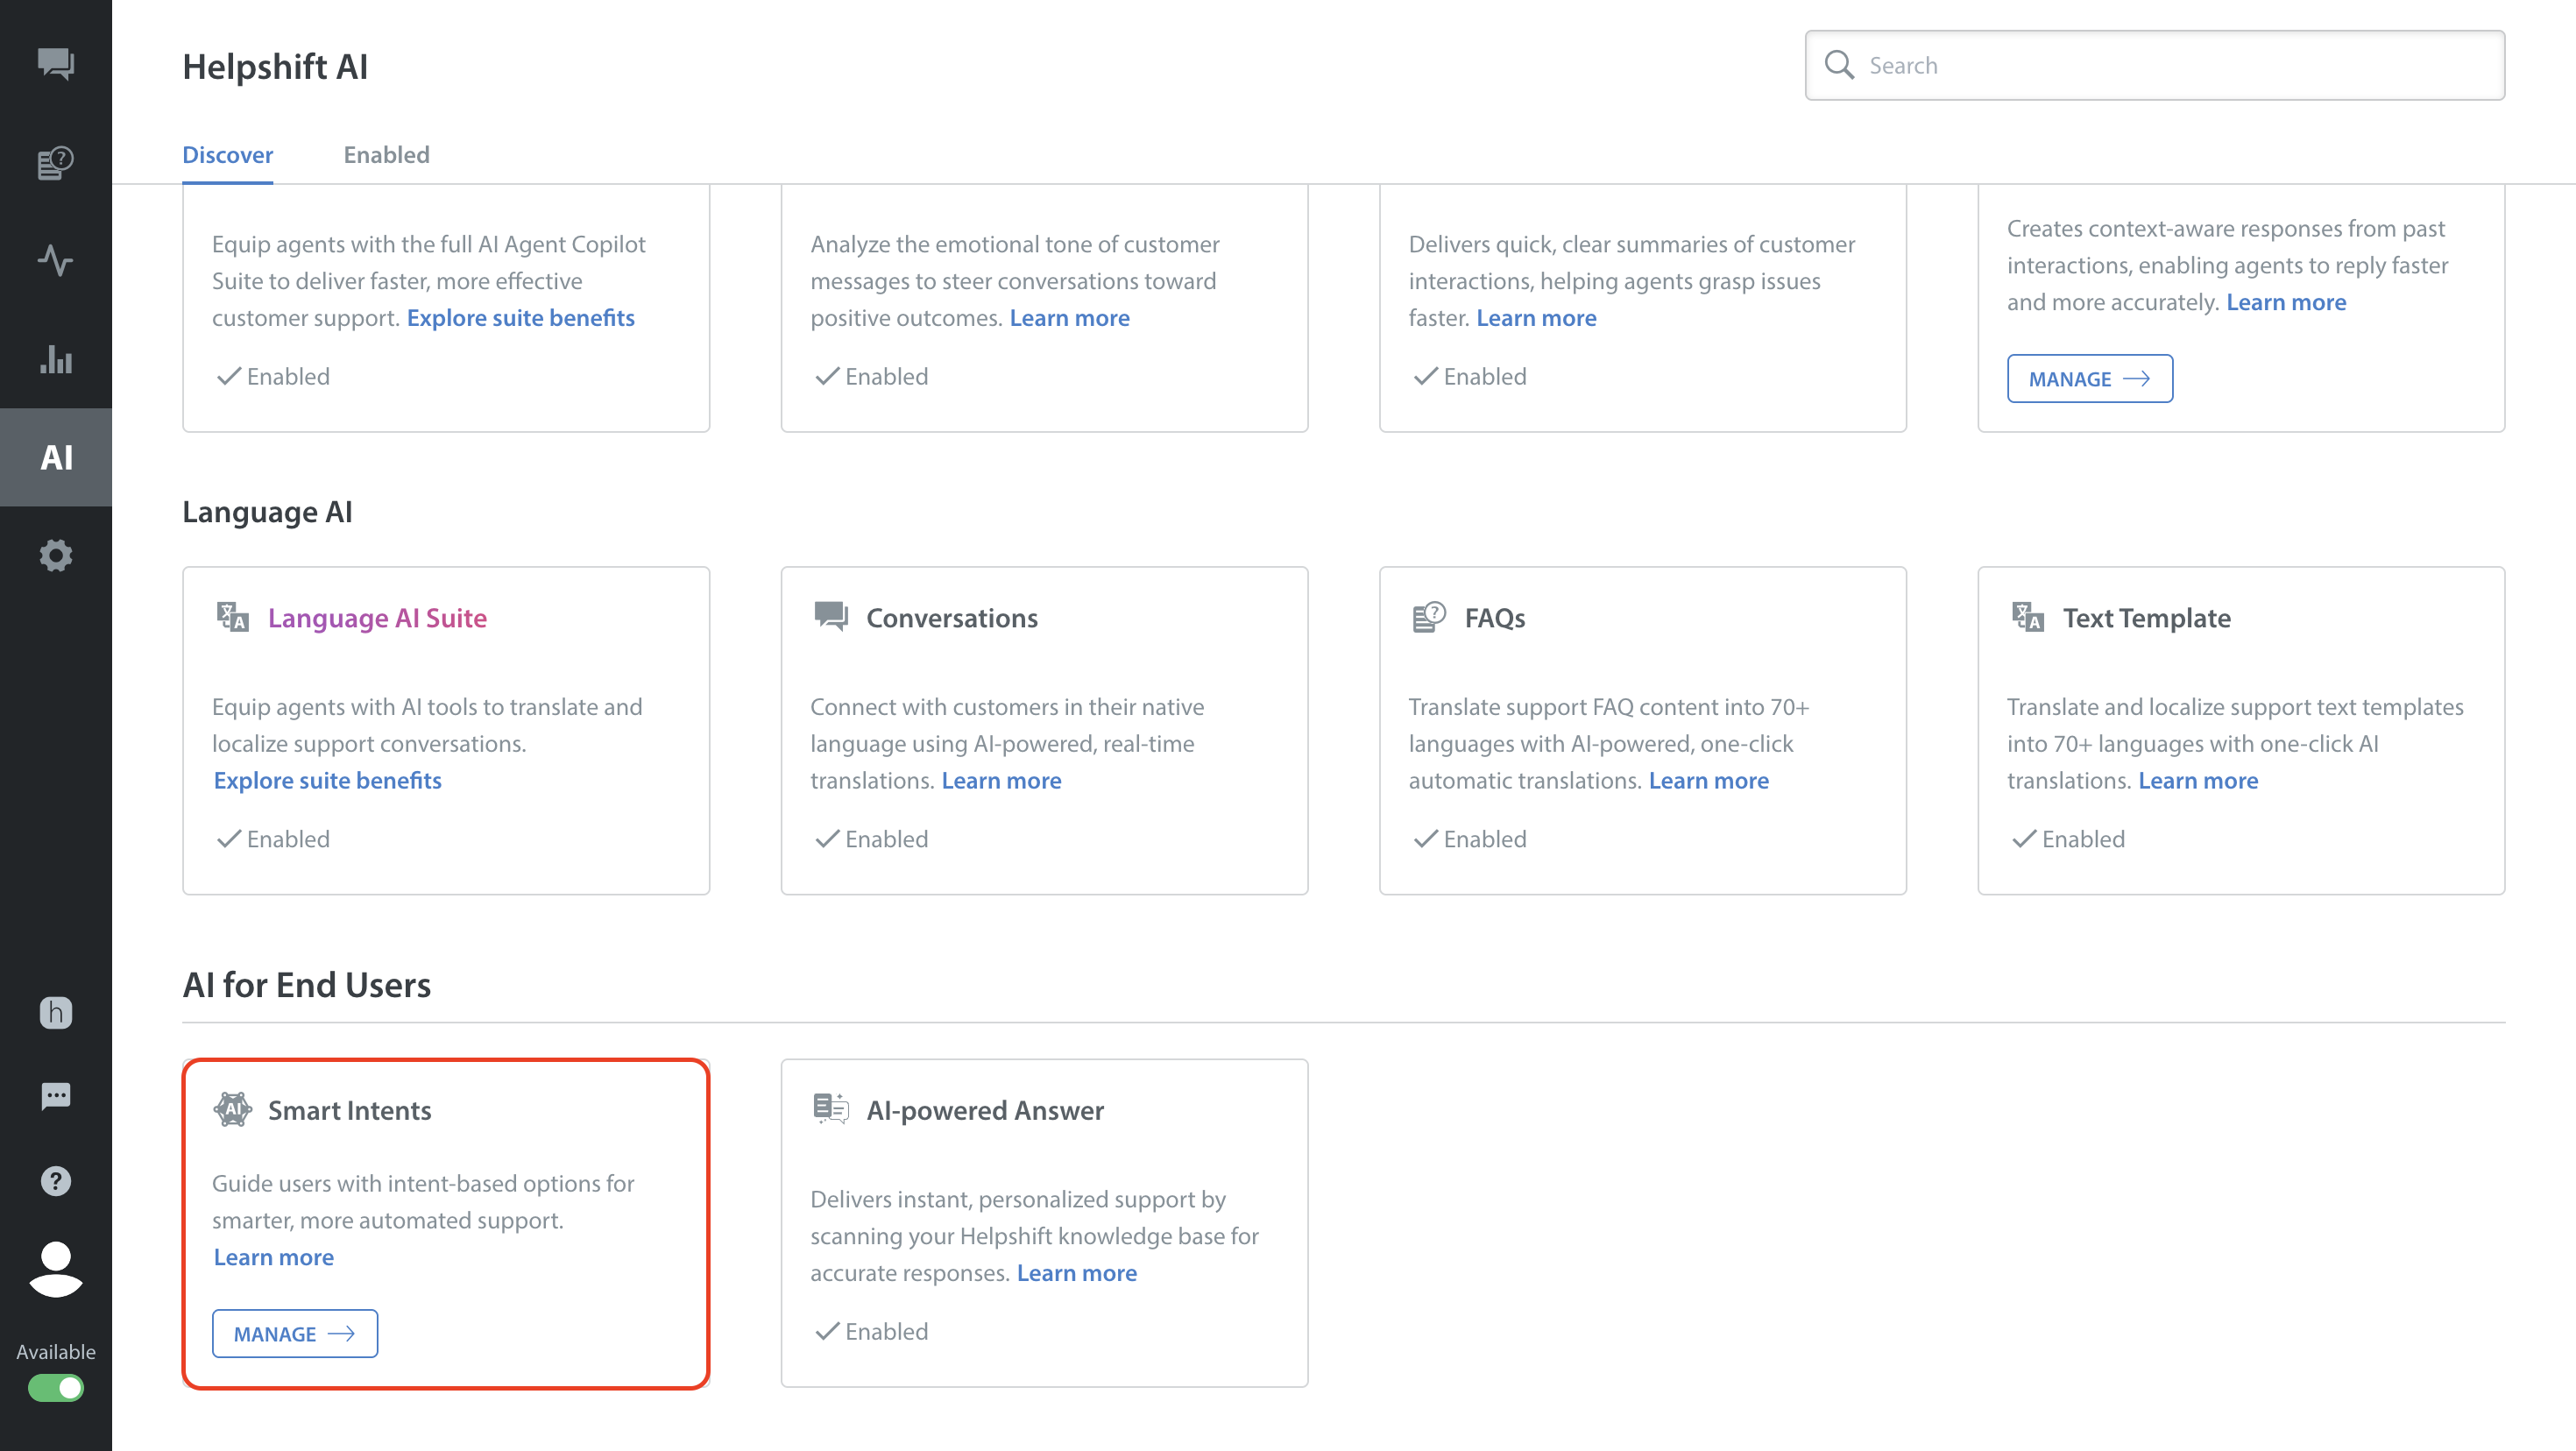
- Navigate to the intent group that contains the intent you want to update with training samples.
If the intent group card is collapsed, click the toggle button to expand it. - Click the More Options button (⋮) of the intent you want to update.
- Select Edit from the dropdown.
The Edit Intent sidebar will slide in from the right.
- In the Training Messages section of the sidebar:
- Click the Add new training message field.
- Type the text for your new training sample.
- Press ENTER to add.
The new sample will appear just below the entry field.

- Add as many training samples as needed.
- Click SAVE to save your changes.
