
Our native iOS and Android SDKs allow you to offer a seamless, conversational messaging experience to your in-app users that is unified with our Web Chat experience. Our AI-powered Bots can work with your SDK to handle routine parts of the conversation and help your support team conduct end-to-end Issue management.

Configuring your mobile SDKs is a three-step process that requires collaboration with your developer, as detailed below. We strongly recommend reviewing our FAQ on QAing your new in-app experience to effectively plan for this update before releasing it to users.
- Developer: Upgrade To the Latest iOS/Android SDKs
- Admin: Enable Conversational Issue Filing
- Admin: Activate Bots
- Optional: Configure Custom Push Notifications
- Customizable 'Enter' behavior
For more detailed steps and best practices, please see our Knowledge Base.
1. Developer: Upgrade To the Latest iOS/Android SDKs
First, download the latest SDK for iOS and Android via our developer documentation. Review the full steps on the SDK page for a complete set of instructions to upgrade your SDK.
If you’re upgrading from a version of the SDK that is older than 7.0.1, please note that the following Helpshift APIs were officially deprecated with that release in May 2018:
- gotoConversationAfterContactUs: No longer applicable in the conversational experience
- showSearchonNewConversation: Replaced with Bot functionality in the Dashboard
- enableTypingIndicator: Replaced with a Dashboard toggle to enable the typing indicator
- loginWithIdentifier (iOS, Android): Replaced with a new Login API
- hideNameAndEmail, requireNameAndEmail: Not applicable in the conversational experience
- setNameAndEmail, setUserIdentifier: Will be replaced by the new Login API
A detailed review of additional changes that came with the 7.0.1 release can be found in our April 2018 SDKs update. To see the last version, review our iOS and Android release notes.

Next, your Admin should review and enable select features in the Dashboard, as detailed below.
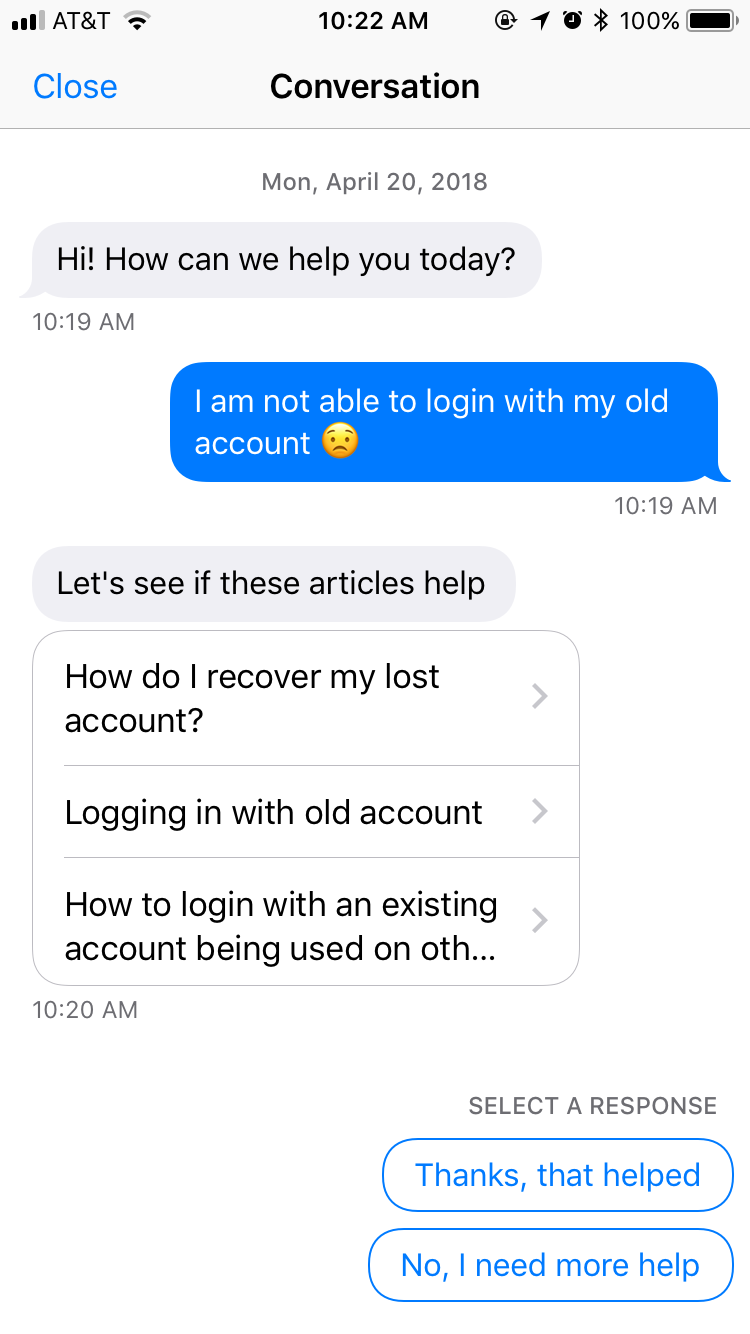
2. Admin: Enable Conversational Issue Filing
Now that your developer has implemented the latest SDK, you are ready to enable Conversational Issue Filing. For complete steps, see our FAQ What is Conversational Issue Filing, and how do I set it up?
As stated above, to ensure a successful integration of this new conversation flow for your users, we recommend that you update your SDKs and Dashboard configurations as follows:
- Create a test app in your Helpshift Dashboard for testing out the new Conversational Issue Filing flow
- Have your developers create a test version of your app that uses the app ID and API keys from your test app in the Dashboard
- Integrate the latest Helpshift SDKs into that test app
- Enable Conversational Issue Filing from the In-app SDK Configurations page in your test app
- Once Conversational Issue Filing has been enabled, try out different configurations for your conversational experience by enabling/disabling the settings listed in this guide
- When you’ve figured out the settings that work best for your workflow, work with your developer to update your app and Dashboard with Conversational Issue Filing
3. Admin: Activate Bots
Now that you’ve enabled Conversational Issue Filing, you’re ready to enable Bots to customize your in-app experience.
The following Bots can be configured from the Conversational Issue Filing page within your Dashboard:
QuickSearch Bot
This Bot engages with the user before a new Issue has been created. It will automatically respond to the end user’s inquiry with relevant FAQ suggestions to help them find the information they need with no Agent assistance needed.
Please note: QuickSearch Bot is an add-on feature that can only be unlocked with an account upgrade. Contact success@helpshift.com to learn more.
See What is QuickSearch Bot, and how do I set it up? to get started with this Bot.
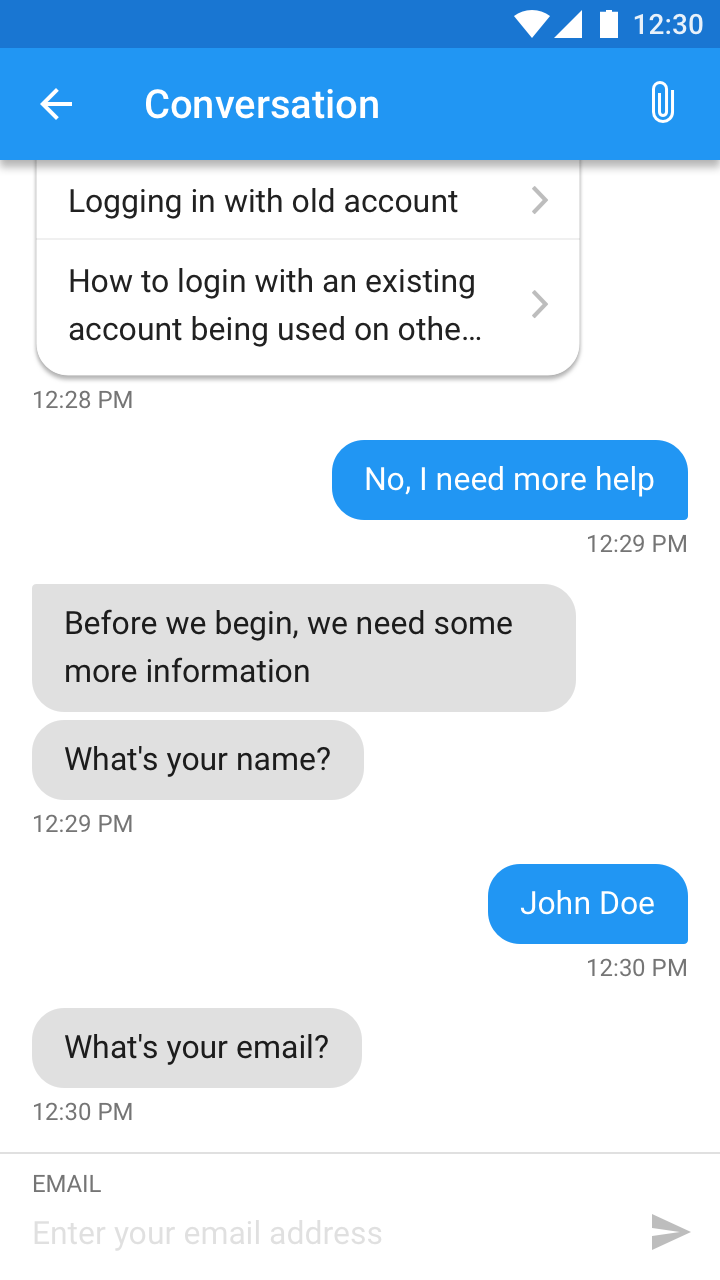
Identity Bot
If the user indicates that they still need Agent assistance, then this Bot will automatically request the user’s name and email address (if this information has not been collected previously) to populate these fields in the new Issue that will be created. If that info is already available on the user’s profile, then this Bot will not ask again.
See What is the Identity Bot, and how does it work? for more information on how to set this Bot up.
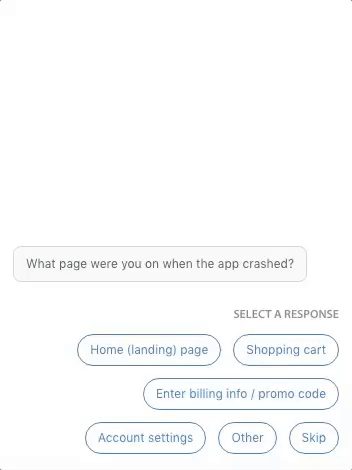
Custom Bots
Custom Bots can be set up to carry out a customizable series of actions on at any point in a conversation. They can do all of the same things as Agents, so they can be used to replicate an interaction with an Agent and provide end-to-end Issue management.
Custom Bots will only engage with open Issues. They can be invoked manually by Agents, or you can configure your workflow to have them automatically called by Automations when certain conditions have been met.
Please note: Custom Bots are an add-on feature that can only be unlocked with an account upgrade. Contact success@helpshift.com to learn more.
Once you have access to Custom Bots, see What are Custom Bots, and how do I set them up? To get started.
4. Optional: Configure Custom Push Notifications
Once you’ve set up in-app messaging, your developer can customize the push notifications that are sent from your app, including using badging to display the new message count by your app icon.
5. Customizable 'Enter' behavior
This feature empowers you with greater control in shaping the Helpshift chat experience for your end-users. Navigate to Settings > App Settings > In-app configuration > Support experience and switch the toggle as per your requirement.

For complete steps to set this up, see our guide on Creating Custom Push Notifications.
To set up additional features and learn more about Helpshift best practices, please review our Knowledge Base.