This page is designed to be your one-stop shop for getting Helpshift up and running. If you’re new to Helpshift, review each of the sections below to plan your Helpshift implementation and set up all the right features in the right order.
What is Helpshift?
Step 0: Plan Your Support Experience
Step 1: Set Up Your Dashboard & SDKs
Step 2: Implement AI & Additional Platforms
Step 3: Create Your Workflow
Step 4: Track Analytics
Step 5: Prepare To Launch
Step 6: Finished! + Useful Integrations
What is Helpshift?
If you’re brand-new, welcome! Helpshift is a customer service platform that enables you to provide a real-time, conversational support experience for all of your users on all different platforms and devices.
By harnessing the power of machine learning, AI, and Bots along with our workflow management features, Helpshift allows you to deliver a remarkable and unified support experience that scales with your organization.
For a 2-minute introduction, watch this:
This page is designed to walk you through the process of setting up Helpshift for the first time. We offer an array of highly customizable features to help you tailor your workflow to provide the best experience for your users and support team. Review the sections below to determine which of these features and configurations is best for you, and how to set them up (and in what order) to get Helpshift up and running smoothly.
Plan Your Support Experience
The most important part of setting up Helpshift is getting your Support Manager, Developer, and Product Owner together to agree on what features and configurations to set up. Thinking this through ahead of time is essential to setting them up correctly to work well together, and ensures that each party knows their responsibilities when it comes to maintaining your Helpshift setup over time.
During this meeting, there are several important questions you must answer together to determine which features to set up. Some of these questions are platform-specific, so they have been listed under their corresponding platform section.
Important Questions
The first and most important question is: what are your goals for using Helpshift?
Examples include quantitative goals, such as support performance metrics, and qualitative, such as wanting to be able to scale for growth. Keep these goals in mind as you read through our features to help you think through how you can use them to meet your goals.
What does the structure of your support team look like?
Helpshift has 3 different role types you can assign based on the access levels you’d like to provide to your team, which are Agent, Supervisor, and Admin. You can also organize your team into Groups or Teams (for larger support organizations) based on specializations, such as geographical location, language, or function.
When setting up your workflow, are there certain types of Issues that you want to prioritize over others?
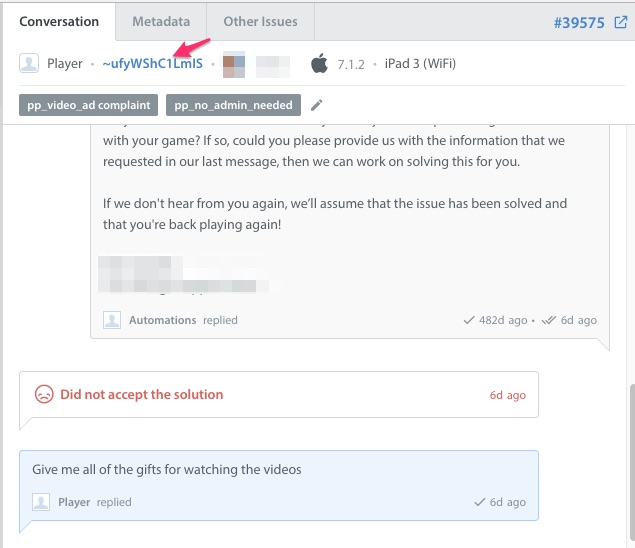
‘Issues’ in Helpshift are known as ‘tickets’ or ‘cases’ in other systems. Examples may include users who have spent a certain amount of money, loyalty program members, time-sensitive inquiries, or other types of Issues.
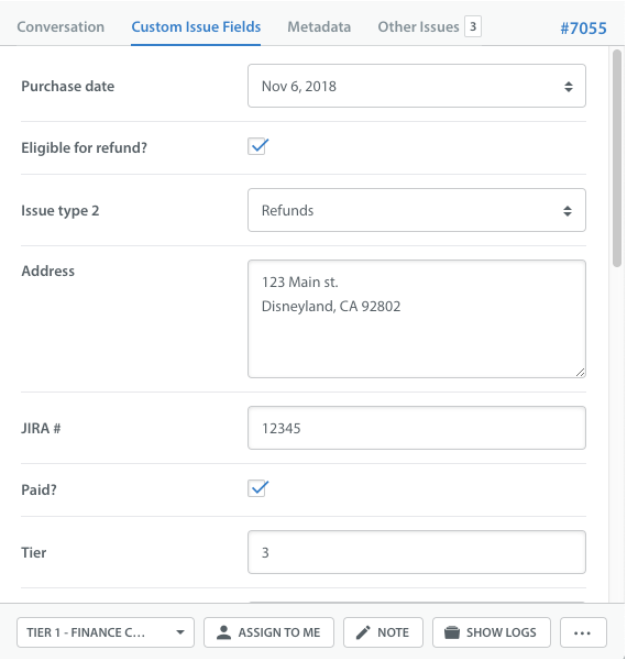
What types of information do you need to collect about your users?
You can set up Helpshift to collect all types of user-specific information, such as their app version, the amount they have spent over time, what their language setting is, and more.
This information can be configured by your developer as Custom Issue Fields, which can be used within your workflow to route and prioritize certain types of inquiries. Custom Issue Fields are also visible to Agents within each Issue, making it easy for them to address user inquiries.
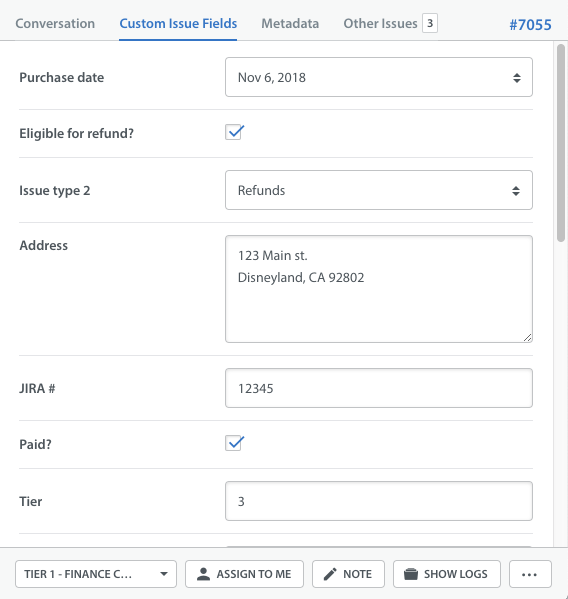
During the planning phase, you should make a list of what Custom Issue Fields you need for prioritizing and organizing web, in-app, and email Issues for your support team to manage.
To better understand what types of Custom Issue Fields are available and how to effectively use them, review the intro of our Custom Issue Fields guide.
How do you want to collect user identity information, such as ID, name, and email?
There are three options across all platforms.
Your developer can configure our Login API for SDK and Web Chat Issues to have this information automatically collected and set in your Dashboard. This data can be configured to automatically link out to your external user management system.
If this information is not known or you are not using the Login API, then your Support Manager can set up the Identity Bot to request a user’s name and email address at the beginning of the first conversation.
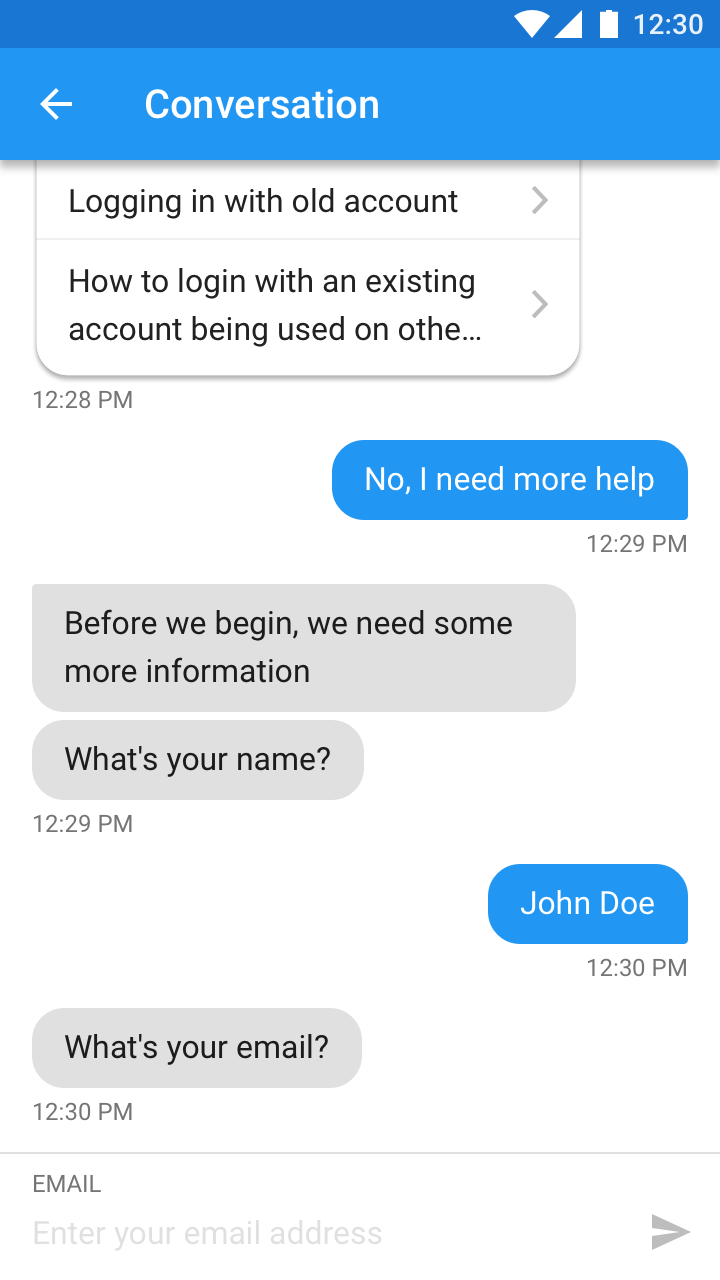
Additionally, if you have both anonymous and logged-in users who write into support, you can use a combination of the Identity Bot and Login API to capture this important identity data.
Do you have set business hours you need to adhere to?
You can use Automations and set configurations within our Web Chat and in-app settings to set expectations with users about when they should expect to hear back from your team.
What is your escalation process like?
If you already have a specific escalation process you follow where Issues must be replied to within a certain time frame or managed by certain team members, you can automate this process using advanced workflow features.
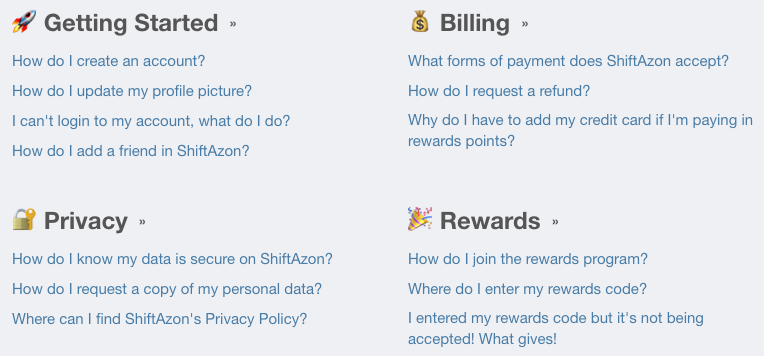
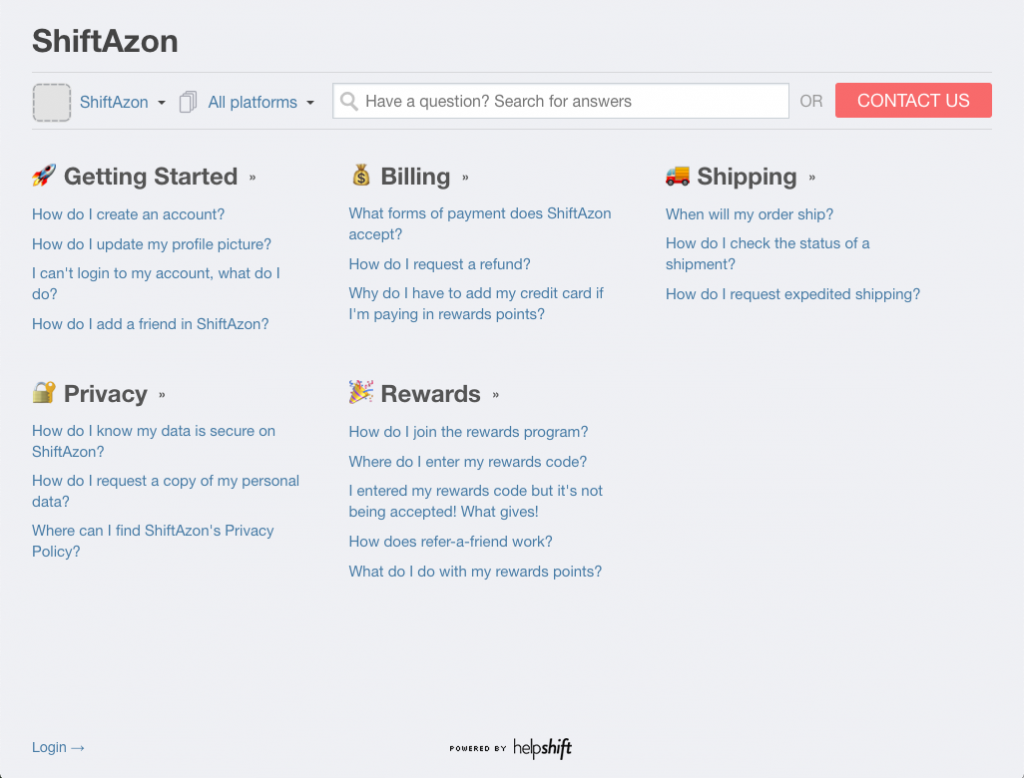
Do you have a current set of FAQs to upload, or do you need to create new FAQs?
Frequently Asked Questions are essential for enabling self-service. Helpshift offers tools for you to consolidate and organize FAQs to make them easy for your users to navigate and review. These FAQs can be made visible across all platforms, including your website and app.
Do you need to have a set of templated/prewritten replies available for your support team to use to respond to users?
These are known as Quick Replies in Helpshift, and you can create them while you’re setting up your Dashboard to help your support team get started.
How are you planning to scale your support workflow over time?
As your user base grows, you’ll need to plan your workflow accordingly to maintain the highest quality support possible without overloading your support team.
We’ve found that the most successful organizations use Auto-Assignment with Queues (an add-on feature) to assign Issues.You can use these features with Custom Issue Fields to route Issues based on the priorities that you’ve set for your team.
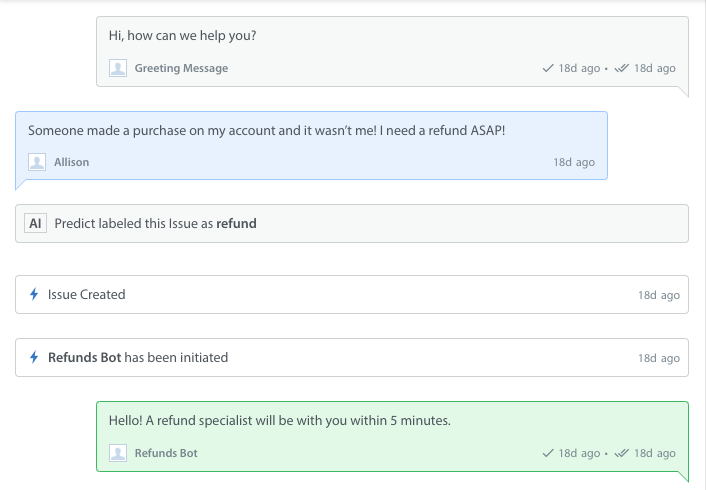
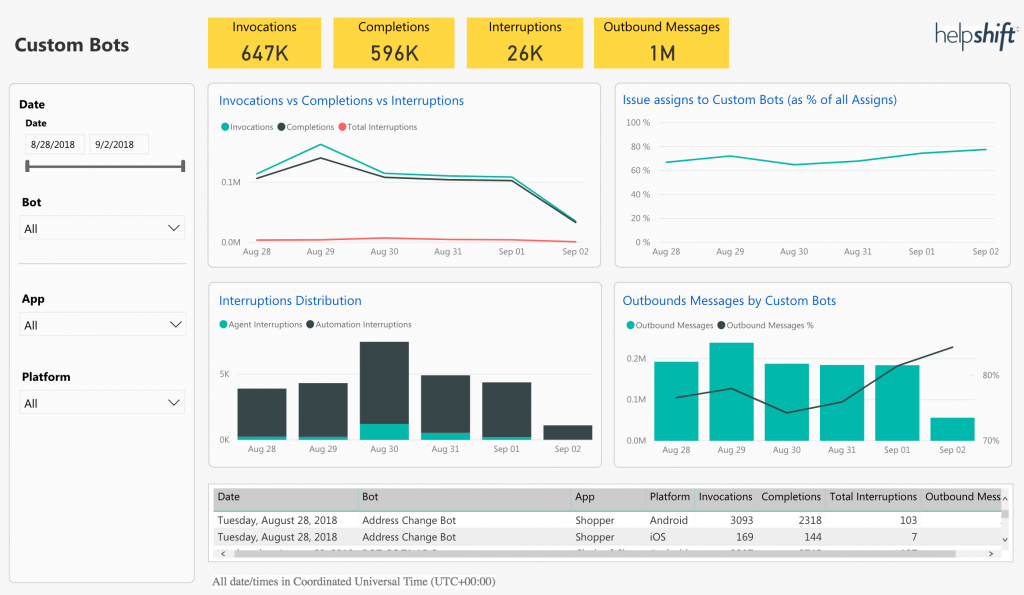
For even more advanced workflow optimization, Custom Bots (an add-on feature) allow you to conduct end-to-end Issue management for common Issue types to save your Agents the work of having to respond to common question types over and over.
Our AI-powered engine SensAI Predict (an add-on feature) can remove the burden of manual Issue categorization by automatically classifying Issues based on the user’s first response.
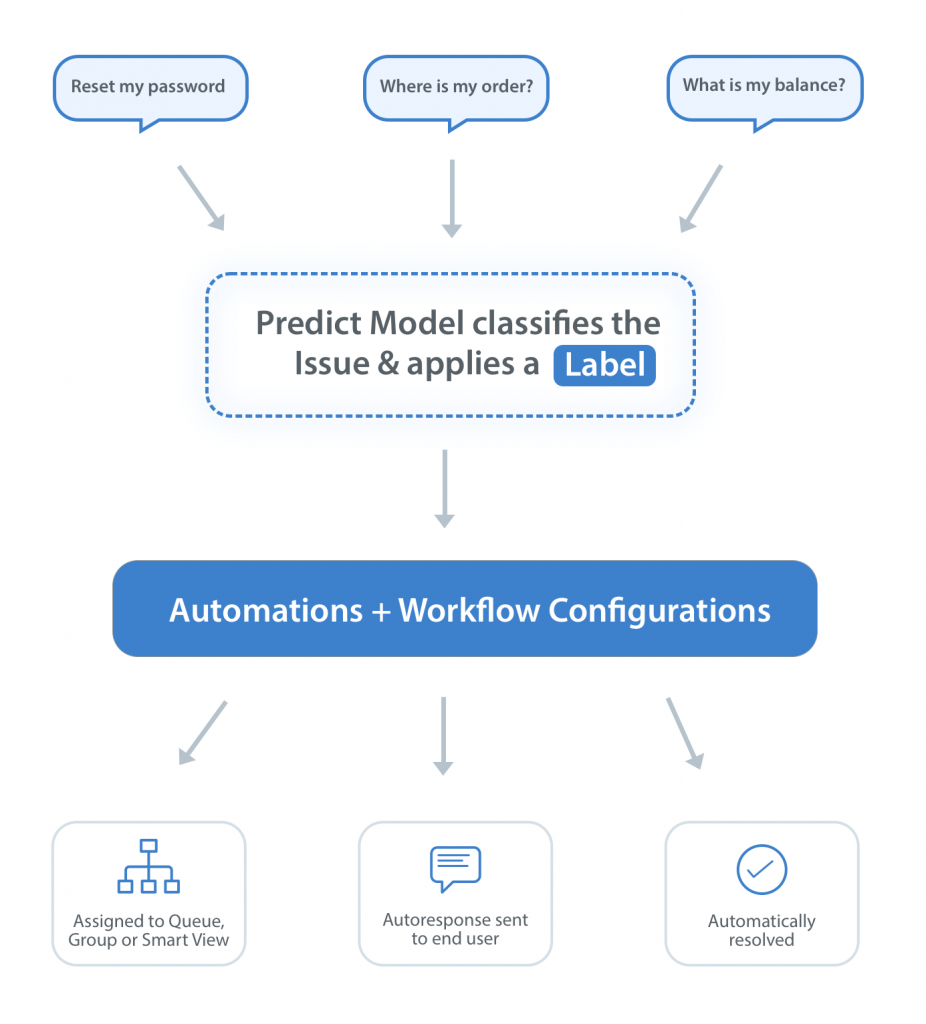
If you are planning to use Predict, you’ll need to work with your team during the planning phase to decide on the set of Labels that Predict should apply to Issues. Labels are categories for your Issues, so just make a list of what categories your Issues will fall into. For example, you may have users writing in about accounts, payments, refunds, shipping, feedback, and more, so those would all be valid Labels.
Keep in mind that each Issue can only have one Label, and that these Labels are essential for using Automations and Auto-Assignment to manage Issues within your workflow. To learn more about how Predict uses Labels, see What is SensAI Predict, and how does it work?
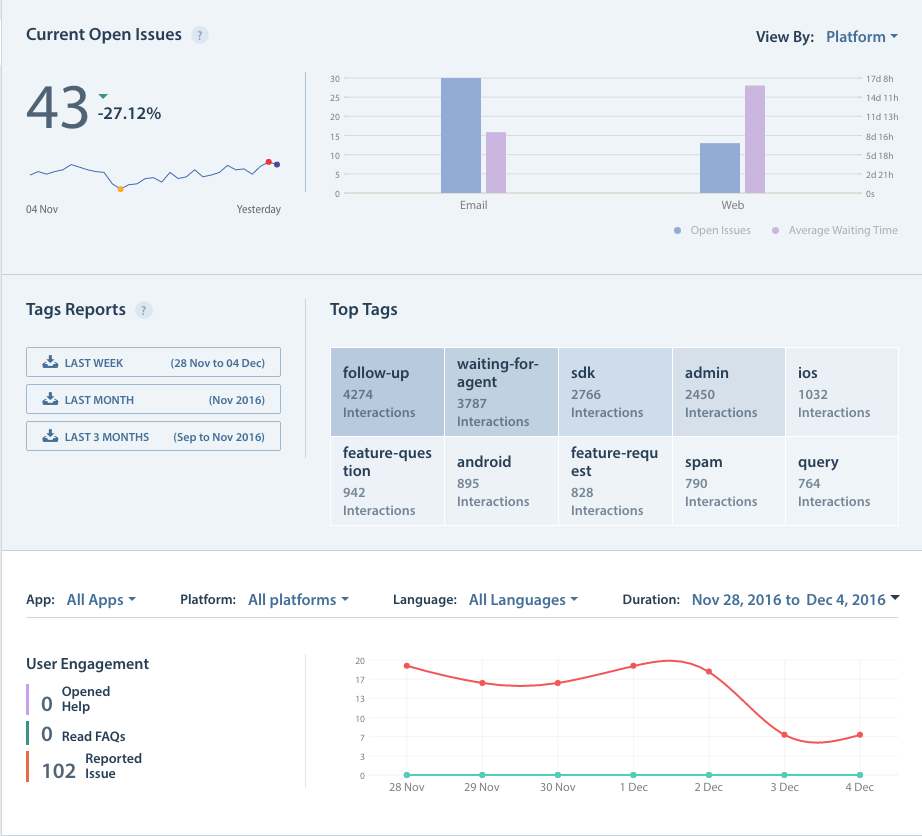
What types of metrics do you want access to for measuring success and team performance?
Helpshift gives you the flexibility to get your data the way that you want it.
Helpshift Analytics allows you to review and analyze historical data directly in the Helpshift Dashboard. For Supervisors managing Agents during shifts, Real-Time Operations (an add-on feature) is another Dashboard tool that allows you to quickly identify and take action on spikes in Issue volume as they occur.
Power BI (an add-on feature) gives you the power to leverage our pre-built reports, while still allowing the flexibility of advanced filtering and report customization (no developer needed!). For maximum flexibility, you can consolidate different data sources in an external tool via our Analytics APIs.
Do you need to support international users?
Your developer can configure the SDK to offer support for multiple languages. Your Support Manager can also add support for multiple languages within your Web Chat widget and FAQs by updating your Dashboard settings, and use workflow tools such as Automations, Bots, Queues and Agent Groups to organize Issues by language.
Does your organization need to adhere to COPPA or GDPR requirements?
COPPA is an American law that prohibits collecting personal identifiers from children under 14. GDPR is a regulation within the European Union that requires appropriate processing of personal data and compliance with individual requests to gain access to that data or have it erased. Helpshift offers tools to allow you to adhere to COPPA and GDPR compliancy requirements. You can learn more by reviewing the following FAQs:
Now that you’ve thought about your goals, team structure, and cross-organizational support needs, you’ll want to consider the following platform-specific questions.Because Helpshift allows you to offer a unified support experience for users on all of these platforms, it’s to your advantage to offer as many of these channels as you need to keep all of your support conversations organized in one place.
Click on each sections below to see an expanded list of questions for that support platform. We’ve included visual examples to give you a sense of what the end user experience will look and feel like with these settings.
In-app (iOS & Android)
Web Chat
Web & Email
Once you’ve answered these questions, review each section below to start setting up the features you need to meet all of your end user and support team’s needs.
Step 1: Set Up Your Dashboard & SDKs
Admin: Create Custom Issue Fields
During the planning phase, you should have decided on a set of Custom Issue Fields that your team needs to prioritize and manage Issues. The first step of setting up your Dashboard is to create those Custom Issue Fields so that your developers can configure the SDK to pass through this data.
Review our Custom Issue Fields guide to complete this step.
Admin: Create Helpshift apps
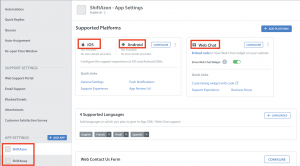
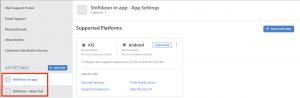
Next, you’ll create your first Helpshift apps. Apps in Helpshift represent each of the products or services you support.
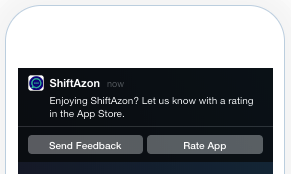
For example, if you have two major products, ShiftAzon (for buying travel products) and ShiftAway (for booking travel), where each product has their own website, mobile apps, platforms and branding, you should create two separate apps (one for each product) and each app should have three platforms within Helpshift. This allows you to customize the support experience for each product, and keep all related configurations organized in one place.
Here is an example of a correct app setup, where two apps are set up with three platforms.
Here is an example of an incorrect app setup, where apps are created based on platform rather than product.
Review How do I add my app in Helpshift? For a full set of steps to create Helpshift apps.
Admin & Developer: Set up In-app Messaging & Bots
Our iOS & Android SDKs allow you to offer a seamless, conversational messaging experience to your in-app users. You can also use AI-powered Bots to handle routine parts of the conversation and help your support team conduct end-to-end Issue management.

Complete steps for the Admin and Developer to set this up are available in our In-App Messaging Guide.
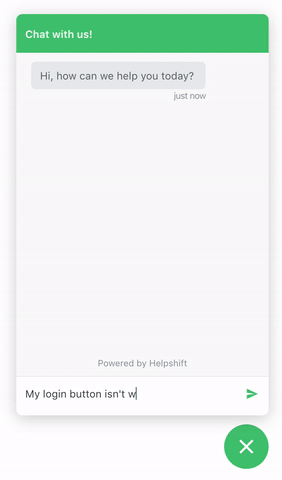
Admin & Developer: Set Up Web Chat & Bots
Our Web Chat widget allows you to offer a live chat experience on your website that is unified with the in-app messaging experience. You can also use AI-powered Bots to handle routine parts of the conversation and help your support team conduct end-to-end Issue management.
Complete steps for the Admin and Developer to set this up are available in our Web Chat guide.
Admin: Create FAQs & Quick Replies
While your developer is implementing your in-app SDK and Web Chat widget, the Admin can create a set of organized, easily searchable FAQs to deflect common Issues and offer users self-service. These FAQs will also be used by your QuickSearch Bot when responding to users, so keep this keep this in mind when deciding what FAQs to create.
A complete set of steps for creating, publishing, and organizing FAQs is available in our handy guide to Creating & Publishing FAQs.
Quick Replies go hand-in-hand with FAQs as an invaluable resource for Agents to efficiently manage common questions. They are templated messages that Agents can easily search for and use to reply to end users, such as greetings, frequently asked questions, signatures, and more.
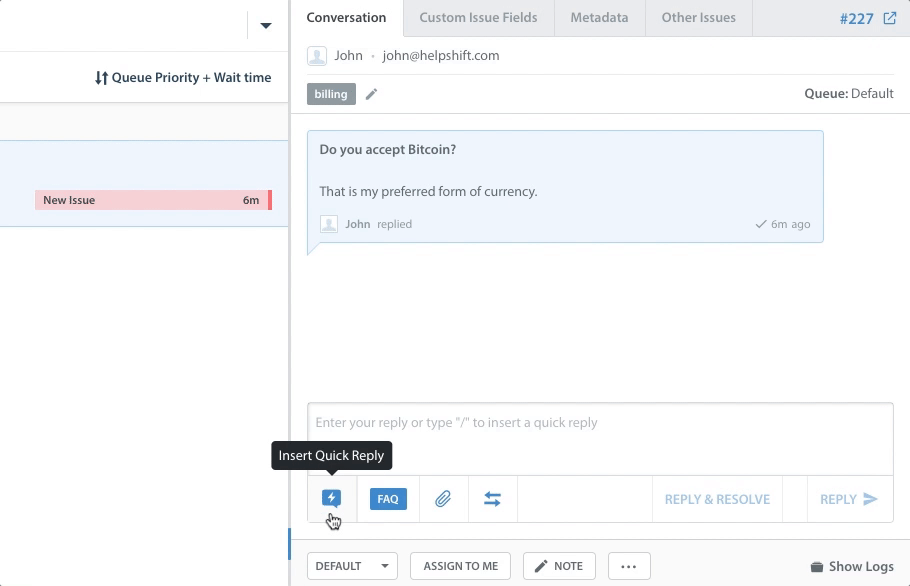
To get started with Quick Replies, review the following:
Step 2: Implement AI & Additional Platforms
Offer Email Support
Now that you’ve your in-app and Web Chat support up and running, you may want to offer email support. You can customize the emails sent by Helpshift to match your branding.
You can also customize your Web Support Portal, where all of your FAQs are housed on the web.
Our guide on Web & Email Support can help you set up and customize both of these in one go.
Set up SensAI Predict
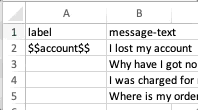
If you’re using SensAI Predict, now is the time to set up your first Model and upload a dataset of Labels to train the Model. The Predict interface will guide you through the process of setting up your Model and creating your first dataset.
For detailed information about how to plan your Labels and upload a dataset, see How do I prepare my data for the Predict Model?
Optional: In-app Proactive Messaging
If you’re interested in having the option to proactively message in-app users from Helpshift, such as to promote a special offer, encourage re-engagement, or announce maintenance, you can work with your developer to set up Campaigns.
Our Campaigns guide provides a full overview of this feature.
Step 3: Create Your Workflow
Once your Custom Issue Fields, platforms, Bots, and AI engine are all set up, you’re ready to set up workflow features to use the data coming into your Dashboard to prioritize Issues. Our workflow and AI features can work together to allow you to provide the following workflow:
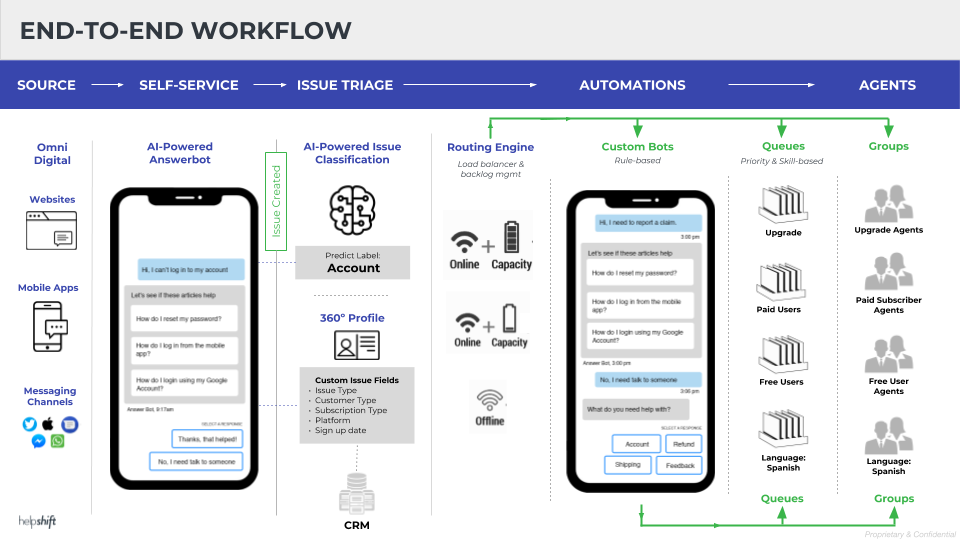
Set up Automations
As the name implies, Automations in Helpshift allow you to automate aspects of your workflow, such as:
- Assigning Issues to Queues, Bots, Groups or individual team members
- Adding or updating Custom Issue Fields or tags
- Replying to Issues with a status update or question
- Updating the Issue status once a certain amount of time has elapsed, such as automatically resolving the Issue
- Replying to and resolving Issues that don’t need Agent attention
Review the Using Automations guide to learn more about and set up different types of Automations.
Create Queues
Automations can automatically route Issues to Queues, which are prioritized groupings of Issues sorted by user wait time with a built-in backlog. Queues allow your support team to manage Issues in a number of ways by giving them the ability to:
- Work through Issues based on Queue priority and how long the user has been waiting for a response
- Move all open Issues assigned to an Agent back to the Queue those Issues came from at the end of their shift
- Unassign Issues back to the default Queue for other groups of Agents to work on
- Escalate specific Issues to a unique Queue which specialized Agents can work out of
This feature may be a good fit for your team if you have at least 10 team members and 2 or more Agent Groups. To learn more, see What are Queues, and how do I use them?
Enable Auto-Assignment
When using Automations to automatically assign Issues to Queues and Agents, it’s important to manage Issue assignment to ensure Agents are only assigned Issues that they are available to work on. Enabling Auto-Assignment allows you to let Agents mark themselves as ‘Available’ or away for Issues, set a maximum amount of Issues that Agents can be assigned, and configure additional settings for optimizing Issue assignment.
To learn about setting up Auto-Assignment, review the following:
Set up Shared Smart Views
If you’re not using Queues to keep your Issues organized, you can also use Automations to add or update Custom Issue Fields to filter Issues into Smart Views. As an Admin, you can create Shared Smart Views to keep Issues organized for groups of Agents, and your Agents can create individual Smart Views for themselves to track specific Issue types thy may want to check back on. You can also organize Smart Views into folders to keep things organized.
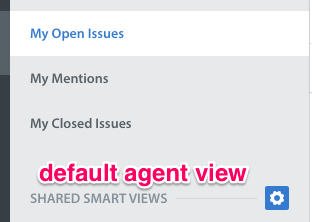
Agent view of Smart Views
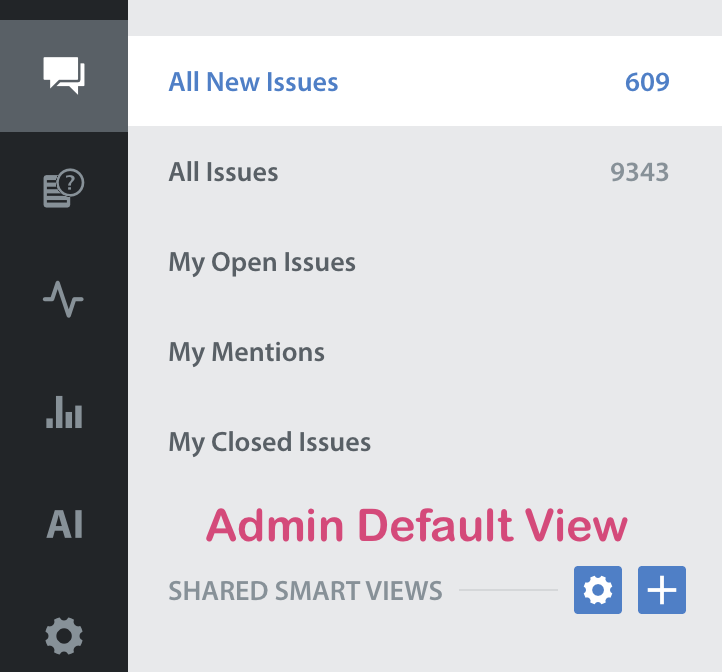
Admin view of Smart Views
To get started, see our guide to Setting Up Smart Views.
Invite & Organize Your Team
Now that your workflow is in place, it’s time to invite and organize your team to start managing Issues.
As stated in the planning section, Helpshift has 3 different role types you can assign based on the access levels you’d like to provide to your team. Those roles are Agents, Supervisors, and Admins.
- Agents (your support specialists) primary function is to respond to Issues from the Dashboard. They only have the ability to manage Issues and review FAQs.
- Supervisors (your support/team leads) can manage Issues and certain settings, including the roles of other team members, Agent Groups, tags, and blocked emails.
- Admins (your support managers/head of operations) have full permissions and can control all aspects of the Helpshift Dashboard.
For a detailed breakdown of each role, see What are the different roles in Helpshift?
You can only update a team member’s role once you’ve invited them to the Dashboard. To do so, see How do I invite my team members as Agents, Admins, and Supervisors?
Depending on the size and complexity of your team, you’ll want to use Agent Groups, Teams, or both to organize your Agents, Supervisors, and Admins.
Agent Groups work out of Queues and Smart Views. You can use Agent Groups to organize your team in many different ways, such as by language (English, Spanish, Russian), platform (iOS, Android), tier (tier 1, 2, 3), or other types of specializations (refunds, VIP, shipping).
Teams (an add-on feature) allows you to maintain a large organizational structure with specialized groups in each Team. For example, you could use Teams to split up your support organization by geography (different office locations or regions), by function (Trust and Safety, Operations) or to manage different groups of outsourced teams, who may have different goals and permission sets.
Once your team members has joined and you’re ready to organize them, see our guide to Managing Your Team. To learn more about structuring your organization via Teams, see What are Teams, and how should I use them?
Step 4: Track Analytics
As your support team works on Issues within the workflow you’ve set up, you’ll want to monitor Issue and team performance to effectively optimize and scale your support experience. We offer several analytics tools for you to get as much out of your valuable data as possible.
Helpshift Analytics
Your Helpshift Dashboard will automatically come with Helpshift Analytics, which allow you to track trends in Agent and FAQ performance. You can use this information to improve your support experience and coach your team.
To learn what’s available in your Helpshift Analytics Dashboard and how to use that data, see our Helpshift Analytics guide.
Power BI (an add-on feature)
Helpshift is integrated with Power BI, Microsoft’s Business Intelligence tool, to offer easy-to-use analytics dashboards and customizable reports. You can do the following with Power BI:
- Review and customizable reports to see only the data you need on your Power BI dashboard
- Track trends down to the minute based on an array of data points and filters
- Set alerts to monitor for spikes and other unusual changes in your workflow
- Filter data by tags, platform, date range Agent, Bots, and much more
- Share reports across your whole team for visibility
- Export data to Excel to share with key stakeholders outside your team
You’ll first need to install Power BI, then you can use our Power BI 101 guide to get started learning how to get the most out of your reports.
Real-Time Operations
Real-Time Operations grants Supervisors the ability to monitor Queue and Team performance live, which enables them to:
- Actively track the number of open Issues in each Queue to watch for unusual trends and reallocate resources as needed
- See which Agents are away to avoid breaks in coverage, and mark Agents as Available or Away right from within the Real-Time Operations page
- Set a threshold which will visually let Agents know if they are meeting team goals by changing the color of the metric
- Check the number and type of Issues each Agent is working on to ensure Agents aren’t overwhelmed
- Monitor the size of the backlog for each Queue to effectively plan for backlog management
- Support a live chat experience by quickly handling spikes and anomalies that would result in delayed Agent responses
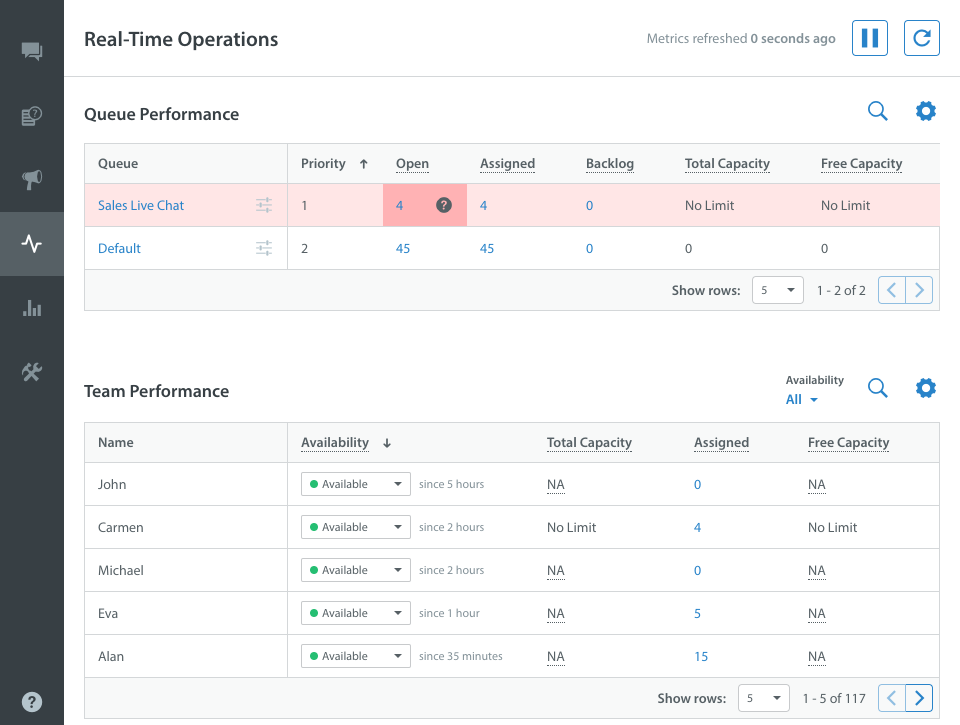
Real-TIme Operations is ideal for your team if you are already using Queues and Auto-Assignment as part of your workflow. To learn more, see What is Real-Time Operations, & how do I use it?
Analytics APIs
Our Analytics API allows you to develop your own custom analytics solutions, with no third party software needed. Your developers can access this API by logging into our API docs portal using the API keys available in your Dashboard.
Step 5: Prepare To Launch
Now that your platforms, workflow, and support team are all in place, it’s time to launch Helpshift!
It’s important to make sure everything is set up correctly before offering your new support experience to end users. To ensure your Helpshift implementation will be successful, we recommend reviewing your setup against our feature-based go-live checklist.
Step 6: Finished! + Useful Integrations
Congratulations! You and your team have successfully launched Helpshift.
What’s next? Check out our array of integrations to harness the power of external tools that connect seamlessly with Helpshift to maximize the value of your Dashboard.
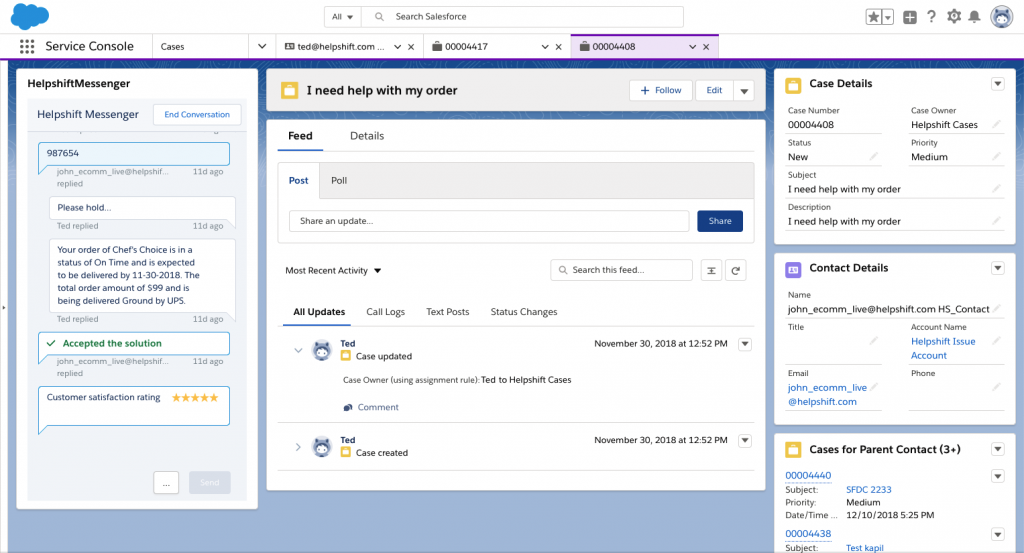
Customer Management w/Salesforce
Our Salesforce Integration allows you to manage your Helpshift Dashboard from directly within Salesforce. You can use the app to invite and assign Agents and Admins; sync FAQs, Issues, Custom Issue Fields, and tags; reply to Issues from within Salesforce; and more. Our detailed Salesforce Integration Guide will walk you through setting this up.
Productivity w/JIRA, Trello, & Slack
Helpshift is integrated with several productivity tools to help you maximize your collaboration and productivity with other teams.
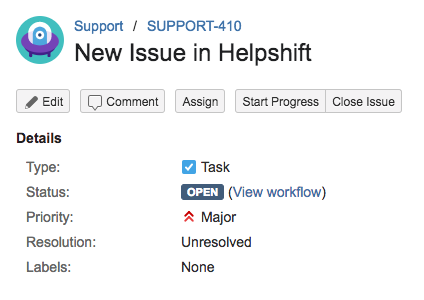
JIRA with Helpshift allows you to create a new JIRA ticket using information from a Helpshift Issue. Get started with our JIRA Integration Guide.
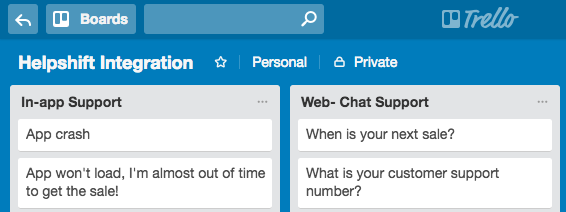
Trello with Helpshift allows you to create new Trello boards or cards using information from a Helpshift Issue. Set this up with our Trello Integration Guide.
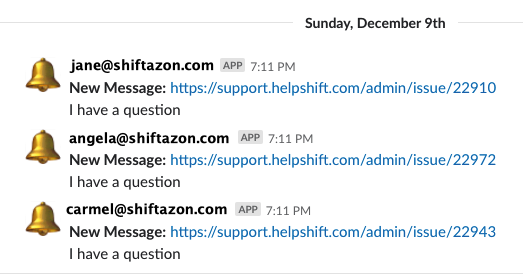
Slack with Helpshift allows you to set up custom Slack notifications for new Issues, and review Helpshift Issue details without having to leave the Slack console. To learn more, see our Slack Integration Guide.
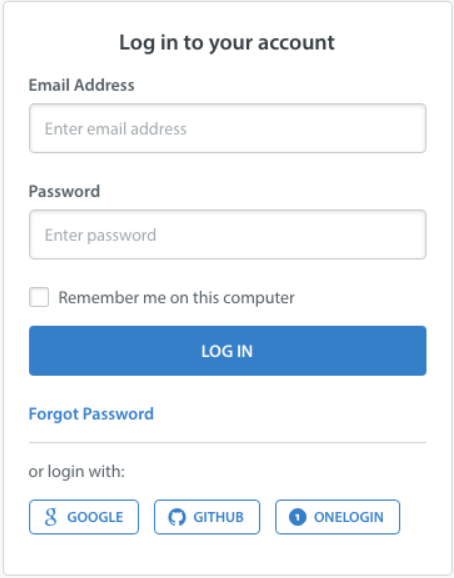
Single Sign-on with Okta & OneLogin
Integrating a secure and scalable SSO (single sign-on) identity management system to effectively manage access to your Helpshift Dashboard.
Our Okta SSO integration allows you to provide secure identity management for your support team using one of the most popular enterprise access management tools available on the market today. Set it up with our Okta Integration Guide.
Our OneLogin SSO integration allows you to effectively manage access to your Helpshift Dashboard using a secure and scalable identity management system. See our OneLogin Integration Guide to get started.