
Smart Views allow you to create an organized, filtered view of Issues by platform, app title, Issue status, assignee, tags, Custom Issue Fields, and more.
There are two types of Smart Views in Helpshift: Shared Smart Views and personal Smart Views. Shared Smart Views can be shared with other members of your team, whereas Smart Views can only be seen by you.
As an Admin, you can create Shared Smart Views to:
- Organize and prioritize Issues for your team based on working hours, specialty, tier, platform, language, and more
- Restrict access to certain Shared Smart Views, such as VIP escalations
- Sort Issues into Smart Views via Bulk Actions and Automations
Admins can aso create personal Smart Views for managing sensitive Issues.
As an Agent or Supervisor, you can create personal Smart Views to:
- Filter for Issues assigned to you based on your specializations, and any searches you may need to conduct on them
- Keep an eye out for Issues previously assigned to you which may reopen
As a developer, you could create a Smart View for Issues tagged as technical or bug-related Issues. A Product Manager could also use Smart Views to review Issues tagged as feedback.
You can use Folders to organize your Smart Views. Please note that the order of Shared Smart Views and Folders can only be organized customized at the Agent level. Folders that an Admin creates will not be globally visible. To learn more about using folders, see How do I organize my Smart Views into Folders?
To create a new Smart View:
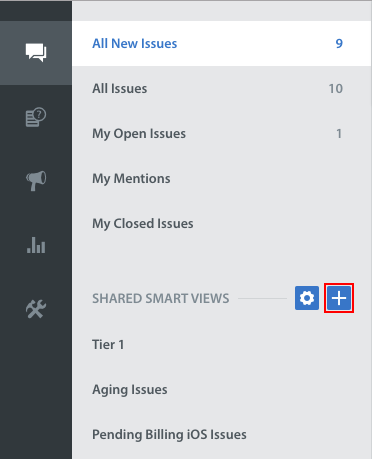
1. Navigate to the Issues page, then to the right of the ‘Smart Views’ or ‘Shared Smart Views’ header, click the + button.
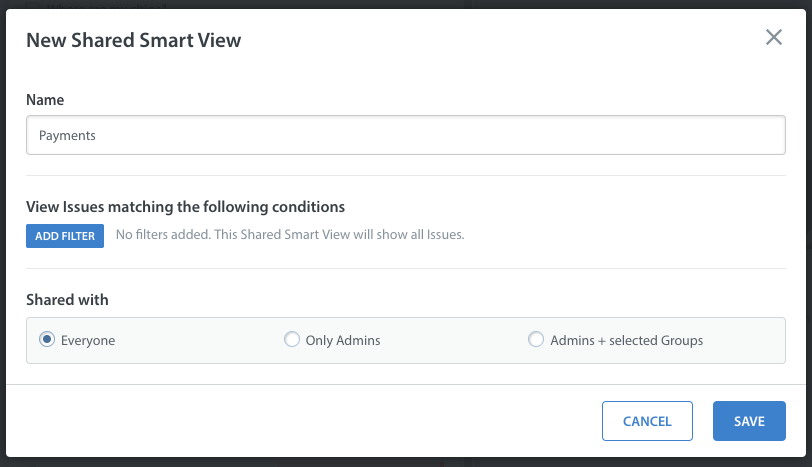
2. A pop-up will appear where you can enter the name of the Smart View and apply filters.
Please note: you can use emojis in your Smart View titles to visually organize them for your team. The steps for adding emojis to Smart View titles are exactly the same as they are for adding emojis to FAQ sections and articles.
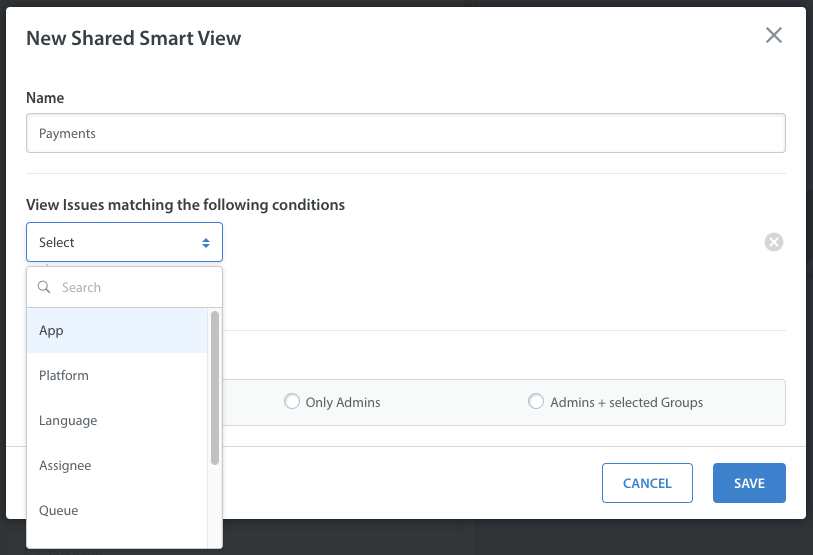
The filters available for you to choose from are as follows:
- App: which of your apps the Issues are associated with
- Platform: iOS, Android, Web
- Language: the language of the end user
- Assignee: the Agent or Agent Group the Issue is assigned to
- Queue: the Queue the Issue is assigned to
- Status: the status of the Issue: New, Waiting For Agent, Pending Reassignment, etc.
- Tags: any tags associated with the Issue – you can select more than one
- Issue Arrival: when the Issue was first created – this is helpful for organizing Issues that were submitted during off-hours into a backlog, or for assigning Issues for certain shifts
- Custom Issue Fields: Any of your Custom Issue Fields available in your Dashboard can be used as a filter for Smart Views
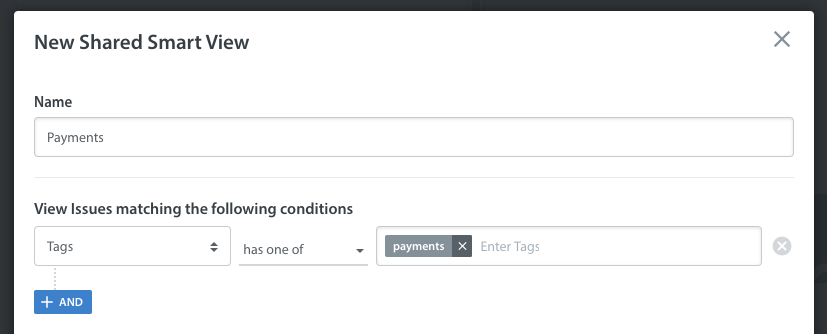
As an example, if you want a Smart View to filter for Issues that are payment-related, you could use Automations or Bulk Actions to have the ‘payments’ tag applied to those Issues, then reroute them to a Smart View.
Select Tags > has one of > then select the ‘payments’ tag.
For Shared Smart Views, you can also configure the sharing settings in the ‘Shared with’ area. Select ‘Everyone’ to allow all of your team members to access this Smart View, or select ‘Only Admins’ or ‘Admins + selected Groups’ to restrict access.

Once you click ‘Save’, your new Smart View will be available on your Dashboard.

If it is a Shared Smart View, it will immediately become visible to everyone you’ve shared access with per the ‘Shared with’ settings.
You can use Bulk Actions and Automations to route Issues to your Smart Views. To learn more, see What are Automations, and how should I use them? And What is a Bulk Action?