
Smart Views allow you to optimize your workflow by automatically filtering Issues into folders by platform, app title, Issue status, assignee, tags, Custom Issue Fields, intents, and more.
Team members have access to different sets of default Smart Views based on their role in Helpshift. To learn more about the default Smart Views, please see What are Smart Views, and how do I use them?
This guide will take you through the process of creating and managing Smart Views and Shared Smart Views, including how to best utilize them to effectively organize your teams workflow.
1. Creating Smart Views
2. Organizing Smart Views into Folders
3. Editing & Removing Smart Views
4. Reordering Smart Views
5. Structuring Smart Views to Support Your Team
To learn about additional features, please see our Getting Started page.
1. Creating Smart Views
There are two types of Smart Views in Helpshift: Shared Smart Views and personal Smart Views. Shared Smart Views can be shared with other members of your team, whereas Smart Views can only be seen by you.
As an Admin, you can create Shared Smart Views to:
- Organize and prioritize Issues for your team based on working hours, specialty, tier, platform, language, and more
- Restrict access to certain Shared Smart Views, such as VIP escalations
- Sort Issues into Smart Views via Bulk Actions and Automations
Admins can aso create personal Smart Views for managing sensitive Issues.
As an Agent or Supervisor, you can create personal Smart Views to:
- Filter for Issues assigned to you based on your specializations, and any searches you may need to conduct on them
- Keep an eye out for Issues previously assigned to you which may reopen
As a developer, you could create a Smart View for Issues tagged as technical or bug-related Issues. A Product Manager could also use Smart Views to review Issues tagged as feedback.
You can use Folders to organize your Smart Views. Please note that the order of Shared Smart Views and Folders can only be organized customized at the Agent level. Folders that an Admin creates will not be globally visible. To learn more about using folders, see How do I organize my Smart Views into folders?
To create a new Smart View:
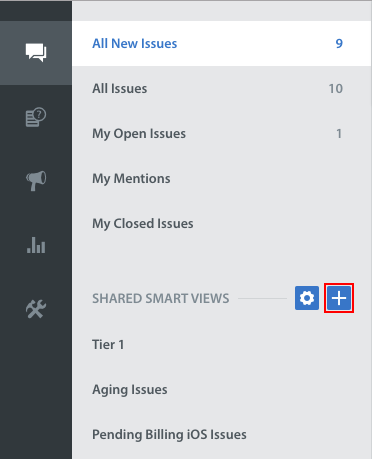
1. Navigate to the Issues page, then to the right of the ‘Smart Views’ or ‘Shared Smart Views’ header, click the + button.
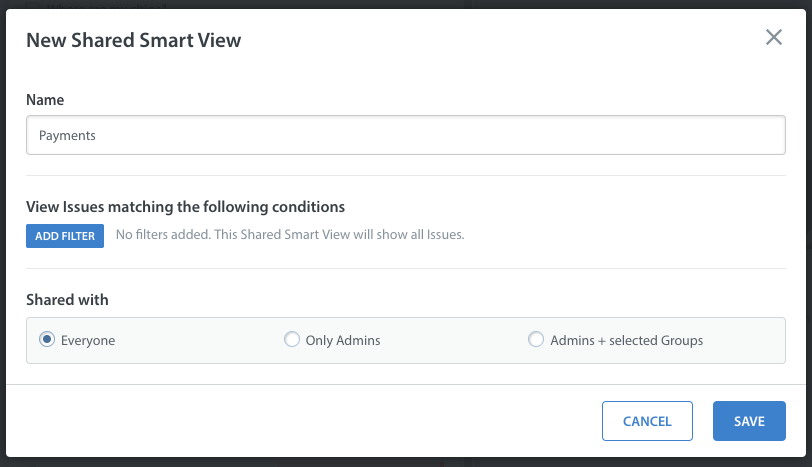
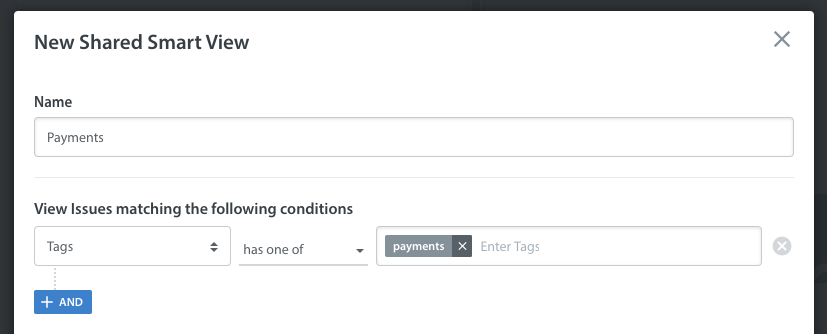
2. A pop-up will appear where you can enter the name of the Smart View and apply filters.
Please note: you can use emojis in your Smart View titles to visually organize them for your team. The steps for adding emojis to Smart View titles are exactly the same as they are for adding emojis to FAQ sections and articles.
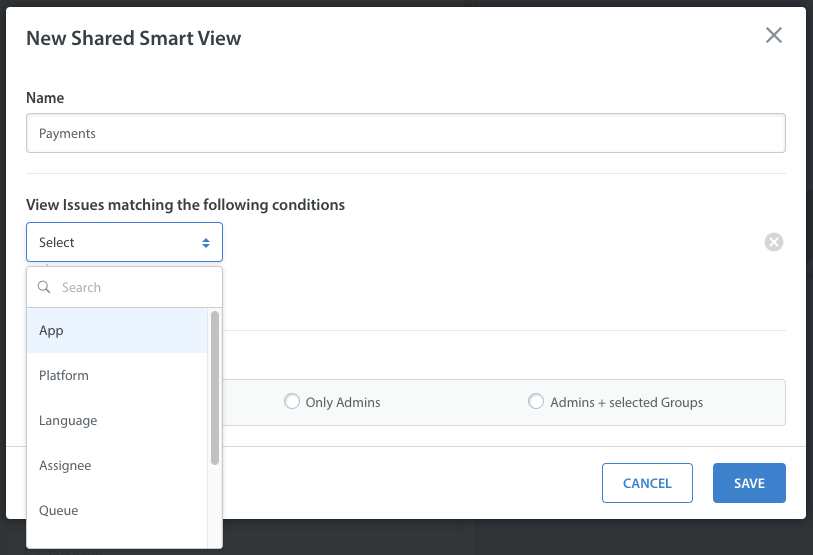
The filters available for you to choose from are as follows:
- App: which of your apps the Issues are associated with
- Platform: iOS, Android, Web
- Language: the language of the end user
- Assignee: the Agent or Agent Group the Issue is assigned to
- Queue: the Queue that the Issue is assigned to
- Status: the status of the Issue: New, Waiting For Agent, Pending Reassignment, etc.
- Tags: any tags associated with the Issue – you can select more than one
- Issue Arrival: when the Issue was first created – this is helpful for organizing Issues that were submitted during off-hours into a backlog, or for assigning Issues for certain shifts
- Custom Issue Fields: Any of your Custom Issue Fields available in your Dashboard can be used as a filter for Smart Views
- Intents: Any intent assigned/associated with the issue
As an example, if you want a Smart View to filter for Issues that are payment-related, you could use Automations or Bulk Actions to have the ‘payments’ tag applied to those Issues, then reroute them to a Smart View.
Select Tags > has one of > then select the ‘payments’ tag.
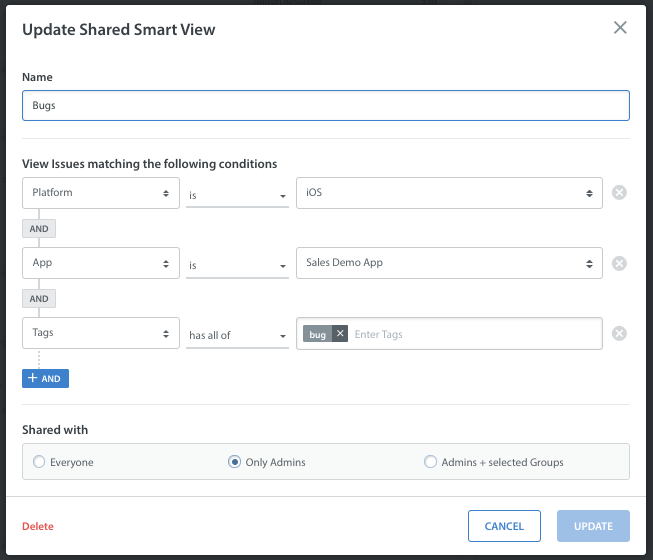
For Shared Smart Views, you can also configure the sharing settings in the ‘Shared with’ area. Select ‘Everyone’ to allow all of your team members to access this Smart View, or select ‘Only Admins’ or ‘Admins + selected Groups’ to restrict access.

Once you click ‘Save’, your new Smart View will be available on your Dashboard.

If it is a Shared Smart View, it will immediately become visible to everyone you’ve shared access with per the ‘Shared with’ settings.
2. Organizing Smart Views into Folders
As your support team and organization grows, so will your list of Smart Views. Organizing Smart Views into Folders allows you to maintain a clean Dashboard while allowing your Agents to quickly access the Smart Views that are relevant to them.
To create Folders to place Smart Views in, proceed as follows:
1. Navigate to the Issues feed, then to the right of the ‘My Smart Views’ header, click the gear icon.
![]()
2. Under ‘Manage My Smart Views’, type the name you want for your folder into the text box with the ‘Create new folder’ placeholder text.
After you’ve added your name, click the + sign to the right. Your new Folder will appear within your list of Smart Views.
To add Smart Views to Folders, click the ‘Change Order’ button at the bottom of the ‘Manage Smart Views’ form, then click the drag and drop  icon in the top left of the Smart View title to drag it into a Folder.
3. Editing & Removing Smart Views
To edit or remove an existing Smart View, navigate to the Issues page, click the title of the Smart View you wish to edit or remove as listed under the ‘My Smart Views’ header, then click the gear icon that appears to the right of the title.

The ‘Update Smart View’ form will appear where you can edit the individual settings for the Smart View. Click the ‘Save’ button at the bottom to save any changes made.
To remove the Smart View entirely, click the red ‘Delete’ button located at the bottom of the form. A prompt will appear requesting for you to confirm your intention to delete this Smart View. Click the ‘Delete’ button to complete this action.
The functionality is the same to edit or remove Shared Smart Views.
Please note: you cannot edit a Smart View when it is in a folder. Please move the Smart View outside of the folder to edit it.
4. Reordering Smart Views
To reorder Smart Views and Shared Smart Views, navigate to Issues, click on the gear icon at the top of the list of Smart Views, then click ‘Change Order.’ This will enable you to drag Smart Views and folders to a new position using the triangular icon at the top left corner of the Smart View.
Once you’ve finished reordering your Smart Views, click ‘Save Changes’, then the X in the top right to return to the Smart Views page.
Please note: reordering Shared Smart Views will change their order in your Dashboard, but won’t alter the order in anyone else’s Dashboard.
5. Structuring Smart Views to Support Your Team
Larger support teams with many different Smart Views are best served by organizing related Smart Views into folders for easy navigation for Agents and other team members. You can use the functions referenced above to create, edit, and reorder your Smart Views into folders to create a great support structure that works best for your team.
Depending on how your support team is structured, you may need to organize your Smart Views in a few different ways: by app, platform, user language, tier of support, and other criteria. To review a full set of example Smart View structures, please see How do I use Smart Views to improve workflow?
To set up additional features and learn more about Helpshift best practices, please review our Knowledge Base.