Groups enable Administrators to manage different tiers of support and improve team efficiency.
Utilizing Groups with Smart Views and Queues allows you to maximize your efficiency to handle various types of Issues.
To manage Groups in the Helpshift Dashboard, we recommend you to learn how to set up your Group’s workflow.It includes the following:
Note: For the trial period, both the new and old group pages would be available for the Admins and Supervisors.
To view an old group page, refer to How do I create Agent Groups?.
Creating a New Group
To create a new group,
- Navigate to Settings > Organization and click Groups. The new ‘Groups’ page appears.
- On the Groups page, select the team from the drop-down and click the ‘+New Group’ button to create a new group.
- The ‘New Group’ modal appears along with the Team name. Enter the ‘Group Name’ and select the ‘Supervisors’ and ‘Agents’ name from the available drop-down list.
- Once you have added the names of the Supervisors and Agents, they will appear in the form of a tag in the corresponding input boxes.
- Click Save. The new group will be created and displayed with the name of the Group.
Note: You can also create a group without adding any members to it. - To delete a group, click the delete icon for that group. A pop-up will appear with a warning message. Click the ‘Delete’ button to confirm. The group and the members within the group will be deleted permanently.
Adding members (Supervisors and Agents) to a Group
You can view all the groups under the ‘Groups’ page and each group displays the number of ‘Members’, ‘Queues’, and ‘Shared Smart Views’.
To add a new member,
- Select the Group to which you want to add new members and click the ‘+Members’ button at the top of the right panel.
- The list of all the members classified into Supervisors and Agents appears. Details of each member in both the sections are shown including name, nickname, and email id.
Note: Once you hover over the ‘Shared Smart Views’ and ‘Queues’ of the group, it displays the names of shared smart views and queues associated with the group.
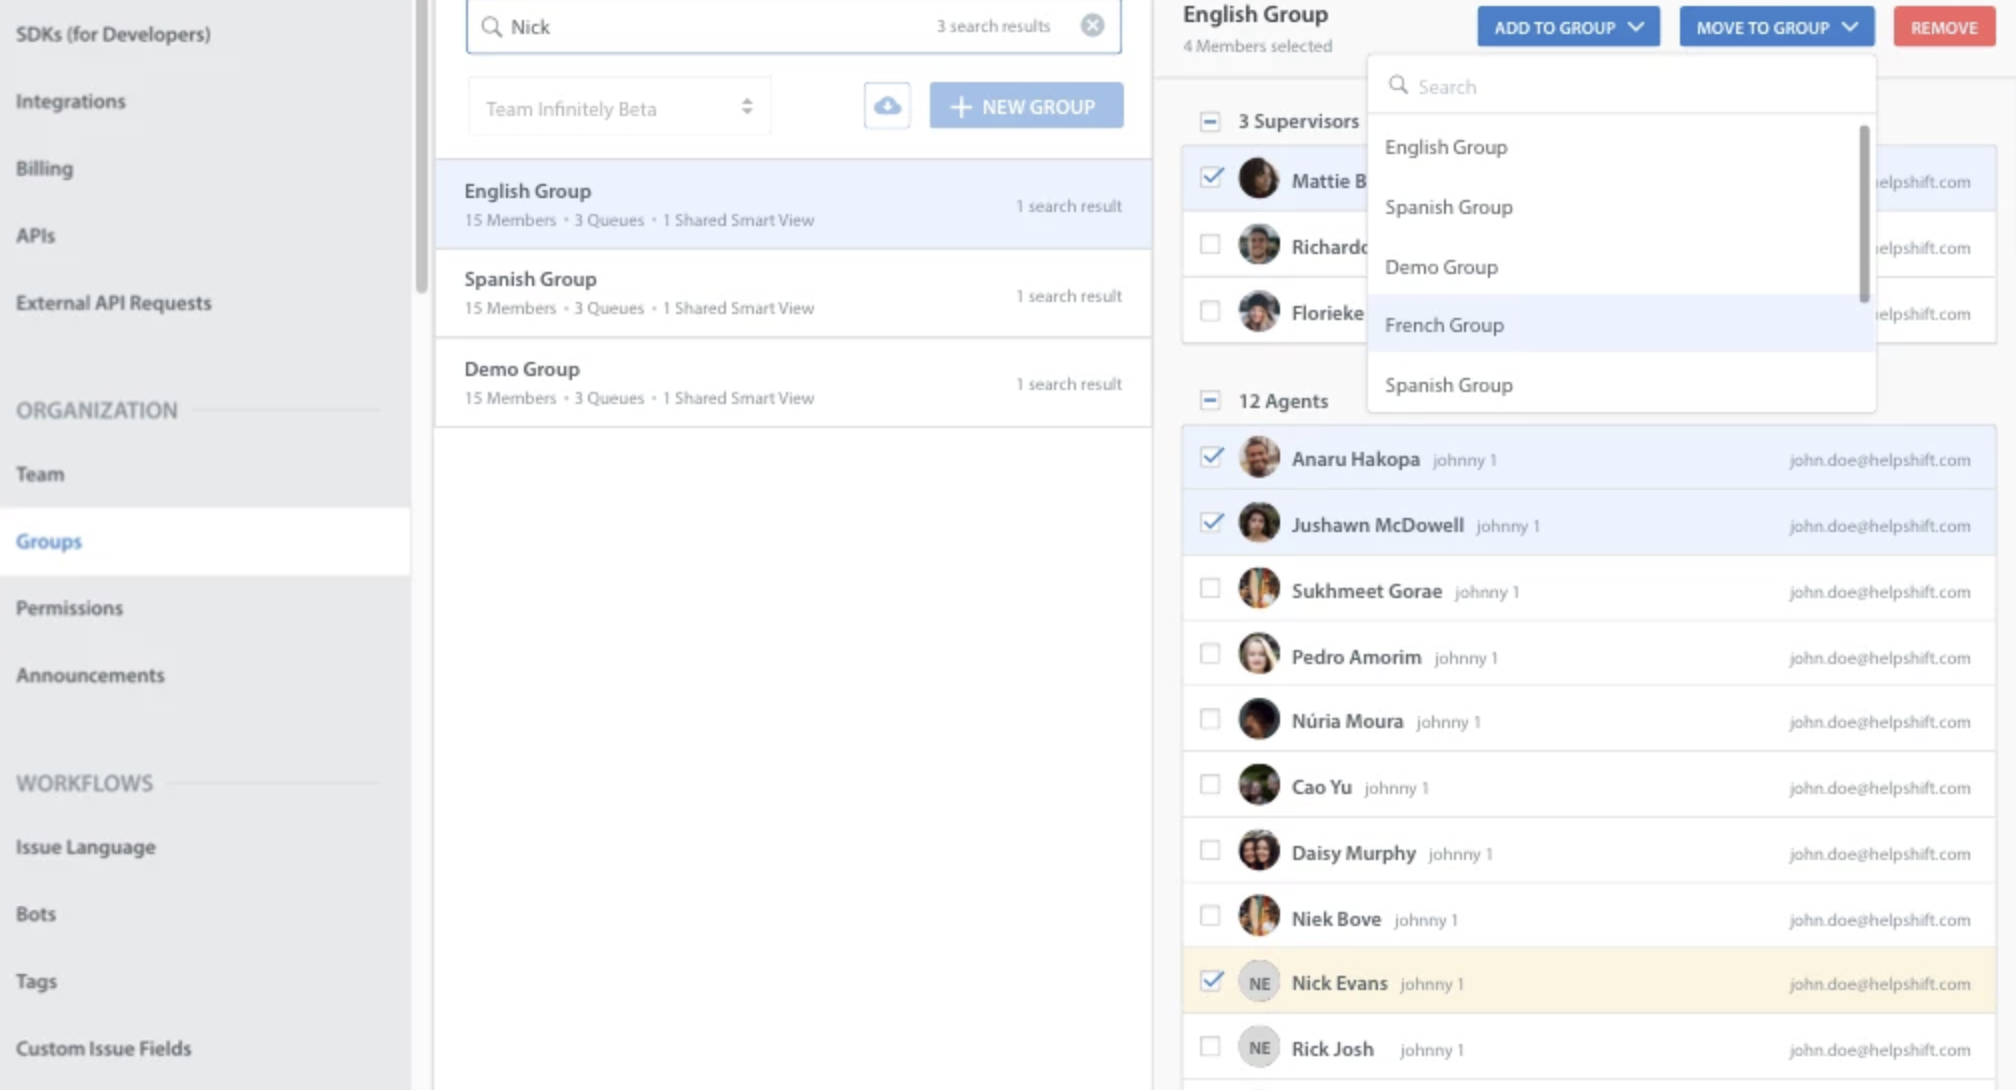
Adding or Moving Members to other Groups
The Groups page allows you to add and move members to other groups by selecting the checkboxes. Once you select the members, you will see three buttons with options to:
- ‘Add to Group’ – This lets you add the selected Members to another Group, without moving them out of the current Group.
- ‘Move to Group’ – This button lets you move the selected Members from the current Group to another Group.
- ‘Remove’ – This removes the Members from the current Group.
Exporting Groups
The Groups page allows you to export the selected groups or export all groups at one time.
To export a group,
- Click the export icon and select an option from the drop-down menu.
- Once you select the option, the group details will be exported into a .csv file.
Searching for Team Members and Groups
You can perform a search on the Agents and groups through the Search bar located at the top of the Groups page.Once you search for an Agent or Group name, it will highlight and display all the groups that match the search.