
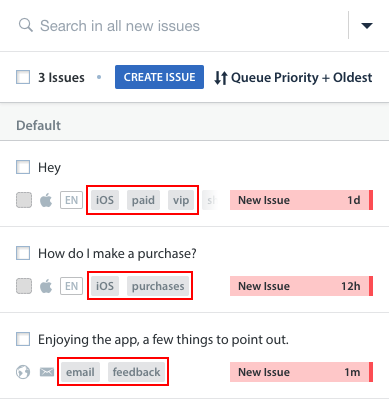
Tags are unique values that can be used to organize your Issues to be filtered into Smart Views, populate your Analytics dashboard with useful data to track trends, and serve as a quick way to reference Issue types from the Issues feed.
To make the best use of tags functionality, you need to work with your developer to establish what HS-Tags are needed when pulling metadata from the backend. To learn more about these topics, please review our FAQ What’s the difference between Metadata, Custom Issue Fields, and tags?.
Setting up tags with HS-Tags and metadata can be used to make the most of Helpshift’s best features, including:
- Smart Views: Manage your team’s workflow and organize your types of Issues by filtering for Issues that match certain criteria.
- Automations: Scale your process by speeding up the organization of incoming Issues and responding to users quickly.
- Bulk Actions: Provide your Agents with the ability to streamline their necessary tasks.
- Analytics & Power BI: Monitor trends by pulling user metrics, observing Agent performance, and tracking prioritized Issues.
Please note that there are no predefined HS-Tags in the SDK. Developer resources are required to add HS-Tags into your Dashboard. Once you’ve planned your metadata and HS-Tags, direct your developer to our developer documentation on tracking in iOS and Android to set them up in your SDK.
In addition to having HS-Tags connected to tags, you can also create and apply tags in the Dashboard without having an equivalent HS-Tag in your SDK. This is useful for tags you may only need temporarily, such as bug reports.
Where Can I See My Tags?
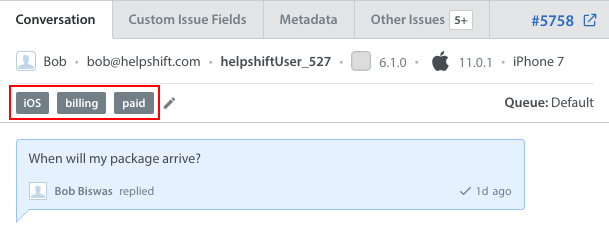
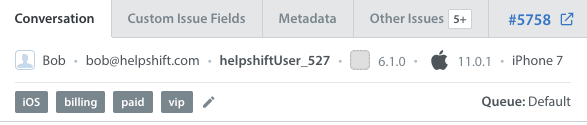
The tags applied to an Issue are visible on the Conversation tab of the Issue details page.
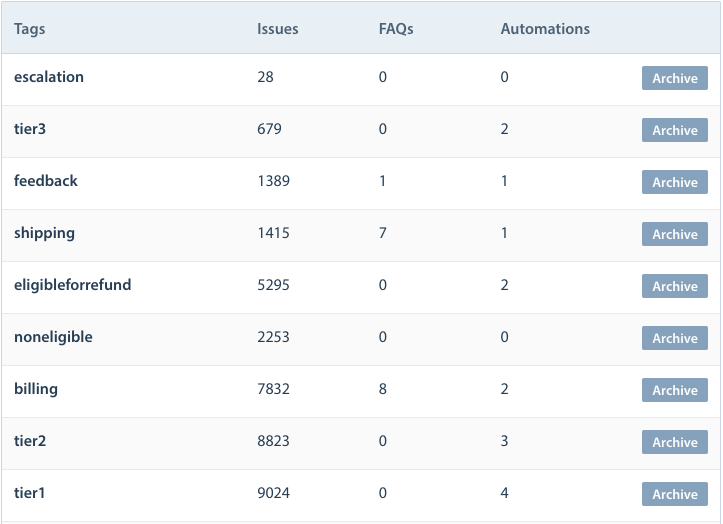
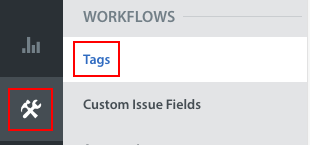
Admins can also find the list of all active tags in your Dashboard under Settings > Workflows > Tags.
How Do I Create New Tags?
Please note: only Admins can create and archive tags.
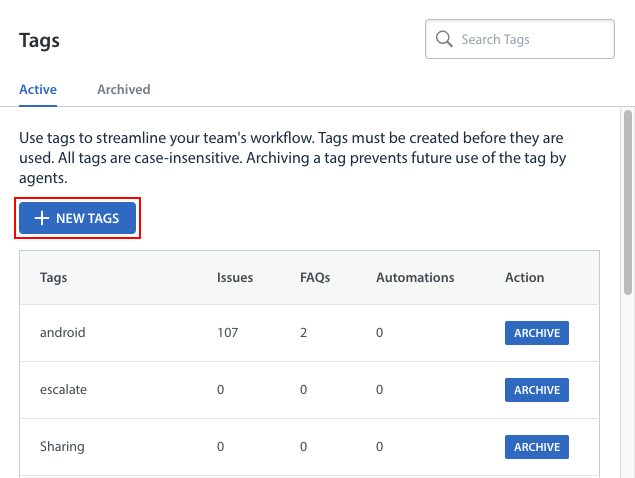
Admins can create and manage tags via the Admin Dashboard Settings. To do so, navigate to Settings > Workflows > Tags.
This will bring you to the Tags page, where all of the active tags in your Dashboard are listed. Click the ‘+ New Tags’ button to create a new tag.
In the pop-up that appears, type each of the new tags you’d like to add.
Please note: tags should be added as all lowercase. Use of capitalization will result in the system being unable to detect the Dashboard tag equivalent.
If you give your tags a meaningful name, it will help you track Issues in a more efficient way. For example, ‘bug’ vs. ‘bug-IOS-2.1’ tags. The ‘bug-IOS-2.1’ tag allows you to instantly figure out which bug this user is facing as well as it is much easier for you to refer to certain Issues. Check out the summary below:
- No spaces between words, instead, use a ‘dash’
- Must be lowercase / No CAPS
- Give your tags *specific* names so they’ll be easier to find, for example: [ bug-ios-version#]
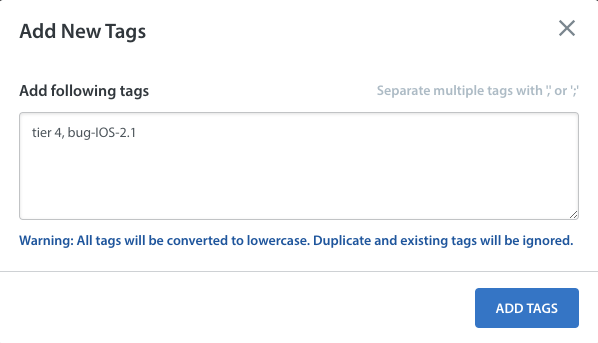
Once you’ve come up with your tag names and entered them into the field, click the ‘Add Tags’ button. These new tags will now appear in your list of active tags.
Please note: tags that already exist in Archived or Active Tags area cannot be added again. To reactivate an archived tag, simply click the Reactivate button next to the tag on the Archived Tags page.

How Do I Manually Add Tags To An Issue?
To add tags to an Issue, navigate to the Issues tab, select an individual Issue to open up the Issue details page, then click the pencil icon in the tags area.
![]()
A drop-down will appear listing all of the active tags associated with your Dashboard.
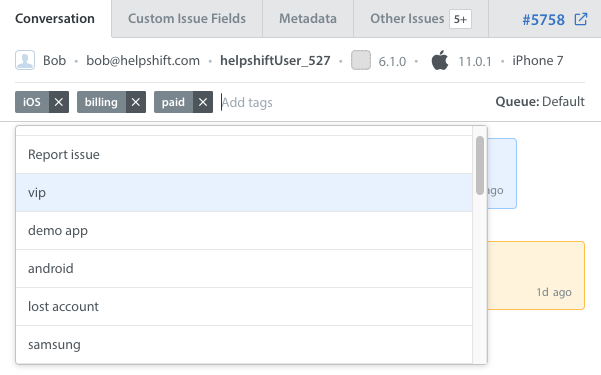
You can also search for a tag by typing in this area.
Once you’ve found the tag you want to add to the Issue, click on it. A toast will appear letting you know that you’ve successfully added the tag, and it will now appear in the ‘tags’ area.
You can remove tags from an Issue via this exact same set of steps.
Please note that from this area, you can only add tags that you’ve added to your Dashboard previously. Please review the instructions above to create new tags to be added via the Issues view.