
To change your email address for your account, you’ll first need to invite a new member with that new email address.
To add a new member, navigate to Settings > Organization > Teams, then click the ‘Invite People’ button in the top left.
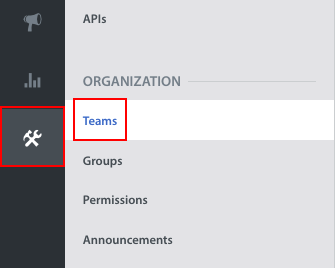

Once you accept the member invite, you may assign the role of the new member by clicking the gear to the right of their name from the Teams list.
![]()
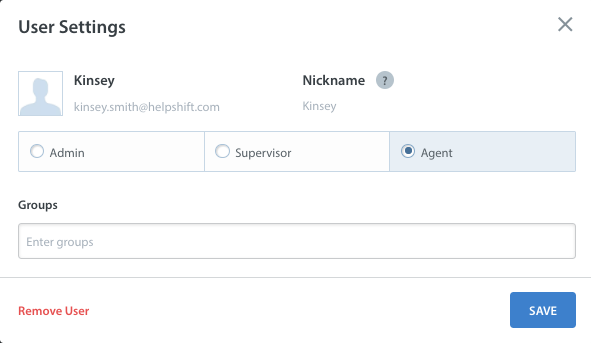
In the pop-up that appears, select the role of Admin, Supervisor, or Agent, then click ‘Save’.
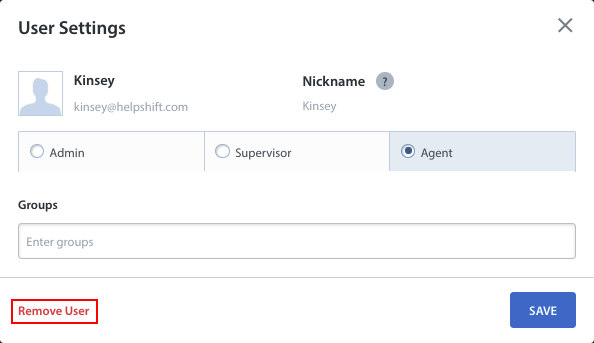
Next, you’ll want to remove the old account. Click the gear icon next to the Agent you’d like to remove.
![]()
In the pop-up that appears, click ‘Remove User’ in the bottom left.
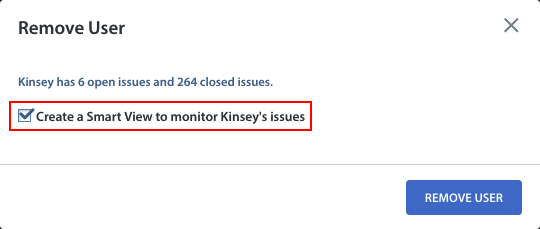
Important: when the old Agent account is removed from Helpshift, the Issues that were assigned to the removed Agent will remain assigned to that account if you do not take further action. Before confirming the removal of the Agent account, you have the option to create a Smart View to view all the Issues that were assigned to the Agent you are removing.
Select the checkbox ‘Create a SmartView to monitor [user]’s Issues.’ prior to clicking ‘Remove User’ to instantiate this option. You can then use this Smart View to work through your ongoing Issues from your new email address.
To update other account settings, see How do I manage my account settings? To change your profile avatar, see How do I edit my profile avatar in Helpshift?