
Helpshift is designed to support any support team, regardless of size or structure. We provide the functionality to organize your team via Agent Groups, assign different role types to structure your team, toggle administrative permissions for individual team members, and more.
1. Creating Agent Groups
2. Assigning Agents, Admins, & Supervisors
3. Toggling Permissions for FAQ & Bulk Editing
4. Using Nicknames to Protect Agent Privacy
5. Removing an Agent, Admin or Supervisor
For the full getting started experience, please see our Getting Started page.
1. Creating Agent Groups
Agent Groups enable Helpshift Admins to manage different levels of Support Teams and improve team efficiency when responding to large volumes of Issues. You can organize Agent Groups based on language, tiers of support, specializations, and any other type of grouping that exists within your organization.
Only Admins can create Agent Groups. If you are an Agent, please direct your Helpshift Admin to this guide.
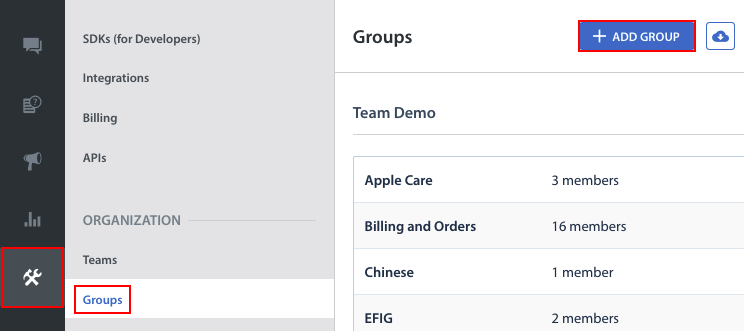
To Create an Agent Group, navigate to Settings, click ‘Groups’ under Organizations, then click the ‘Add Group’ button.
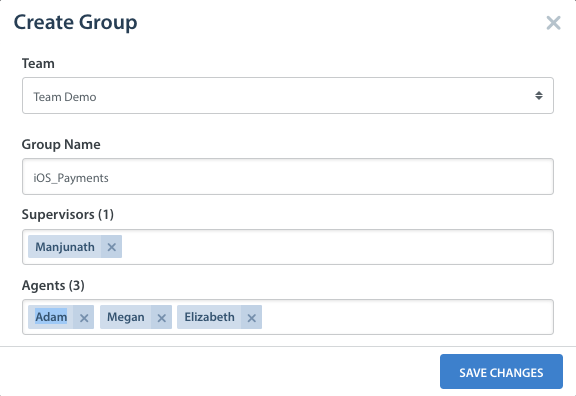
A pop-up will appear where you can create a name for your Group and add in the names of Agents you want in the Group. Press ‘Tab’ after each Agent’s name is populated to enter additional Agents.
Using Agent Groups with Shared Smart Views allows you to maximize your efficiency and ability to handle various levels of Issues. A Smart View allows you to create a custom Smart View in Helpshift that only displays certain Issues based on the conditions you set when creating the View. Shared Smart Views can be shared among team members. Granting an Agent Group access to a Shared Smart View allows that Group to focus in on the Issues that they need to work through.
To learn how to create Shared Smart Views, please see our guide on Setting Up Smart Views. To learn how to create a Shared Smart View for your Agent Groups, see How do I create Smart Views?
2. Assigning Agents, Admins, & Supervisors
When you initially invite your team members to the Helpshift Dashboard, you’re able to assign their role via the User Settings page. When they are assigned a role, they maintain this role as part of any Agent Groups that they are in. As an example, if you are a Supervisor in Helpshift, you are also a Supervisor within any Agent Groups you are part of, such as a Japanese language Group or a Payments group.
To assign a team members role, navigate to Settings, click ‘Teams’ under Organization, then click the gear icon to the right of the team member whose role you’d like to update.

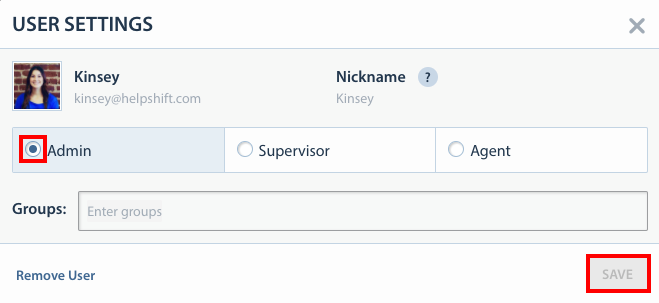
A pop-up will appear listing the name, email, role, and Agent Groups that the team member is associated with. To update their role, select the radio button new role, then click ‘Save’.
If you’ve already created your Group, you can also add individual team members to your Group via their User Settings pages.
3. Toggling Permissions for FAQ & Bulk Editing
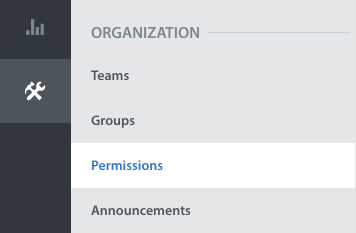
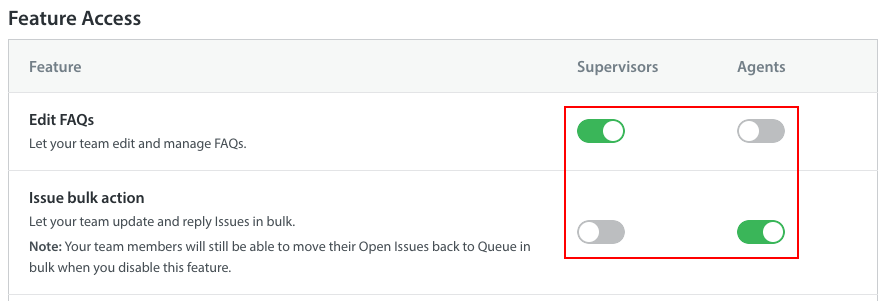
To toggle permissions for Agents and Supervisors, navigate to Settings > Organization > Permissions.
Under the ‘Feature Access’ area, toggle the ‘Edit FAQs’ and ‘Issue bulk action’ options as needed.
4. Using Nicknames to Protect Agent Privacy
Though not required as part of the workflow for creating and managing Agent Groups, you may wish to add Agent Nicknames in cases where Agents need privacy when responding to Issues. These shield the Agents real name from the user by providing a pseudonym that differs from their real identity.
To set up Nicknames for use in user notification emails, the first step is to check that you have the setting to add nicknames enabled, as follows:
1. Navigate to Settings, then click ‘Email Support’ under Support Settings
2. Under ‘Email Support Settings’ check that ‘Personalize emails to customers with agent’s nickname’ is toggled to ‘YES’

To set up Nicknames for in-app conversations, you’ll need to enable a different setting:
1. Navigate to Settings, then under App Settings, select the app you’d like to work with
2. Under ‘Support Configurations’ check that ‘Show agent’s nickname in conversation view’ is toggled to ‘YES’

Nicknames are visible in all Email and SDK conversations. When a Nickname is added, it is automatically applied to all conversations originating from your Web form or sent directly via email and in-app. Anywhere your Agent name appears user-facing, this nickname will appear instead.
5. Removing an Agent, Admin or Supervisor
Only Admins of a Helpshift account may remove team members from the Admin Panel/Dashboard. When you remove a team member, you’ll want to reassign their Issues to a Shared Smart View to allow other Agents to work through those Issues after the removal. We recommend creating a Shared Smart View to filter these user’s Issues to be managed by other Agents. To learn more about and set up Shared Smart Views, please see our guide to Setting Up Smart Views.
Please note that when removing a team member, you permanently delete the history of their support KPIs (Key Performance Indicators). Proceed with caution.
To remove a team member, navigate to Settings, click ‘Teams’ under Organization, then click the gear icon to the right of the member you’d like to remove.
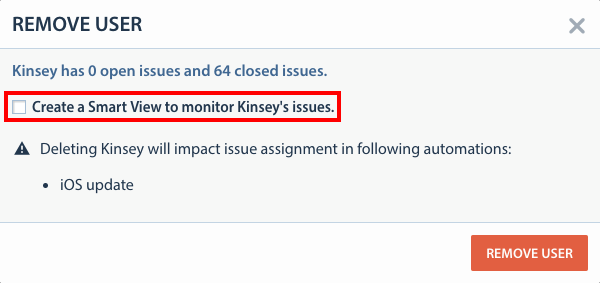
In the pop-up that appears, click ‘Remove User’. Another pop-up will appear letting you know how many open Issues the member has and offering you the option to create a Shared Smart View to monitor the User’s issues. We strongly recommend that you select this option. The pop-up will also let you know if removing this team member will impact any Automations.
Click ‘Remove User’ to finalize the removal.
To learn more about how to use Smart Views, see our guide to Setting Up Smart Views.
To set up additional features and learn more about Helpshift best practices, please review our Knowledge Base.