
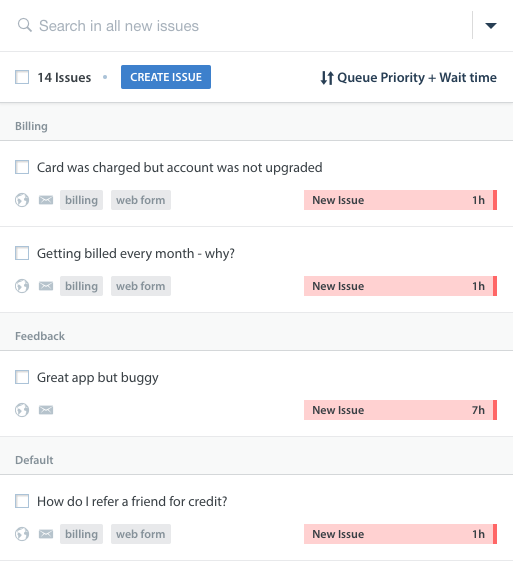
A Queue is a grouping of Issues sorted by end user wait time with a built-in backlog line. Queues can be used in your workflow in a number of ways, as detailed below.
This feature may be a good fit for your team if you have at least 10 team members and 2 or more Agent Groups, and must be unlocked with an upgrade. Please reach out to your Account Manager or to success@helpshift.com to learn more about how you can use Queues to scale your workflow.
Queues give your team the ability to:
- Use Automations to do ‘smart’ Auto-Assignment to Groups with built-in backlog management
- Unassign Issues back to the default Queue
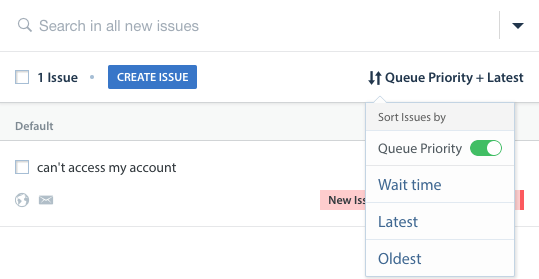
- Work solely out of My Open Issues, which can be sorted by Queue Priority
- Escalate specific Issues to a unique Queue which specialized Agents can work out of
- Move all open Issues assigned to an individual Agent back to the respective Queue at the end of their shift
- Quickly filter for specific sets of Issues in Smart Views and Automations
- Review Analytics by Queue (instead of by sets of tags)
- Move open Issues back to a Queue for other Agents to work on
Queues can be used as part of your workflow to Auto-Assign Issues to individual Agents and Groups based on their availability. To learn more, see our guide to Workflow Management.
Real-Time Operations can be used by Supervisors and Admins to review detailed metrics for Queues during their work shifts. To learn more, see What is Real-Time Operations, & how do I use it?
How do I use Queues within my workflow?
When new Issues enter your Dashboard, you can use Automations to automatically route those new Issues into Queues based on the rules set in that Automation. Once those Issues are routed into Queues, individual Agents and Groups can work directly out of the Issues in those Queues. Since Queues are automatically sorted by end user wait time, they will receive a steady stream of Issues already organized by priority.
You can also order Queues by priority directly from the Issues feed so Agents know which Queues to work out of first.
When Queues are enabled on your Dashboard, you’ll start with at least one Queue, referred to as the ‘default’ Queue. The default Queue is the starting point for all Issues and is the catch-all for Issues which do not currently have a Queue. Any Issue not being acted upon by a New Issue Automation will automatically be assigned to the default Queue.
The default Queue is meant to be for Issues which do not belong in any of your other Queues, or for lower priority Issues. You can use Time-Based Automations to automatically redistribute Issues between Queues. This allows you to identify and manage backlog and reprioritize Issues for Agents.
If a Queue is archived, all Issues which were previously assigned to that Queue will be reassigned to the default Queue.
On the Issue details page, the Queue that the Issue is in is listed in the top right.

You can review, create, and manage Queues from the Queues page. To get there, click the ‘Settings’ icon on the left, then select ‘Queues’ under the Workflows section.

Once Queues has been enabled for your Dashboard, you can review the following FAQs to learn how to create, manage and delete Queues: