
This guide is intended to help Agents quickly get started using the Helpshift Dashboard to manage Issues. It can also be used to get started with the Helpshift Chat App for Zendesk, as all of the functionality included in this guide is available in the Chat App. If you haven’t completed the integration yet, please have your Admin review our Zendesk Integration Guide first.
1. Dashboard Overview
2. Replying to & updating Issues
3. Creating new Issues
4. Creating Smart Views
5. Using Advanced Search
6. Managing Your Account Settings
To learn about additional features, please see our Getting Started page.
1. Dashboard Overview
The Helpshift Dashboard is designed as a simple, 3-pane view to allow you to review all Smart Views, Issues, and Issue details. You can learn more about how to adjust the 3-pane view by reviewing How do I review Issues in Helpshift?
When starting your day, you’ll want to review the Issues section first to see all Issues that may need your attention. Issues in Helpshift are what are known as ‘tickets’ in other support systems.
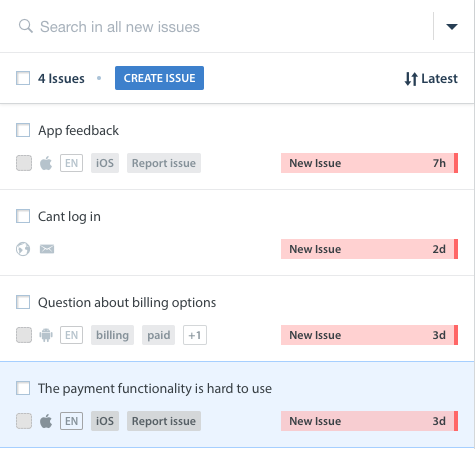
Click the Issues icon on the left side to review all of the different Smart Views available within your Dashboard in the first pane.
![]()
By default, you will see the following Smart Views:
- All New Issues: Issues with a status of ‘Open’ that have not yet been replied to by an Agent
- My Open Issues: all Issues with a status of ‘Open’ that are assigned to you
- My Mentions: Issues in which you are mentioned in a Private Note
- My Closed Issues: Issues assigned to you with a status of resolved
- All Issues (Admins only): All Issues, regardless of the status or Assignee
These Smart Views are automatically organized by Wait Time, though you can re-sort them by Latest and Oldest. Wait Time is the amount of time that has elapsed since the user submitted the inquiry or the latest response; Latest is the most recently submitted Issues; and Oldest are the Issues that were submitted the longest ago.
If you have Queues enabled, you’ll also be able to sort by Queue priority. To learn more about Queues, please see our FAQ What are Queues, and how do I use them?
As an example: if there are three Issues in your Issues feed submitted on Dec. 1st, 3rd and 5th, sorting by Latest will put the Dec. 5th Issue at the top of the list, and sorting by Oldest will put the Dec. 1st Issue on top. However, If the Dec. 1st and 5th Issues were already replied to by an Agent, then when you sort by Wait Time, the Dec. 3rd Issues will be at the top of the list (because this person has not yet received a response from someone on your team).
Click into a Smart View to see the individual Issues associated with it in the second pane.
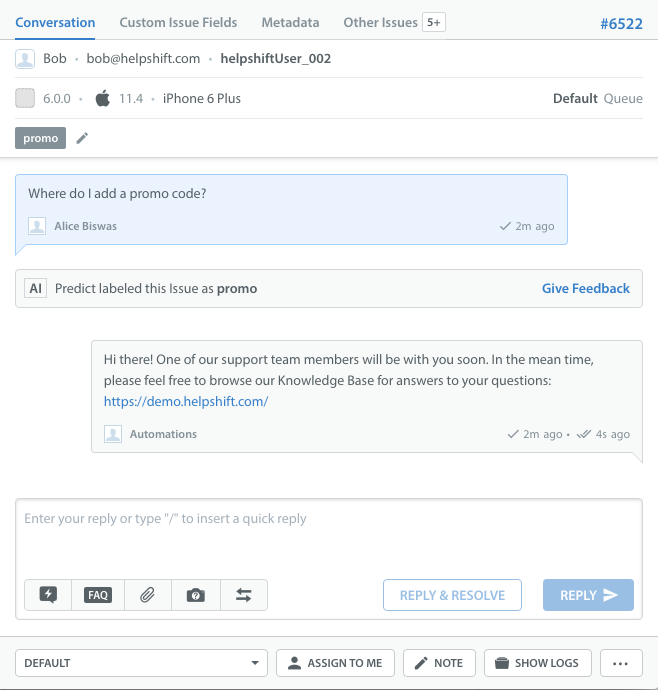
From here, you can click on each Issue title to review the Issue details in the 3rd pane. Issue details includes the end user’s name, email, and device, the conversation between the Agent and end user, any tags applied to the Issue, the Queue that the Issue is assigned to, and options for updating the Issue (described in more detail below).
The other tabs allow you to review the metadata and Custom Issue Fields associated with this Issue. To learn more about these topics, please see our FAQ What’s the difference between Metadata, Custom Issue Fields, and tags? You can also review other Issues submitted by the same user in the past.
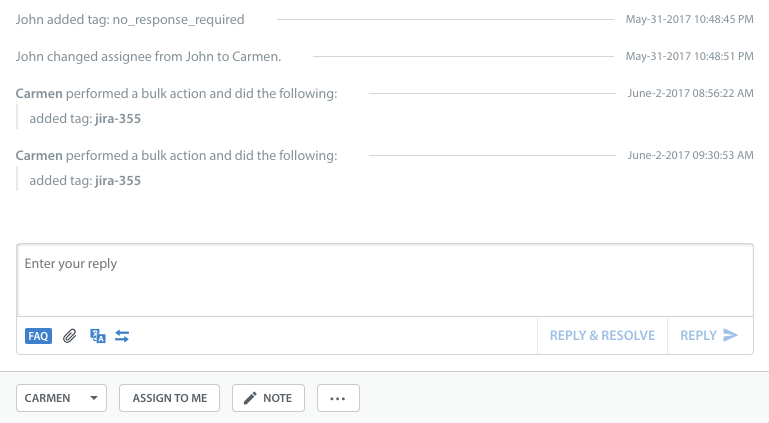
You can view the actions taken on an Issue by clicking the button in the bottom right. The Issue Details page will update to display all actions that were taken on an Issue in addition to the messages and other data.
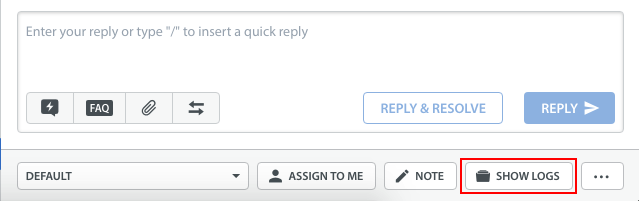
When you click this button, the Issue Details page will update to display all actions that were taken on an Issue in addition to the messages and other data.
2. Replying to & updating Issues
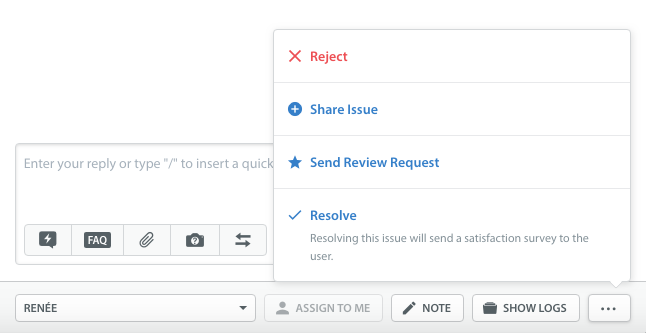
You can only reply to an Issue if it is assigned to you. To reply to an Issue, simply type a reply into the text box and click ‘Reply’ or ‘Reply & Resolve’.
Please note that if you have CSAT enabled, clicking the Reply & Resolve option will automatically prompt the user to complete a CSAT survey upon resolution of the issue. To learn how to use CSAT, see What are (CSAT) Customer Satisfaction Surveys, and how do I set them Up?
There are also options to Reject an Issue, Share the Issue, send a Review Request, and Resolve an Issue with no reply via the 3 dots shown below the reply text box.
Within the text editor, you’ll see the following options:
![]() Insert Quick Reply: This icon allows you to search for and insert a templated message, such as a greeting or signature. To learn more, see What are Quick Replies, and how do I use them?
Insert Quick Reply: This icon allows you to search for and insert a templated message, such as a greeting or signature. To learn more, see What are Quick Replies, and how do I use them?
![]() Insert FAQ:This allows you to insert an FAQ instead of a Quick Reply in response to end users. To learn more, see How do I reply to a message with a predefined answer / FAQ article?
Insert FAQ:This allows you to insert an FAQ instead of a Quick Reply in response to end users. To learn more, see How do I reply to a message with a predefined answer / FAQ article?
![]() Attach files: Click this icon to select and attach a file. To learn what file types can be attached, see How do Agents attach files to replies from the Dashboard?
Attach files: Click this icon to select and attach a file. To learn what file types can be attached, see How do Agents attach files to replies from the Dashboard?
![]() Request screenshot: This allows you to request in-app screenshot from a user, which is useful for diagnosing technical issues. To learn more and see what the end user experience looks like, see How do I request an in-app screenshot from a user?
Request screenshot: This allows you to request in-app screenshot from a user, which is useful for diagnosing technical issues. To learn more and see what the end user experience looks like, see How do I request an in-app screenshot from a user?
![]() Text direction: Use this button to update the text direction from Right to Left, or vice versa.
Text direction: Use this button to update the text direction from Right to Left, or vice versa.
From this area, you can also click the ‘Note’ button to leave a private note instead of a public reply. Private Notes are internal notes that an Agent/Admin can add to an Issue. Private Notes are not visible to the customer, and are added in-line within the messages. This feature is helpful for providing context when mentioning or reassigning an Issue to another team member. For more info, see What are Private Notes and mentions, and how do they work?
You can also apply Custom Issue Fields and tags to Issues to organize Issues.
Custom Issue Fields allow you to classify Issues using fields made up of a label and a type. They can be updated from the Custom Issue Fields tab of the Issue details page. To learn more, see guide on Custom Issue Fields.
Tags allow you to categorize and track your Issues so that you and your team can stay organized. Admins are able to create and manage tags via the Dashboard settings. For more info, see How do I create and use tags?
To add a tag to an Issue, click the ‘Edit’ button next to any current tags (towards the top of the Issue details screen).
![]()
In the drop-down that appears, enter the new tags you’d like to add to this Issue. Please note that you will need to add a comma between tags.
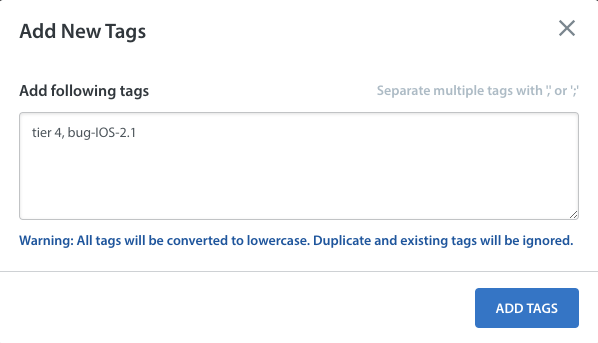
Click ‘Add Tags’ to complete this process. The new tags will now appear next to the Issue on your Dashboard.
3. Creating new Issues
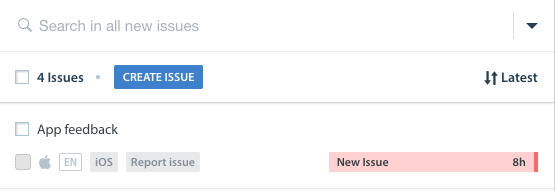
There may be instances where you want to create an Issue on behalf of a user, such as to document offline support inquiries or to follow up on a very old inquiry. To create an Issue on behalf of a user, navigate to the Issues page, then click the ‘Create Issue’ button located in the 2nd pane.
In the ‘Create New Issue for this Customer’ pop-up, enter the following:
- Customer Name
- Customer Email
- Issue Title
- The Queue (if enabled) that the Issue should go to
- The First Message of the Issue
- Set the Custom Issue Fields for the Issue
The first message can be a summary of an Agent + User phone conversation or direct email correspondence. It can also be used to track and answer emails from organizations within your company. Do not direct this message at the user; they will not see these details until your NEXT message in the thread.
If you wish to be taken directly to the Issue, check the box that says ‘Take me to this issue after submitting’ and Click ‘Submit’.

Once the Issue has been created and you are in the Issue Detail page, all of the Issue behaviors will be the same as with any other Web reported Issue within Helpshift. You can Tag the Issue, Insert FAQs, enter a Reply to your User, reassign the Issue to a team member or Bot, and Resolve.
4. Creating Smart Views
Smart Views are great for creating an organized list of Issues filtered by app title, Issue status, assignee, Tags, and more. As an Agent, you can create Smart Views for your specialization, such as iOS Issues or Issues tagged as payment related.
To create a Smart View:
1. Navigate to the Issues page, then to the right of the ‘Smart Views’ or ‘Shared Smart Views’ header, click the + button.
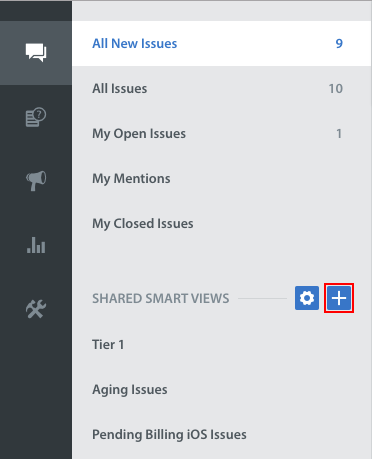
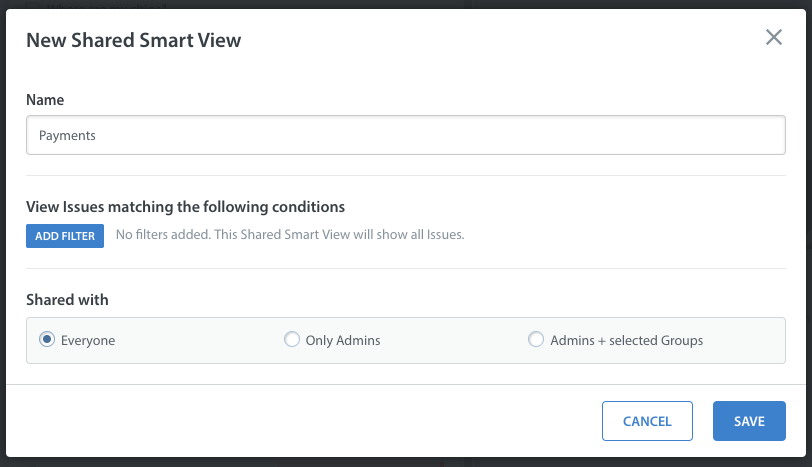
2. A pop-up will appear where you can enter the name of the Smart View and apply filters.
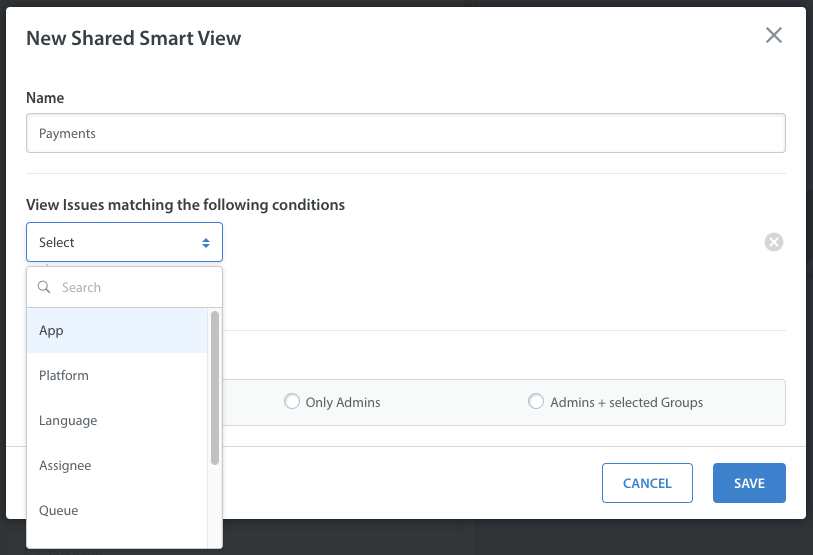
The fields available to filter by are as follows:
- App: which of your apps the Issues are associated with
- Platform: iOS, Android, Web
- Language: the language of the end user
- Assignee: the Agent, Agent Group, or Bot that the Issue is assigned to
- Queue: the Queue the Issue is assigned to
- Status: the status of the Issue: New, Waiting For Agent, Pending Reassignment, etc.
- Tags: any tags associated with the Issue – you can select more than one
- Issue Arrival: when the Issue was first created – this is helpful for organizing Issues that were submitted during off-hours into a backlog, or for assigning Issues for certain shifts
- Custom Issue Fields: Any of your Custom Issue Fields available in your Dashboard can be used as a filter for Smart Views
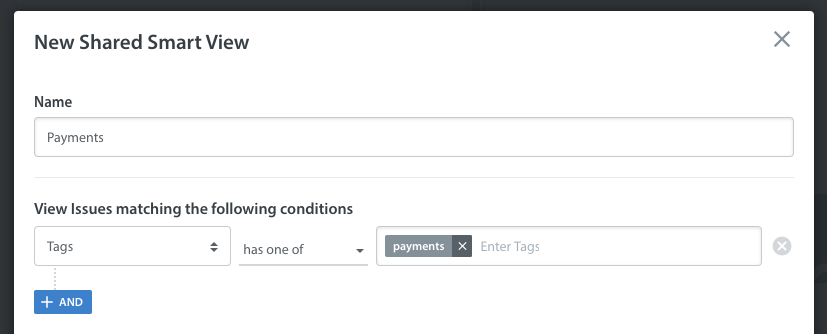
As an example, if you want a Smart View to filter for Issues that are payment-related, you could use Automations or Bulk Actions to have the ‘payments’ tag applied to those Issues, then reroute them to a Smart View.
Select Tags > has one of > then select the ‘payments’ tag.
For Shared Smart Views, you can also configure the sharing settings in the ‘Shared with’ area. Select ‘Everyone’ to allow all of your team members to access this Smart View, or select ‘Only Admins’ or ‘Admins + selected Groups’ to restrict access.

Once you click ‘Save’, your new Smart View will be available on your Dashboard.

The Admin(s) of your team can create Shared Smart Views, which can be accessed and used by all team members within your organization. To learn how to create these, see How do I create Smart Views?
You can use Bulk Actions and Automations to route Issues to your Smart Views. To learn more, see What are Automations, and how should I use them? And What is a Bulk Action?
5. Using Advanced Search
Advanced Search allows you to find Issues based on various data points available in your Dashboard. You can define an Advanced Search formula, aka a statement, that mimics a sentence structure.
Knowing how to use Advanced Search is essential to making the most of the capability of your Dashboard. To get started, see What is Advanced Search, and how do I use it? You can also use Advanced Search with Smart Views via the Saved Search functionality. To learn how, see How do I use the Saved Search feature?
6. Managing Your Account Settings
All of your Account Settings can be found by clicking the profile icon in the bottom left corner of the Dashboard, then clicking ‘Account Settings’.
![]()
The account settings you can review and update here are as follows:
- Name: The name that shows to fellow team members within the Dashboard and to customers in Issues
- Nickname: A nickname can be added to protect Agent privacy when responding to Issues
- Email Address: The email associated with your Helpshift account
- Time Zone: The time zone that your team works within
- Change Password: edit your password using this option
- Availability: Checkbox to allow you to be automatically marked as available upon login
- Connected Accounts: If you have connected a Google or Github account, clicking the logo for each one will bring up information about those accounts
- Email Notifications: Options to enable emails notifications when you are mentioned in an Issue, when there are updates to Issues assigned to you, and when a new Issue is assigned to you
- Pop-up Notifications: Notifications which appear in your Dashboard immediately after an Issue was assigned to you
- Language AI Message view: Control how translated messages are shown in your conversation
Note: This view is only available to users who have Language AI enabled in their account.
For a complete detailed overview of how these settings work, please see our FAQ How do I manage my account settings?
To set up additional features and learn more about Helpshift best practices, please review our Knowledge Base.