
End users often share their identity information during support chat conversations. Adding these as User IDs helps build a more complete user profile. This allows brands to easily recognize users, connect ongoing issues across channels, and offer more personalized support.
As an admin or operator with access, you can add User IDs to a user profile on the Helpshift Agent Dashboard to enrich the user’s identity information.
Granting Roles and Permissions
Admins can manage the Roles and Permissions to allow agents/supervisors to add User IDs. You can edit the permissions later to remove access if needed.
Admins can manage operator permissions through both System and Custom Roles. System Roles apply permissions to all agents or supervisors, while Custom Roles allow admins to grant access to specific agents or supervisors.
System Role Permissions for All Agents/Supervisors.
To grant System Role permissions for all agents or supervisors, follow these steps:
- Navigate to Settings on the Helpshift dashboard.
- Click the Roles and Permissions tab under ORGANIZATION.
- Under the System Roles tab, go to Manage Additional Permissions.
- Enable the toggle Add User IDs to grant permissions.
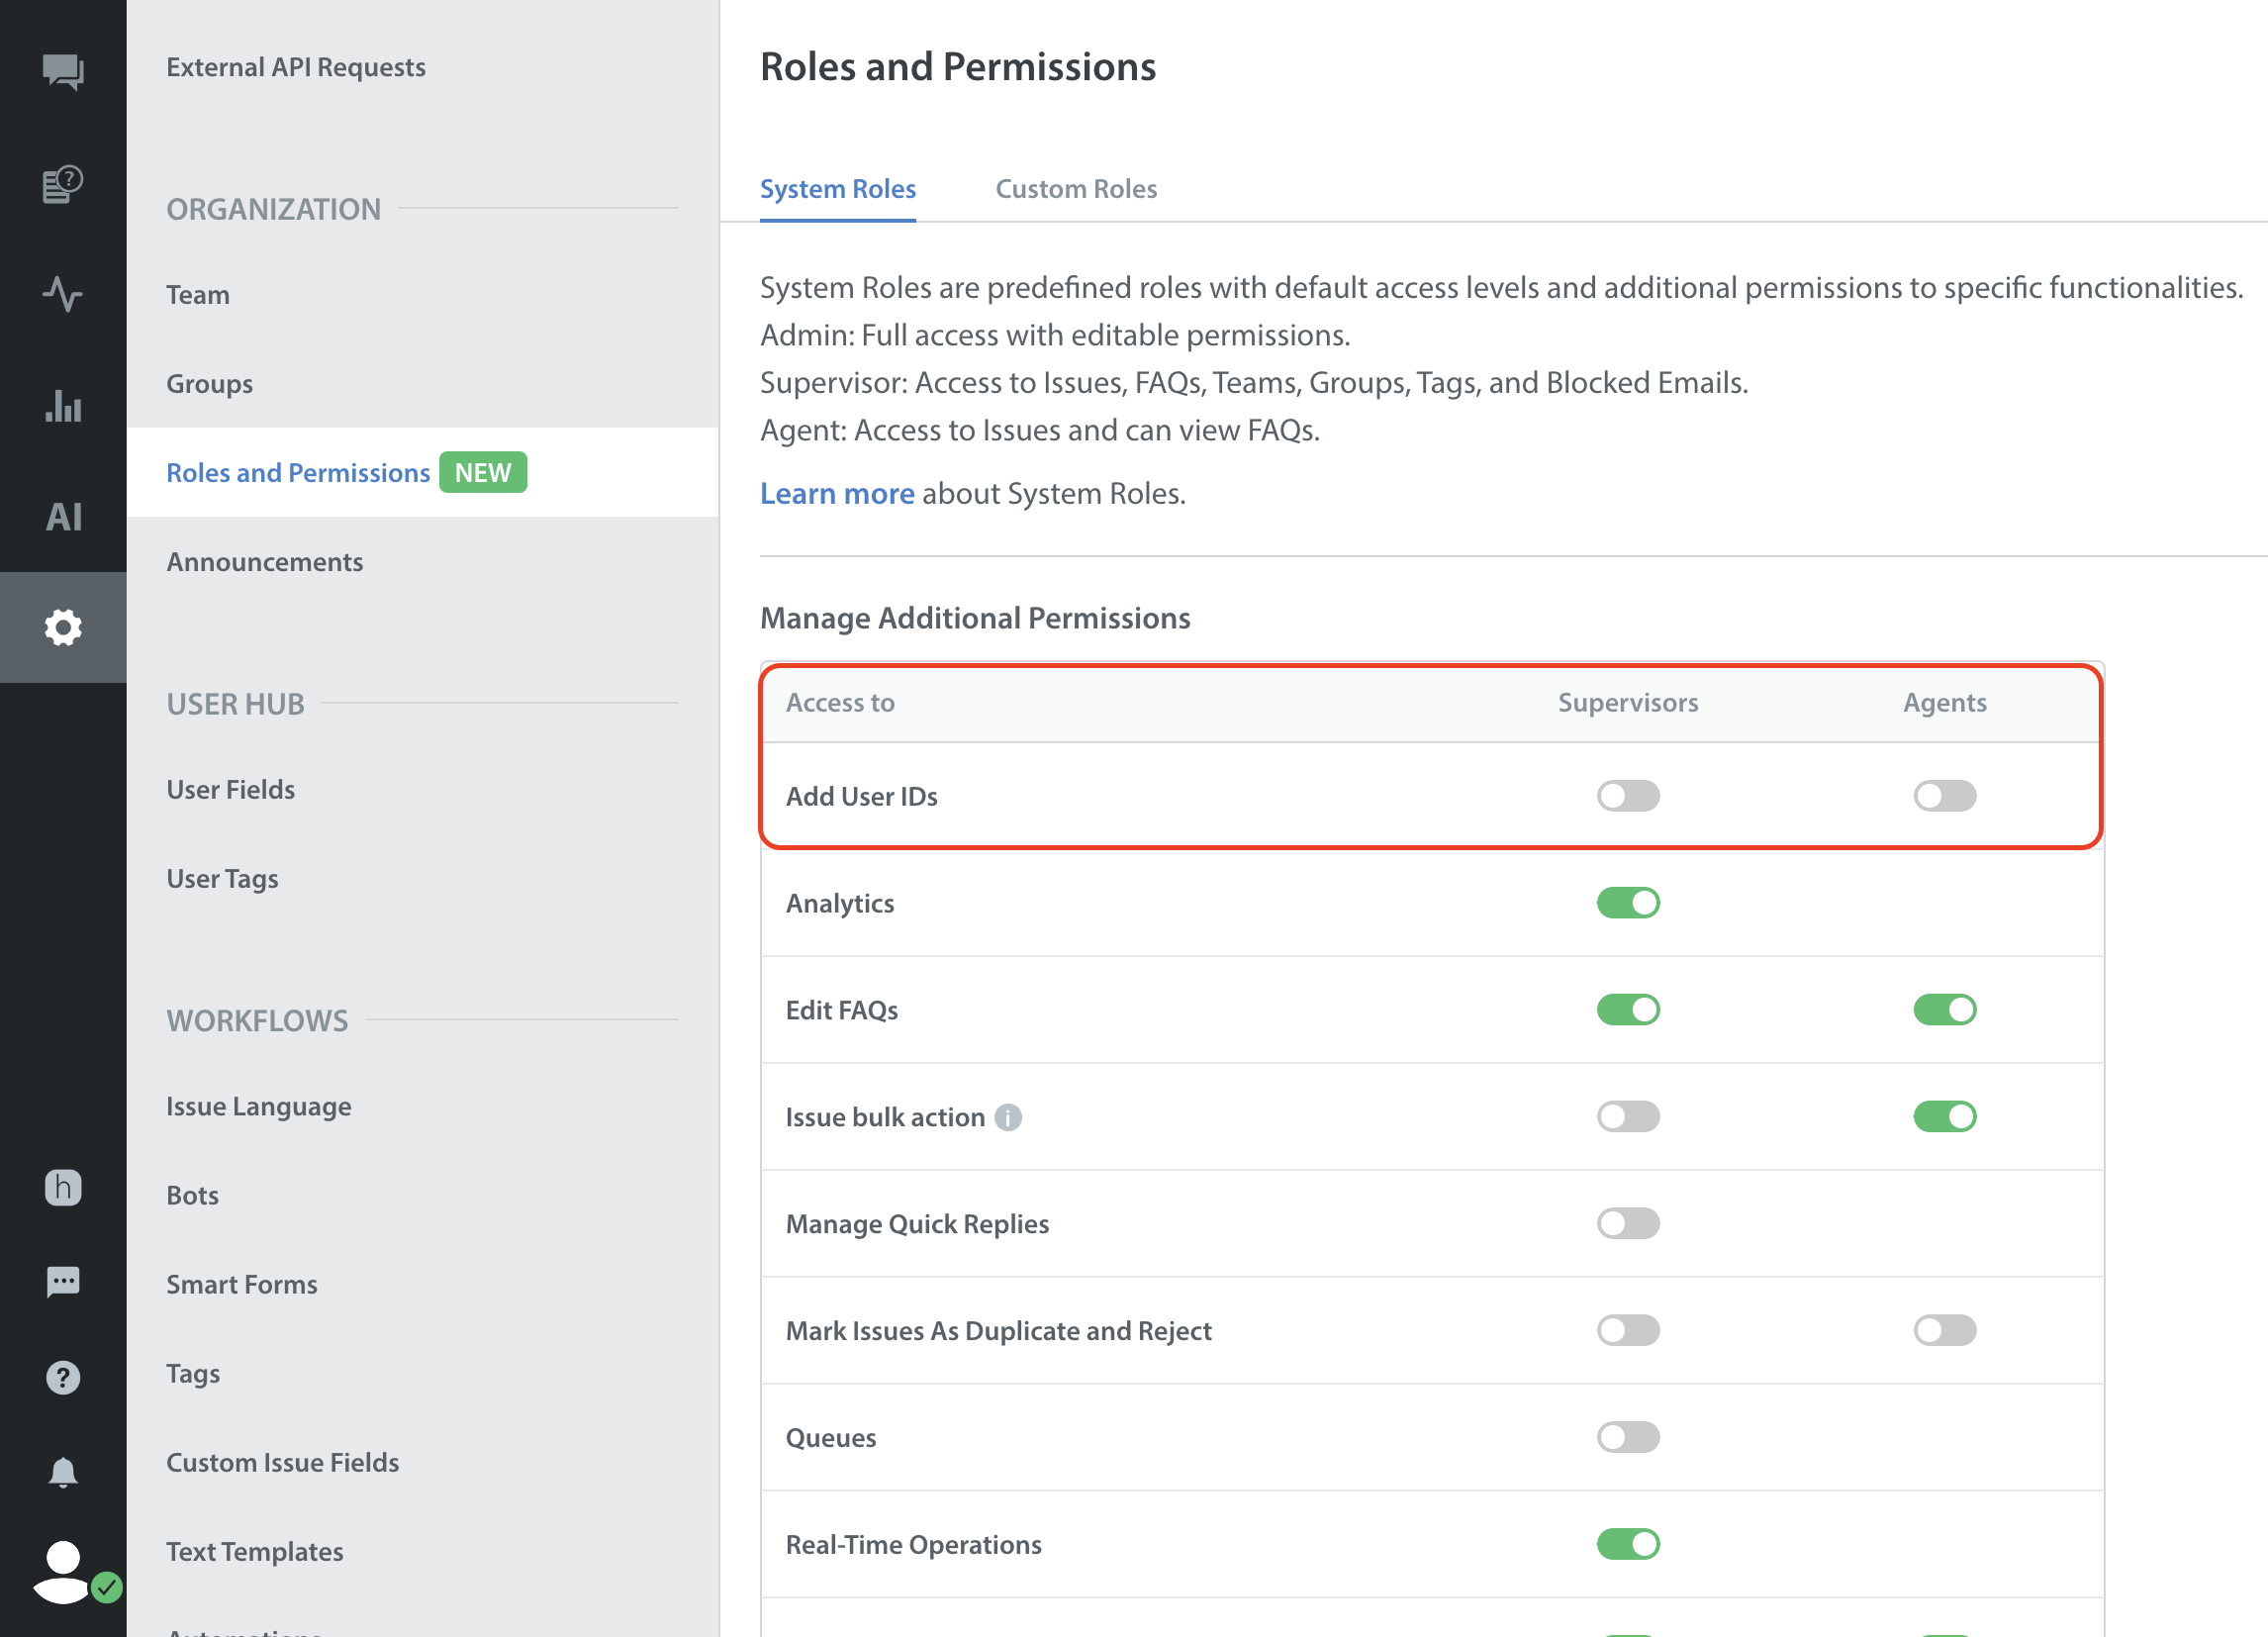
Note: By default, this setting is OFF for supervisors and agents.
Custom Role Permissions to a Set of Agents/Supervisors
To grant Custom Role permissions for specific agents or supervisors, follow these steps:
- Under the User Hub section, check the box to Add User IDs.

- Click SAVE to create the custom role.
- Assign the Custom Role to the operators.
- Once the dashboard refreshes, the assigned role will have access to add User IDs.
Note: In Custom Roles, the section previously labeled as User Fields access is now renamed to Issue Fields access.
Adding User IDs
Operators (Agents/ Supervisors/ Admins) can add User IDs on the agent dashboard.
To add User IDs, follow these steps:
- Log into your Helpshift account.
- Navigate to Issues > User profile.
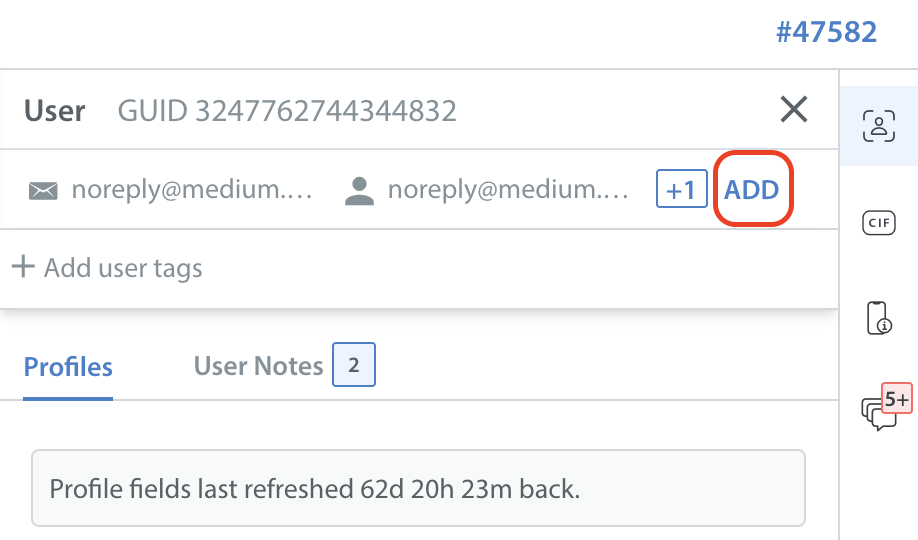
- Click the ADD button next to User IDs.
The Add User ID popup will open, displaying different ID types in a dropdown.
- Select the appropriate ID type and enter the User ID in the provided field.
Tip: Phone numbers must include the country code, and Email IDs should be entered correctly.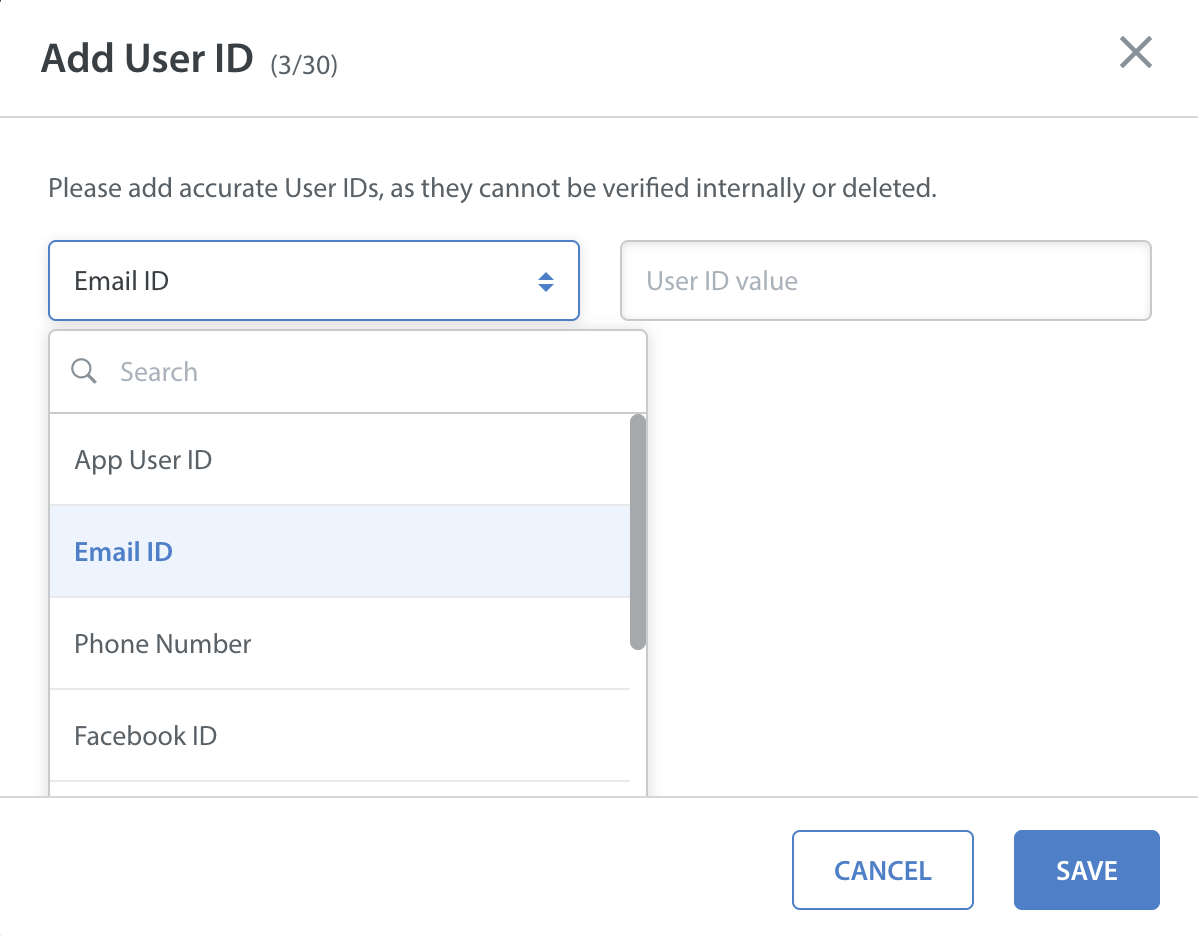
- Click SAVE.
Once saved, User IDs cannot be deleted.

Adding User IDs in Open page view
You can also add User IDs on the Issue details page.
For more details, refer to User Context in Agent Dashboard.
Note:
- You can add up to 30 User IDs. Once the limit is reached, the ADD MORE button will be disabled.
- If the User ID you entered already exists for a user, it will show an error. Please ensure to avoid duplicate IDs.
- To ensure data privacy and security, PII masking is applied except for User IDs, Email IDs, and Phone Numbers.

