
You can review Issues in Helpshift via the 3-pane view of your Issue tab, or via the full Issue view (which you can access by clicking the Issue number from the Issue details pane).
The 3-pane View
The 3-pane view consists of 3 panes: navigation, the Issues feed, and Issue details.
You can resize your 3-pane view by clicking and dragging the blue sliders at the bottom of the screen. The right slider will transform into a four-pointed arrow upon hover to allow you to complete this action. You can also click the double arrows on the left slider to hide that view if you would prefer a 2-pane view.

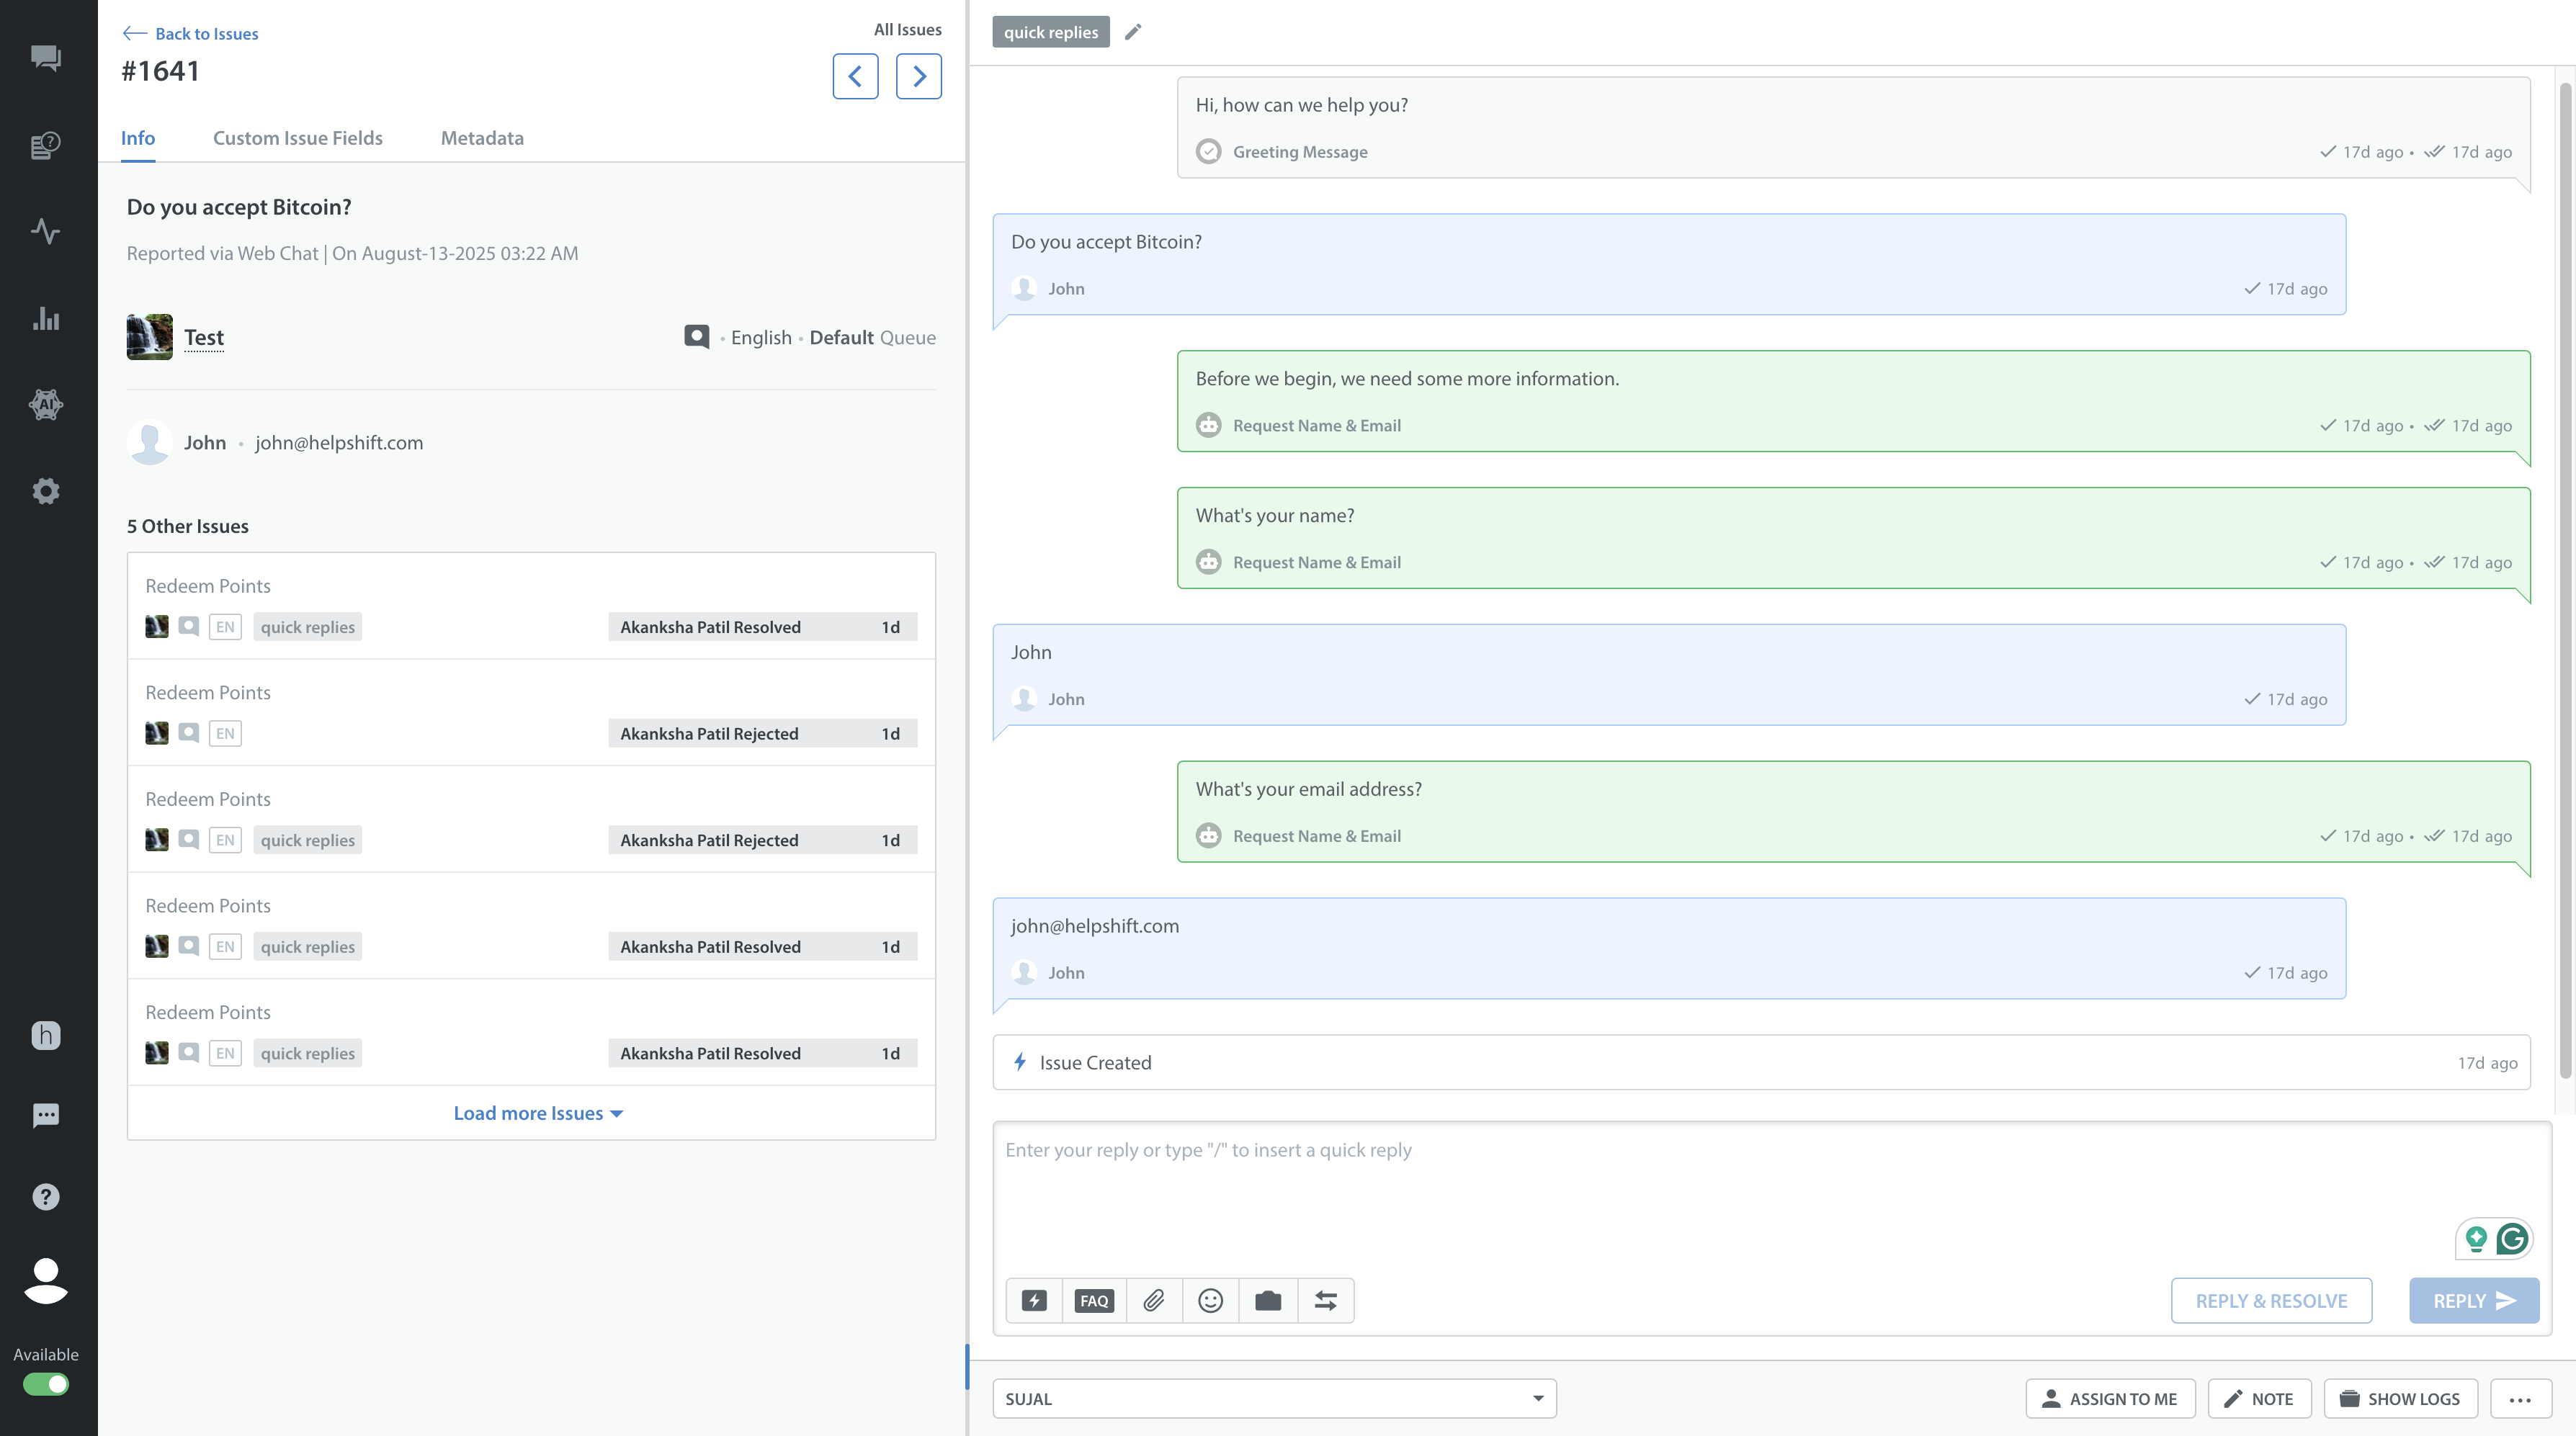
The Full Issue View
To see the full Issue view, click the Issue number in the top right corner.
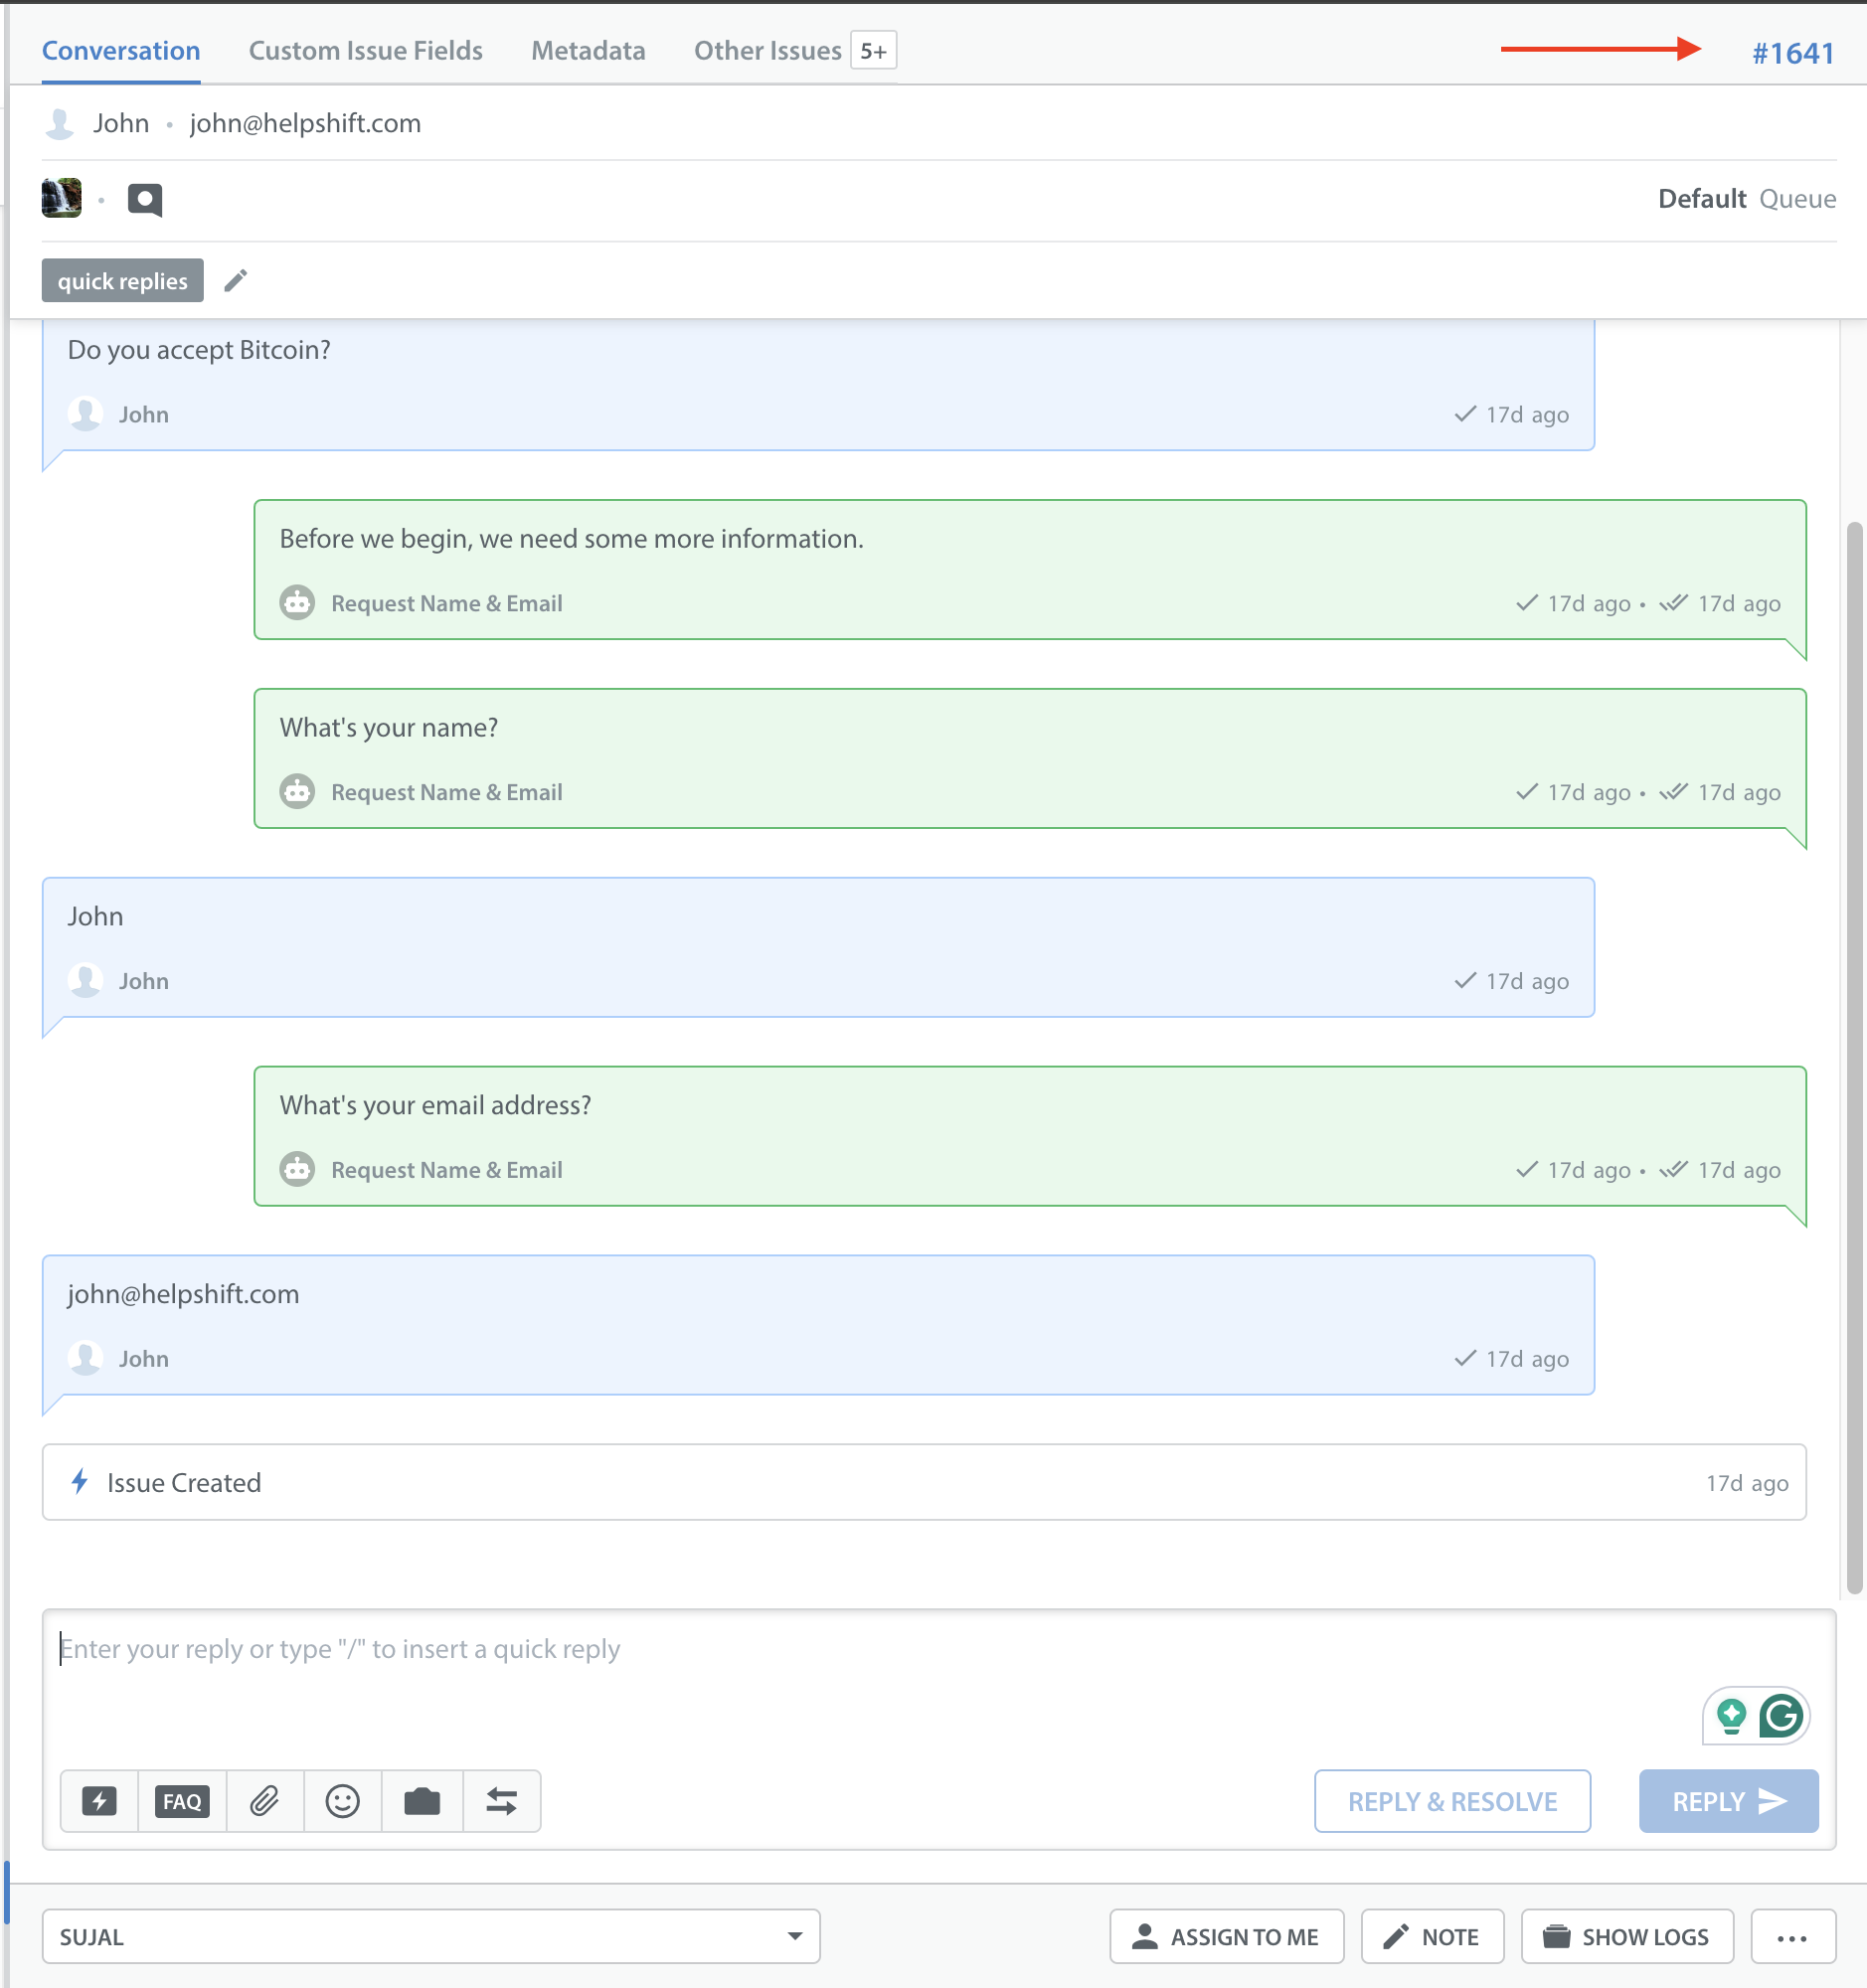
The full Issue details page looks like this:
Issue Details
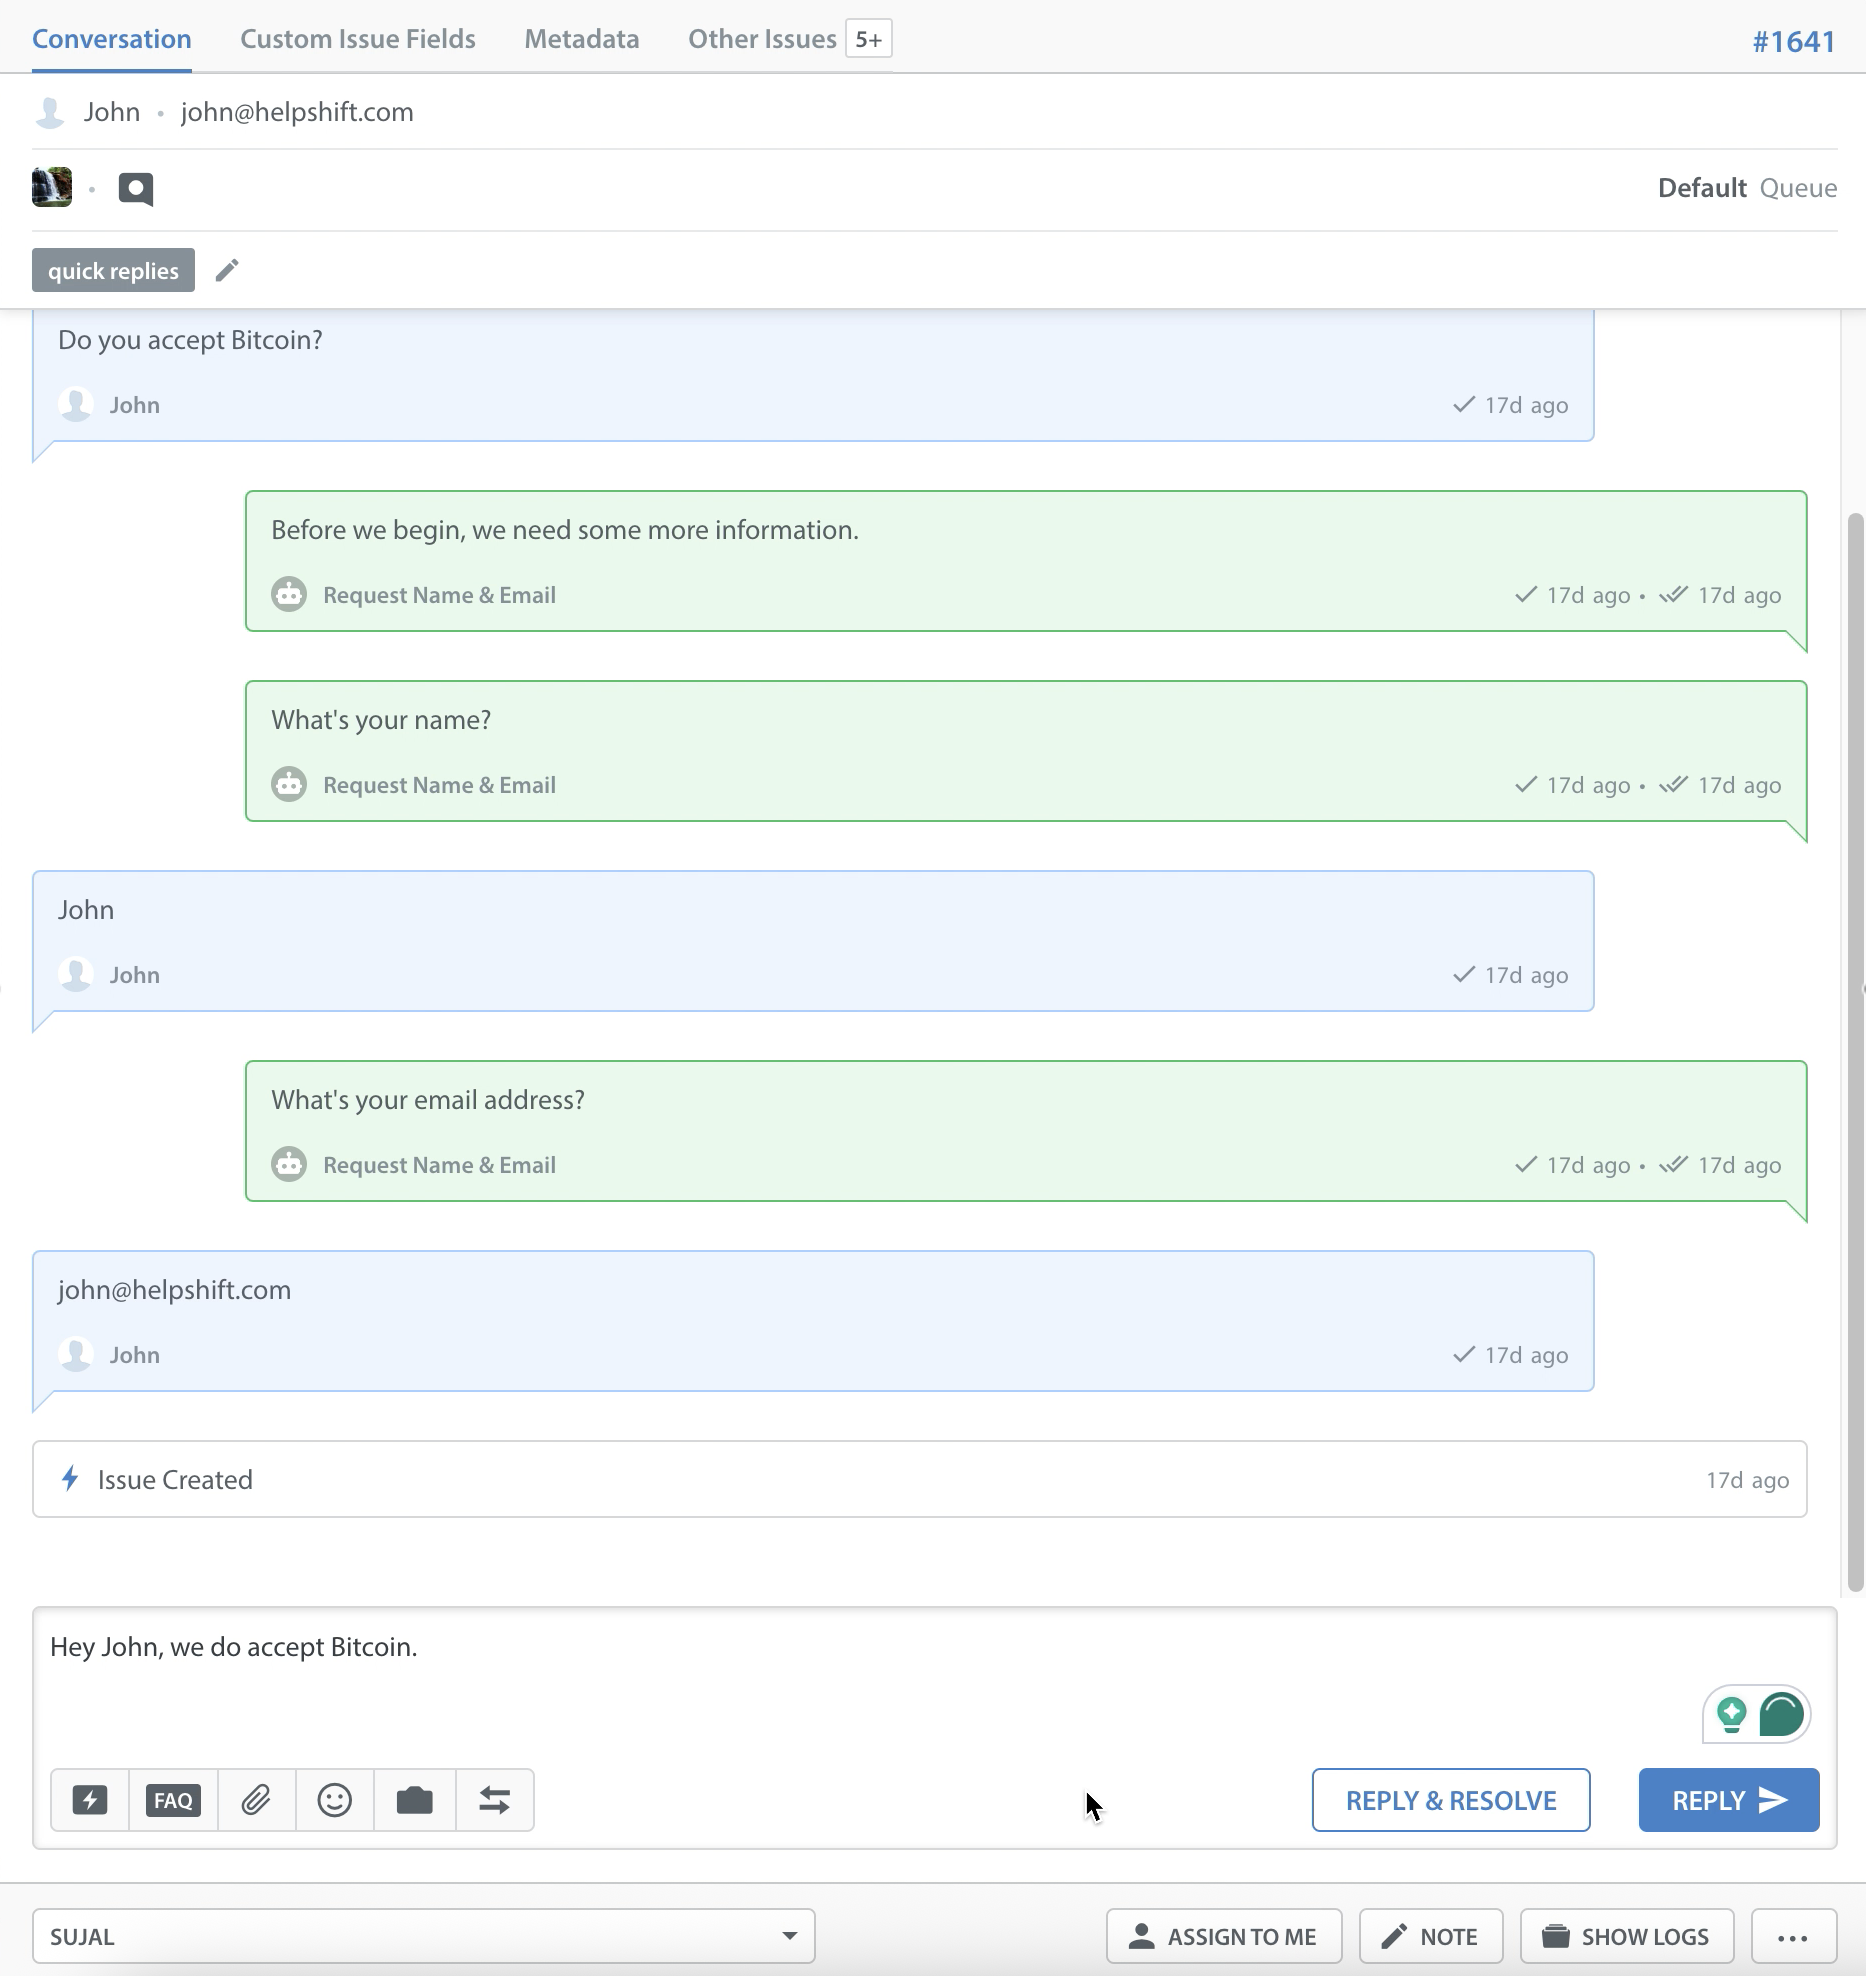
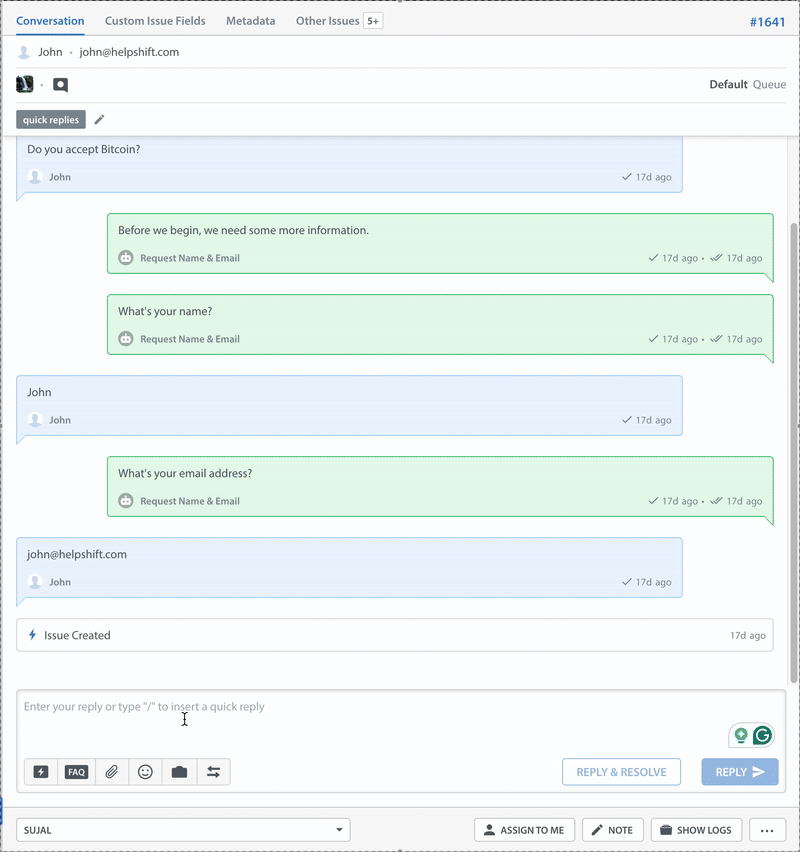
In the 3-pane view, the Issue details page includes the conversation between the Agent and end user, with options to update and manage the Issue at the bottom.
You can click the tabs in the upper navigation bar to review the metadata or Custom Issue Fields associated with this Issue, as well as other Issues that have been submitted by the same user in the past. More information about these tabs is provided later in this article.
Replying To & Updating Issues
You can only reply to an Issue if it is assigned to you. To reply to an Issue, simply type a reply into the text box and click ‘Reply’ or ‘Reply & Resolve’.
Note: If CSAT is enabled, clicking the Reply & Resolve option will automatically prompt the user to complete a CSAT survey upon issue resolution. To learn how to use CSAT, see What are (CSAT) Customer Satisfaction Surveys, and how do I set them up?
There are also options to Reject an Issue, Share the Issue, send a Review Request, and Resolve an Issue with no reply via the 3 dots shown below the reply text box.
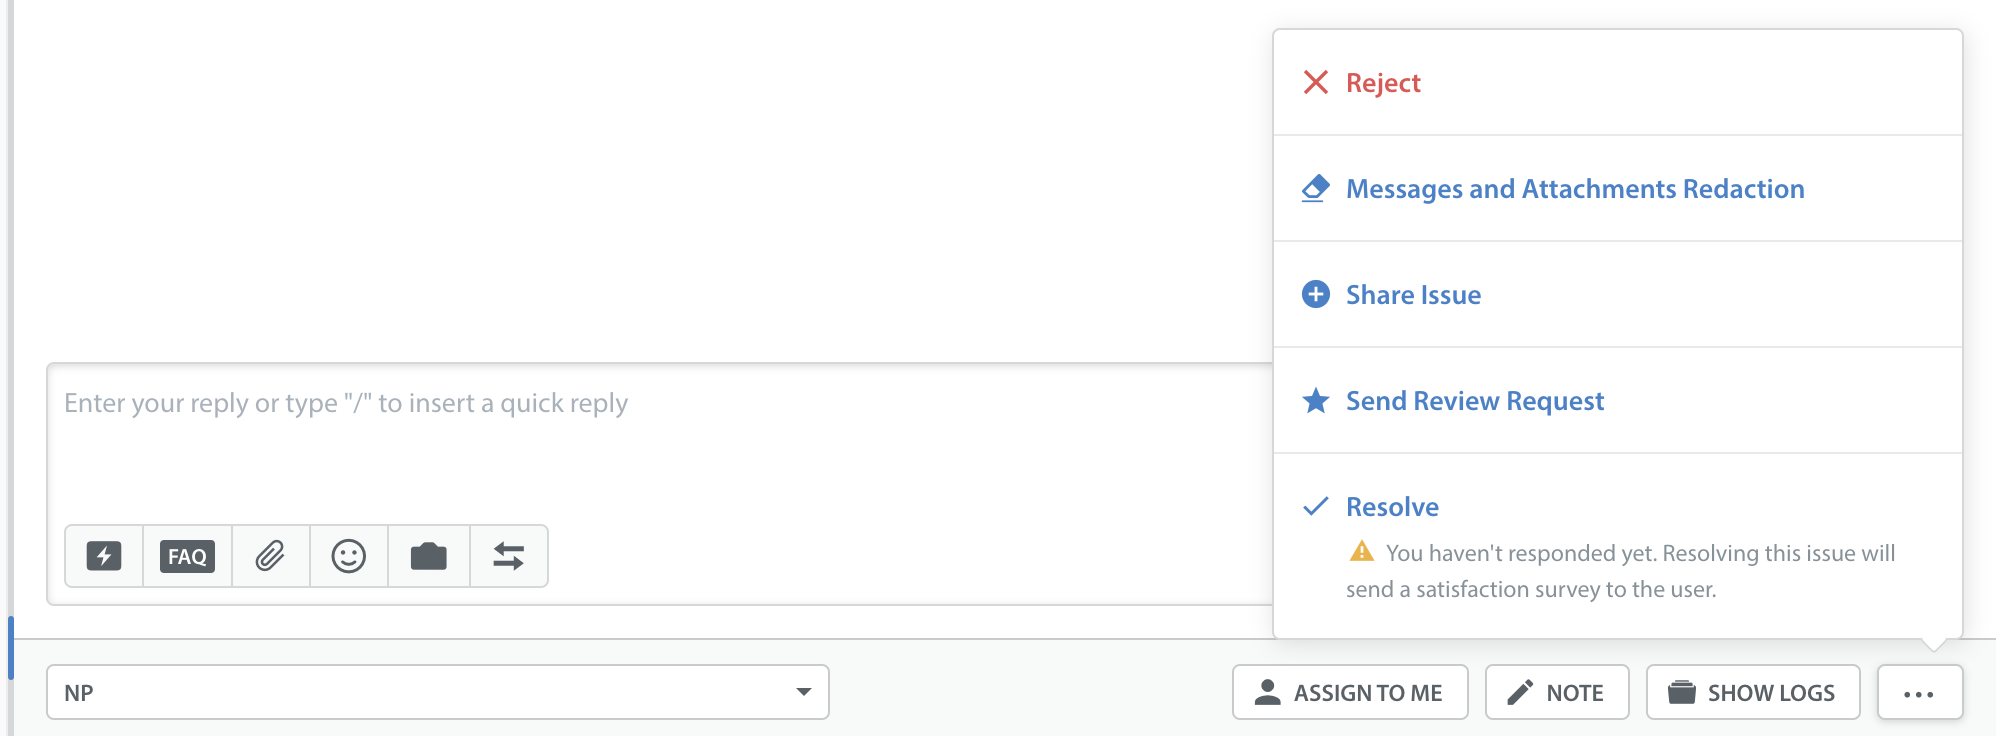
Within the text editor, you’ll see the following options for managing Issues:
![]() Insert Quick Reply: This icon allows you to search for and insert a templated message, such as a greeting or signature. To learn more, see What are Quick Replies, and how do I use them?
Insert Quick Reply: This icon allows you to search for and insert a templated message, such as a greeting or signature. To learn more, see What are Quick Replies, and how do I use them?
![]() Insert FAQ: This allows you to insert an FAQ instead of a Quick Reply in response to end users. To learn more, see How do I reply to a message with a predefined answer / FAQ article?
Insert FAQ: This allows you to insert an FAQ instead of a Quick Reply in response to end users. To learn more, see How do I reply to a message with a predefined answer / FAQ article?
![]() Attach files: Click this icon to select and attach a file. To learn what file types can be attached, see How do Agents attach files to replies from the Dashboard?
Attach files: Click this icon to select and attach a file. To learn what file types can be attached, see How do Agents attach files to replies from the Dashboard?
![]() Insert Emoji: This allows you to insert an emoji in replies to end users. To learn more, see For Admin: How do I use emojis and special characters in replies to end users?
Insert Emoji: This allows you to insert an emoji in replies to end users. To learn more, see For Admin: How do I use emojis and special characters in replies to end users?
![]() Request screenshot: This allows you to request in-app screenshot from a user, which is useful for diagnosing technical issues. To learn more and see what the end user experience looks like, see How do I request an in-app screenshot from a user?
Request screenshot: This allows you to request in-app screenshot from a user, which is useful for diagnosing technical issues. To learn more and see what the end user experience looks like, see How do I request an in-app screenshot from a user?
![]() Text direction: Use this button to update the text direction from Right to Left, or vice versa.
Text direction: Use this button to update the text direction from Right to Left, or vice versa.
Click the  button to leave a Private Note that only your support team can see. These are helpful for providing context when reassigning an Issuer. They are not visible to the end user, and are added in-line within the conversation. To learn more, see What are Private Notes and mentions, and how do they work?
You can view the actions taken on an Issue by clicking the  button in the bottom right. The Issue Details page will be updated to display all actions taken on an Issue, in addition to messages and other data.
You can also apply tags to Issues in the top navigation bar. Tags let you categorize and track your Issues so you and your team can stay organized. Admins can create and manage tags in the Dashboard settings. To learn more about tags, see How do I create and use tags?

For more information on how to make the most of your Dashboard, see How does the Issues feed on my Dashboard work?
The Custom Issue Fields Tab
To provide additional information about an Issue in a format that is easily accessible for your Agents, such as the tier of the Issue, a JIRA ticket associated with an Issue, crash logs, and more, you can use Custom Issue Fields. Custom Issue Fields can be used to store and share important data about an Issue by allowing you to define organized, specialized types.
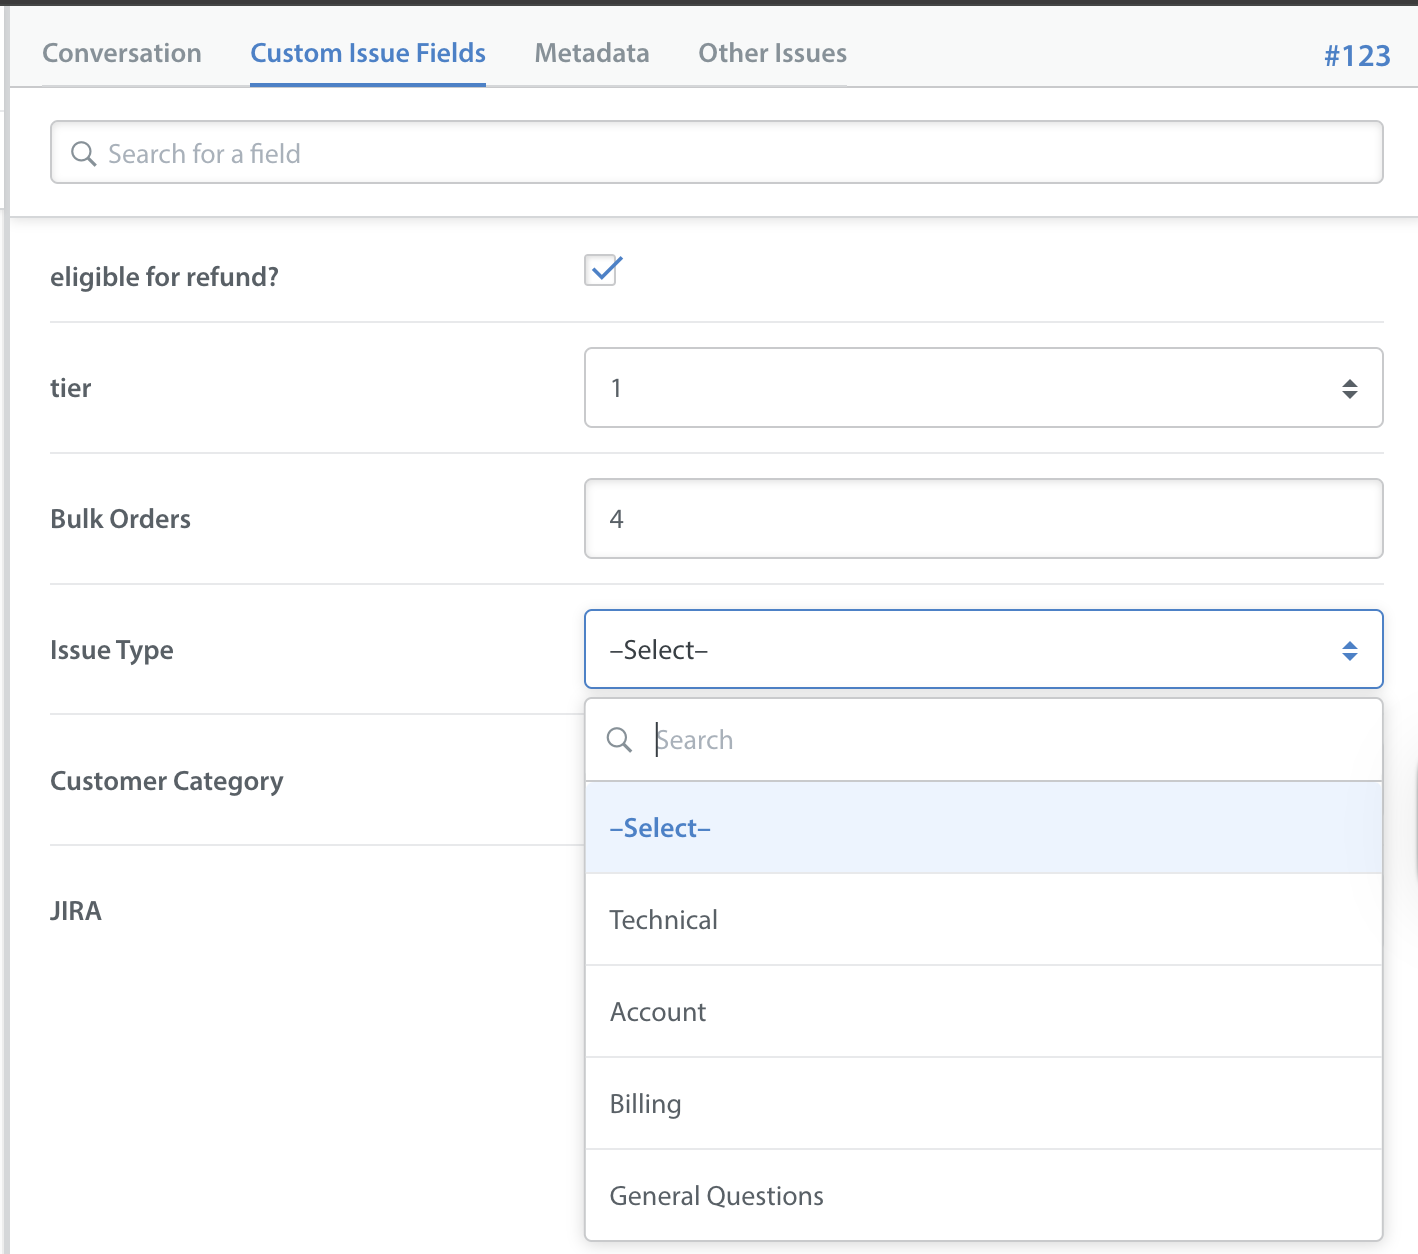
Custom Issue Fields can be defined to be completed as follows:
- Custom Issue Fields can be automatically added by the app when metadata is passed through about the Issue
- Agents can fill out or update Custom Issue Fields on Issues from within the Helpshift Dashboard, as seen in the screenshot above
- When your end users reach out via your contact form, Custom Issue Fields can be added into that form for them to complete when submitting the new Issue – that way, Agents already have the information needed to resolve their Issue
Since the Custom Issue Fields listed on this tab within the Issue Details page are universal for all Issue types, it is best for the Admin of your team to plan a set of Custom Issue Fields that will apply to most Issue types. Please refer your Admin to our Custom Issue Fields guide to get started.
The Metadata Tab
Metadata is information our SDK collects out of the box from the device when it is integrated into your app. This includes the user’s OS type, app version, device type, battery level, and more.
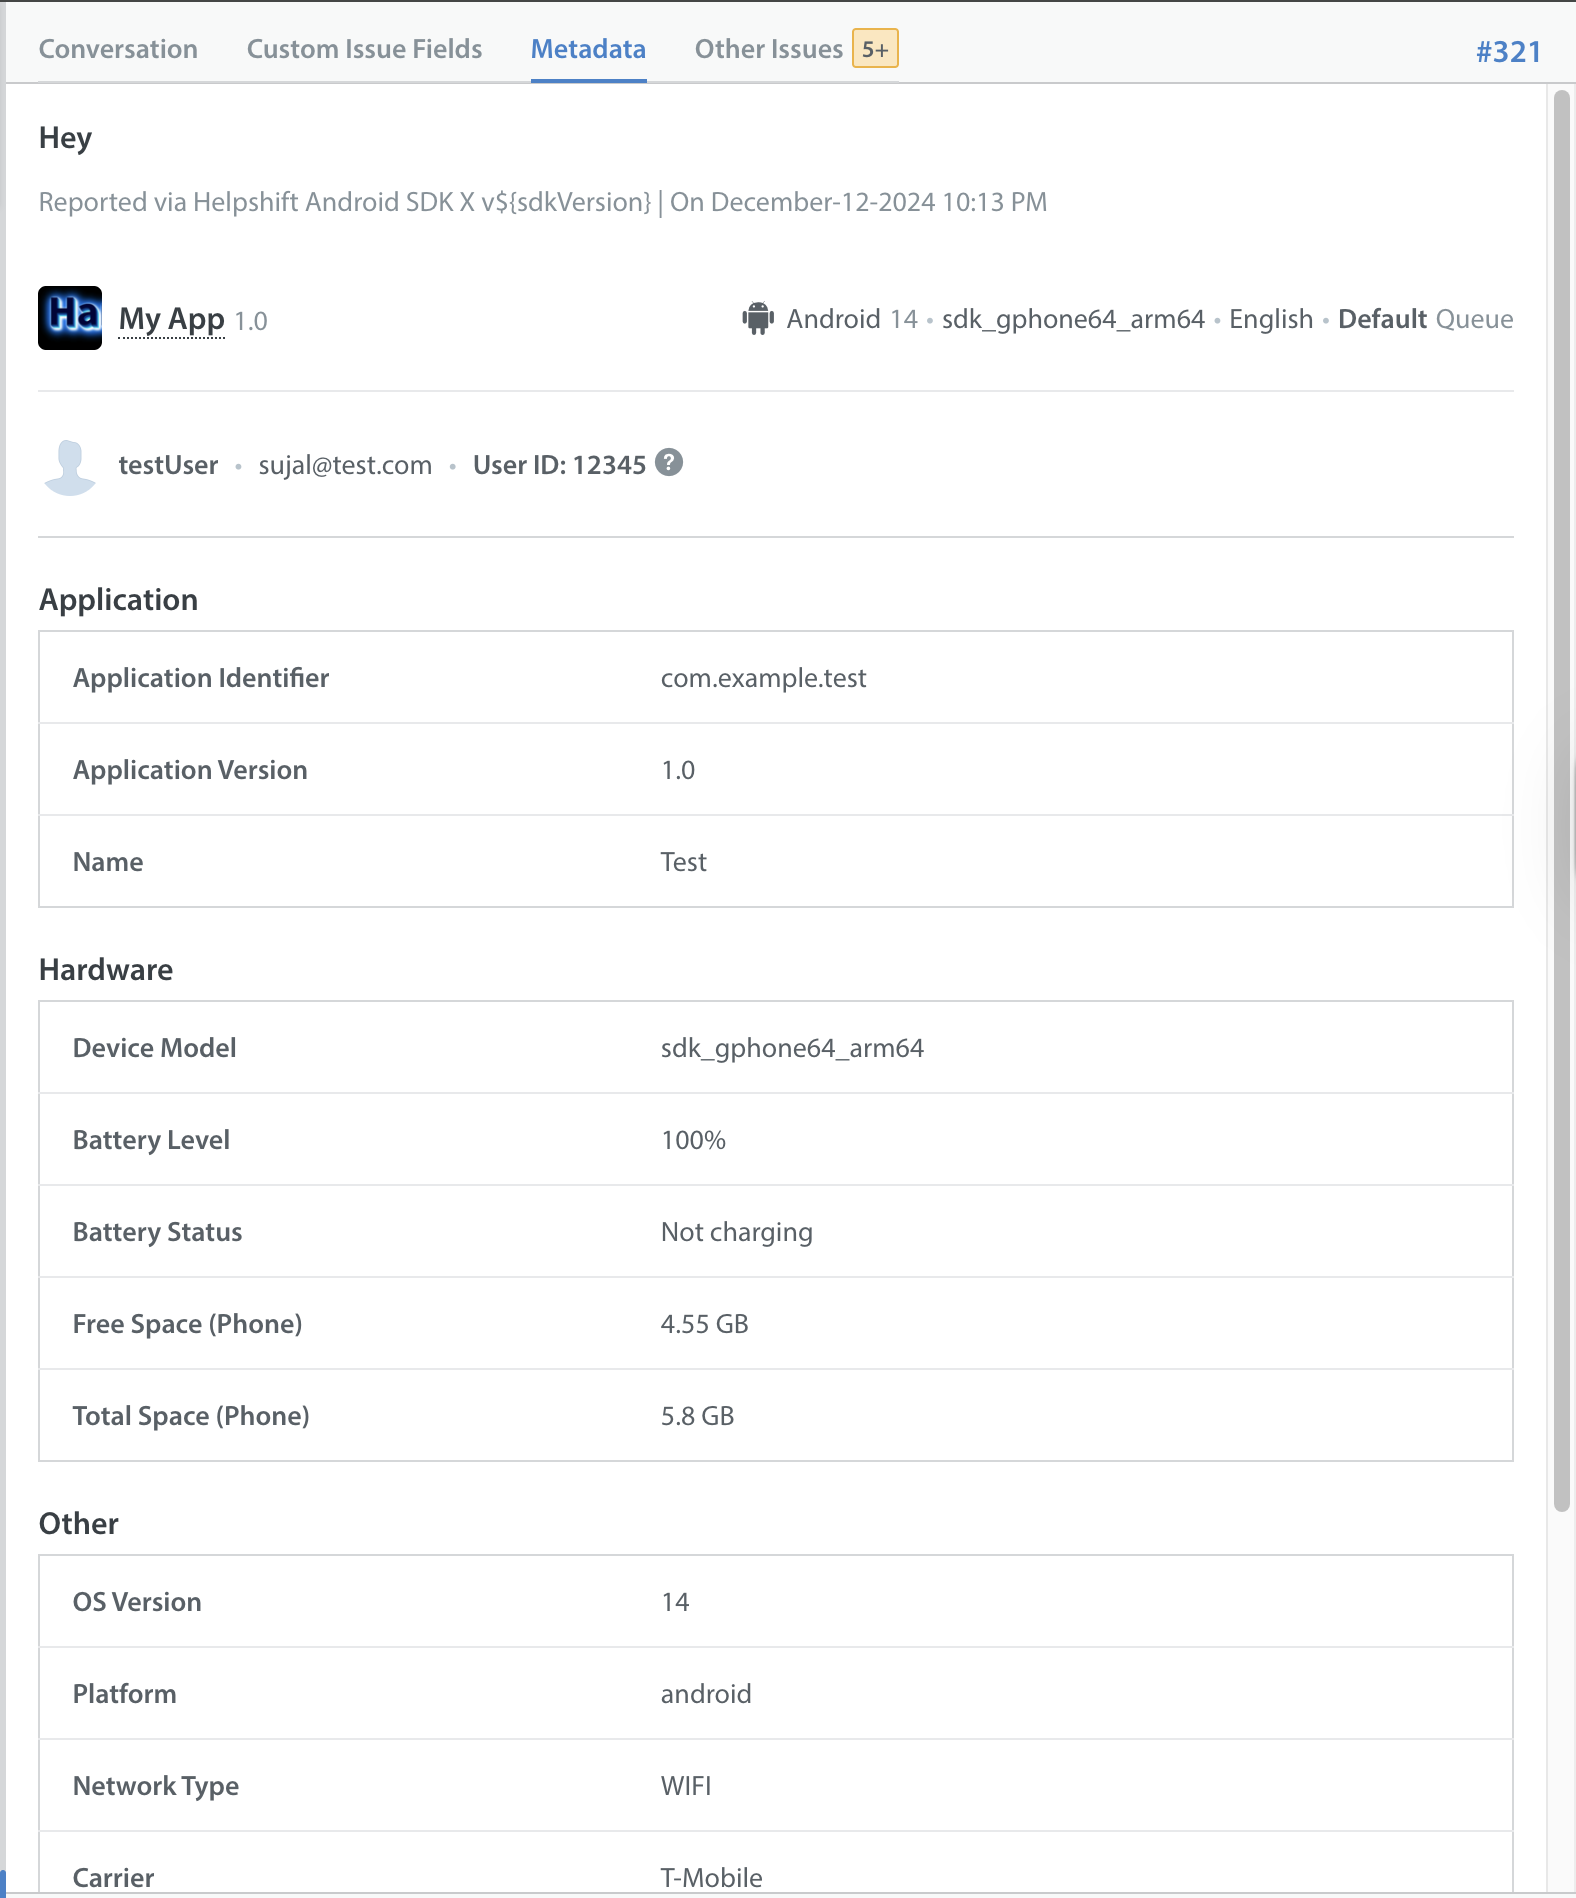
You will notice a section titled ‘Custom Data’ in your metadata tab for in-app Issues. Custom Data is data that is unique to your app that is not collected by default, and that your developers can configure our SDK to collect. This data could include $ spent, User ID, install date, number of purchases, and anything else you’d like to know upon Issue creation.
The Custom Data section also lists the HS-Tags associated with this Issue. HS-tags are unique values that can be associated with Issues to further categorize them.
To learn more about Metadata, Custom Data, and HS-Tags, review the FAQ What’s the difference between Metadata, Custom Issue Fields, and tags?
Other Issues Tab
The ‘Other Issues’ tab lists previous Issues submitted by the user.When an end user submits their first Issue in Helpshift (either via the app or the web), the name and email address that they provide during that outreach are captured by the SDK and stored in your Helpshift Dashboard. The User ID is then associated with those identifiers.
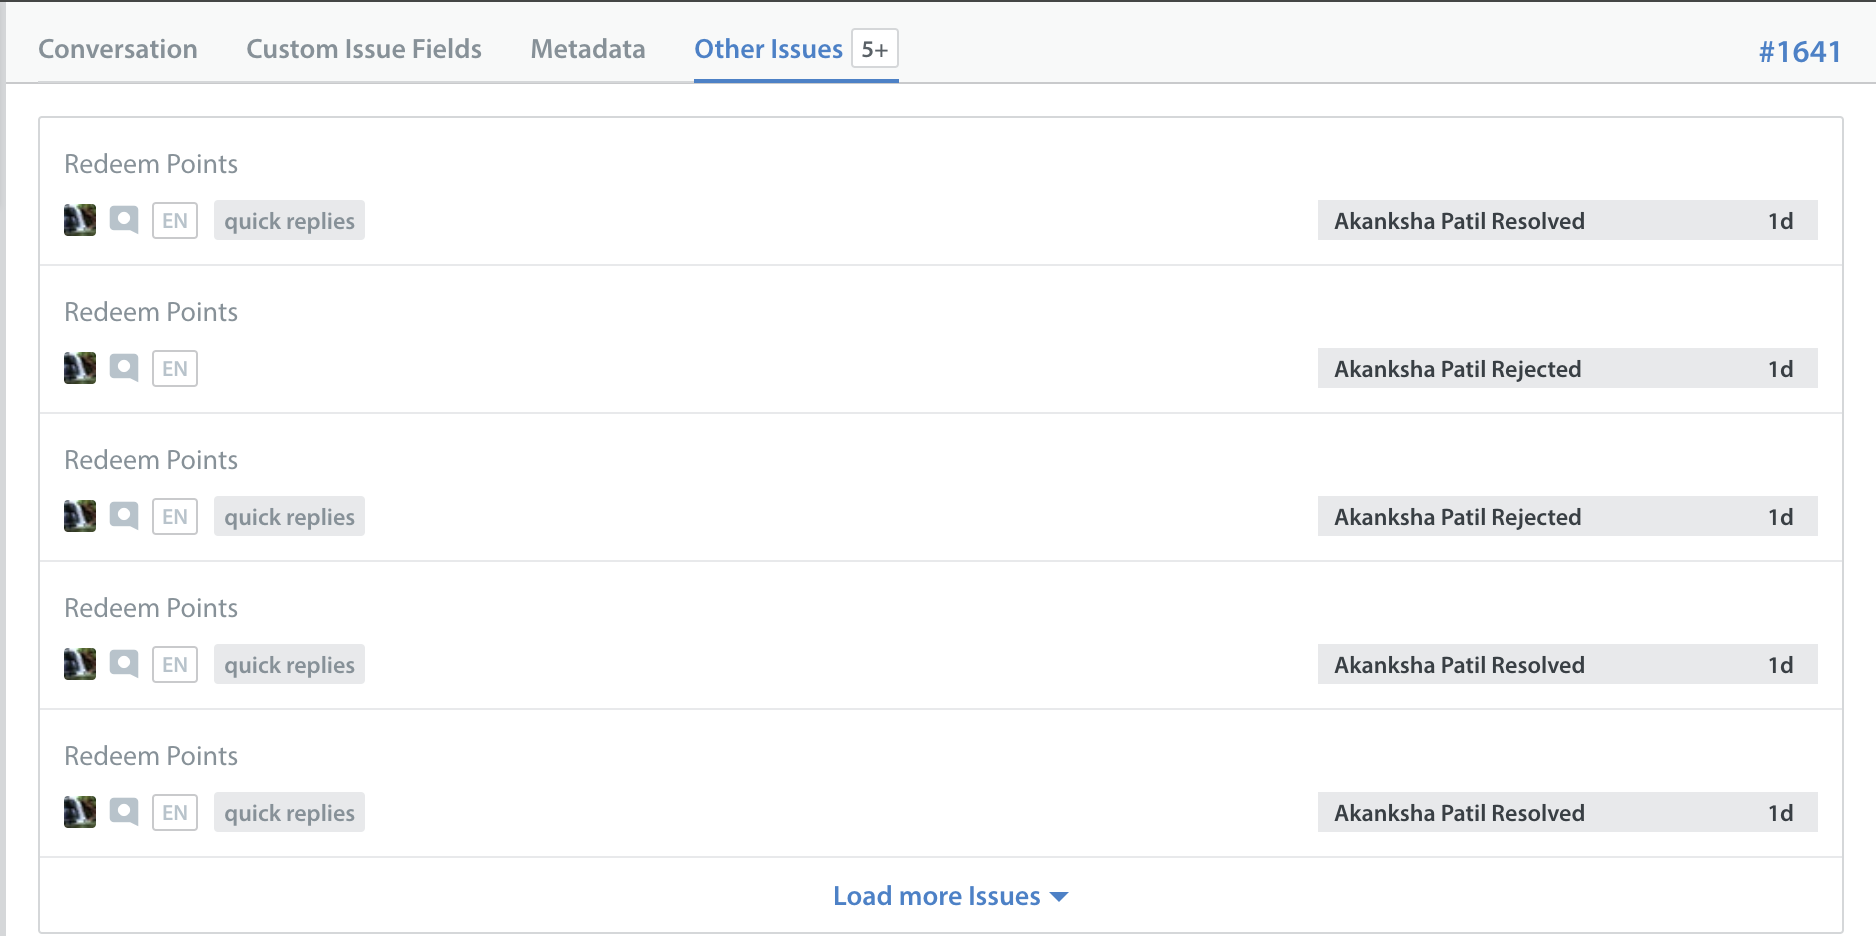
To learn more about how this works, see How are ‘other Issues’ identified within Helpshift?