Introduction
Abandoned chat sessions disrupt the natural flow of work when service agents must await a response that never comes. User presence detection prevents this disruption. The insight that user presence detection provides helps service agents to prioritize their support of active users. It also helps to lower the stress of having a heavy but unprioritized workload. You can trigger, or branch, time-based automations according to the presence or absence of a user.
CAPABILITY
- Service agents will be able to see, in almost real time, when a user leaves their conversation.
- In Agent Dashboard, a green dot next to a user’s avatar signals that the user is present.
- Absence of this green dot signals that the user has gone.

Enable user presence detection
PROCEDURE
- Log in to Helpshift as its administrator.
- Click Settings in the Helpshift toolbar, and then scroll the navigation pane to its App Settings area.
- In the App Settings area, click an app that should support user presence detection.The screen refreshes to show several categories of configurable settings.
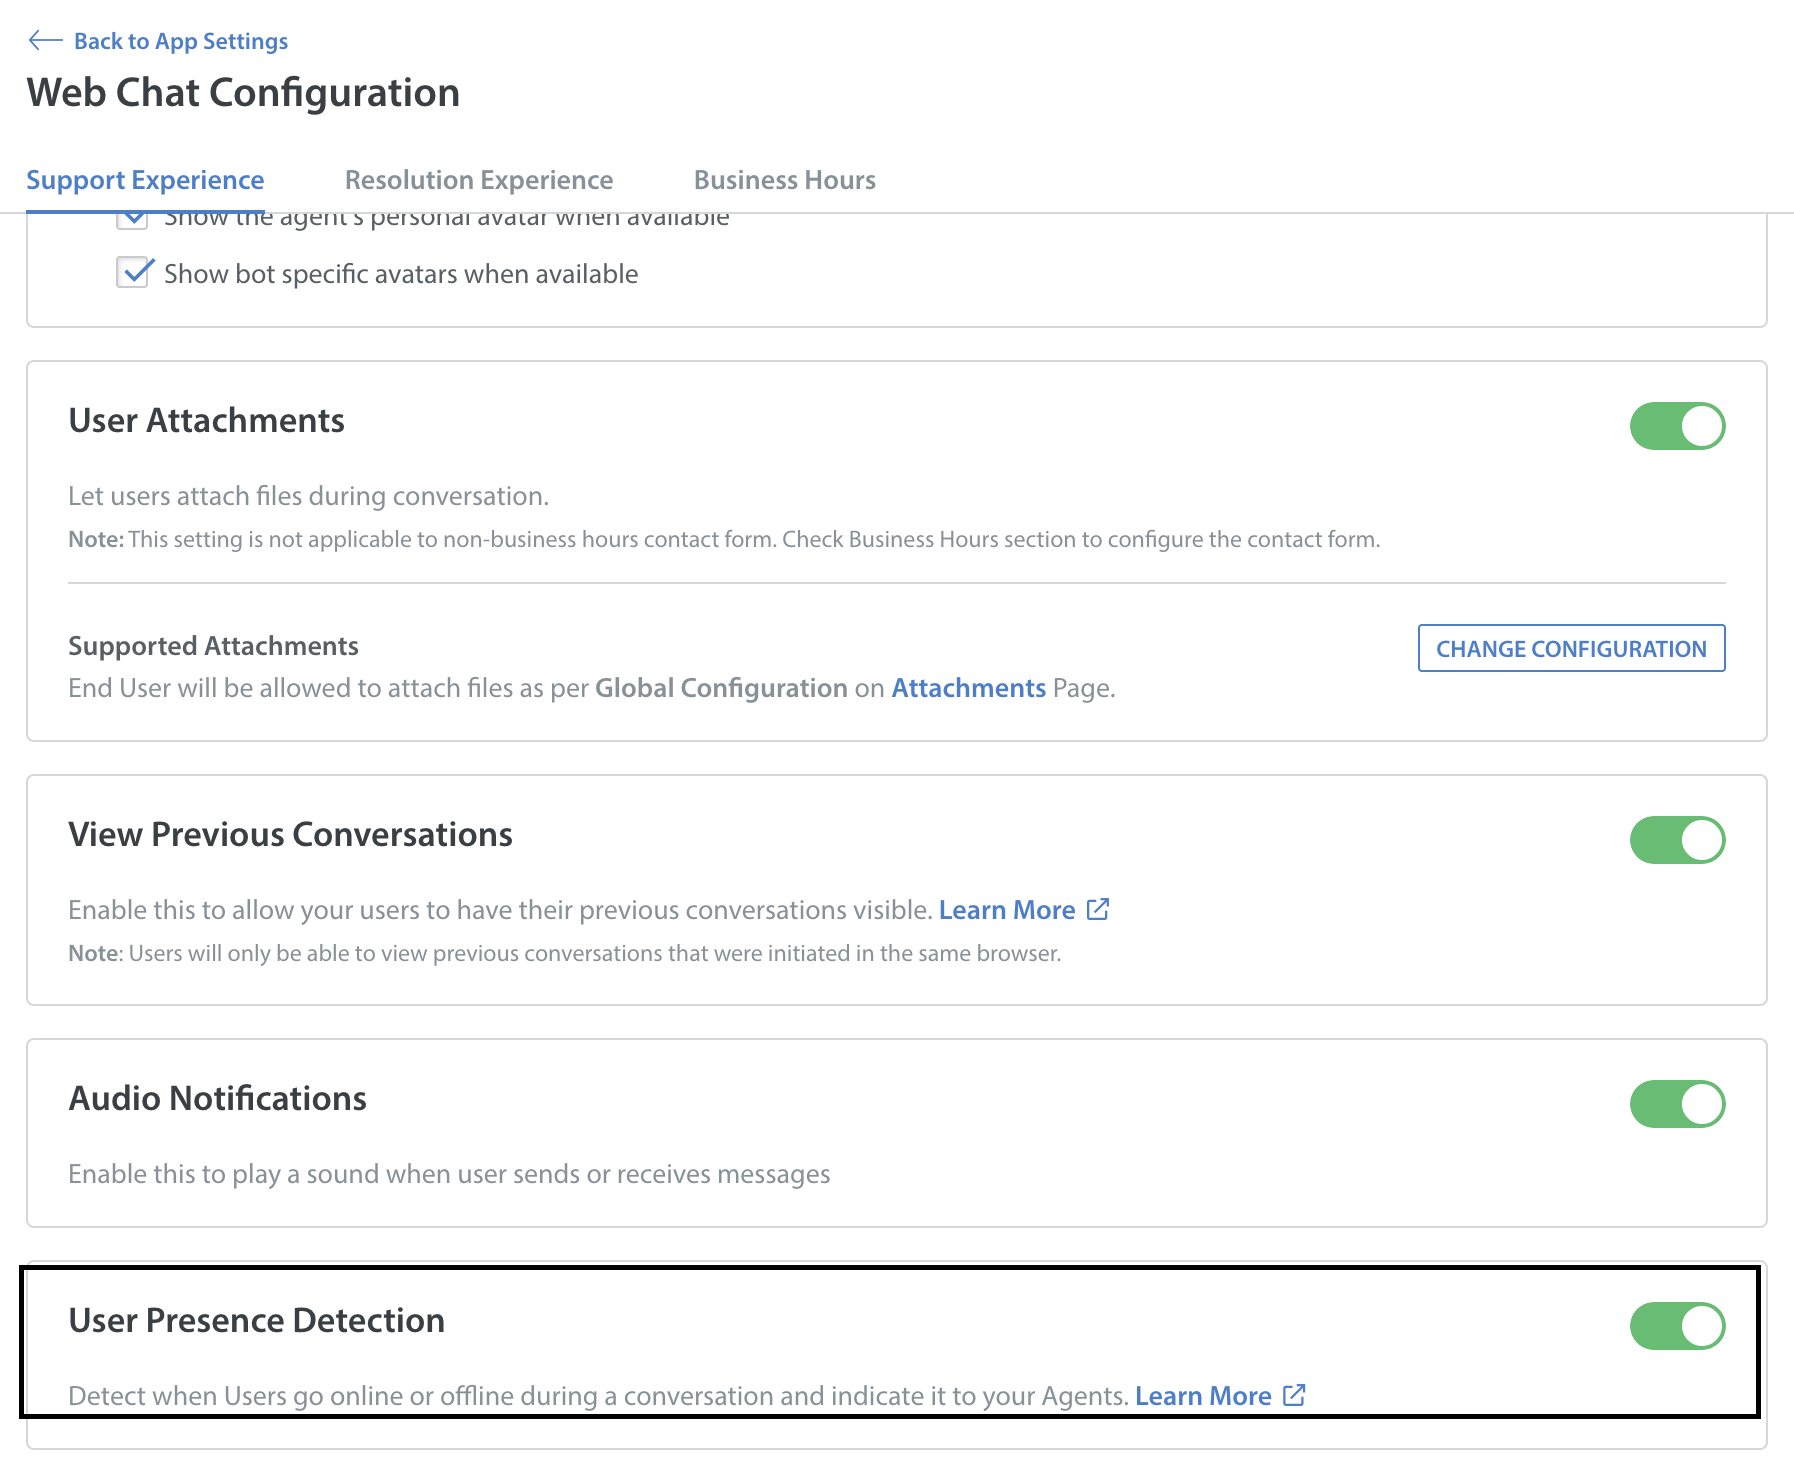
- Click Configure for Web Chat or In-App respectively.
- Turn On the toggle next to 'User Presence Detection' present under the support experience page.
Base new workflows on user presence detection
You can configure time-based automations that consider how long a user has been offline.
PROCEDURE
- Log in to Helpshift as its administrator.
- Click Settings in the Helpshift toolbar, and then scroll the navigation pane to its Workflows area.
- In the Workflows area, click Automations.
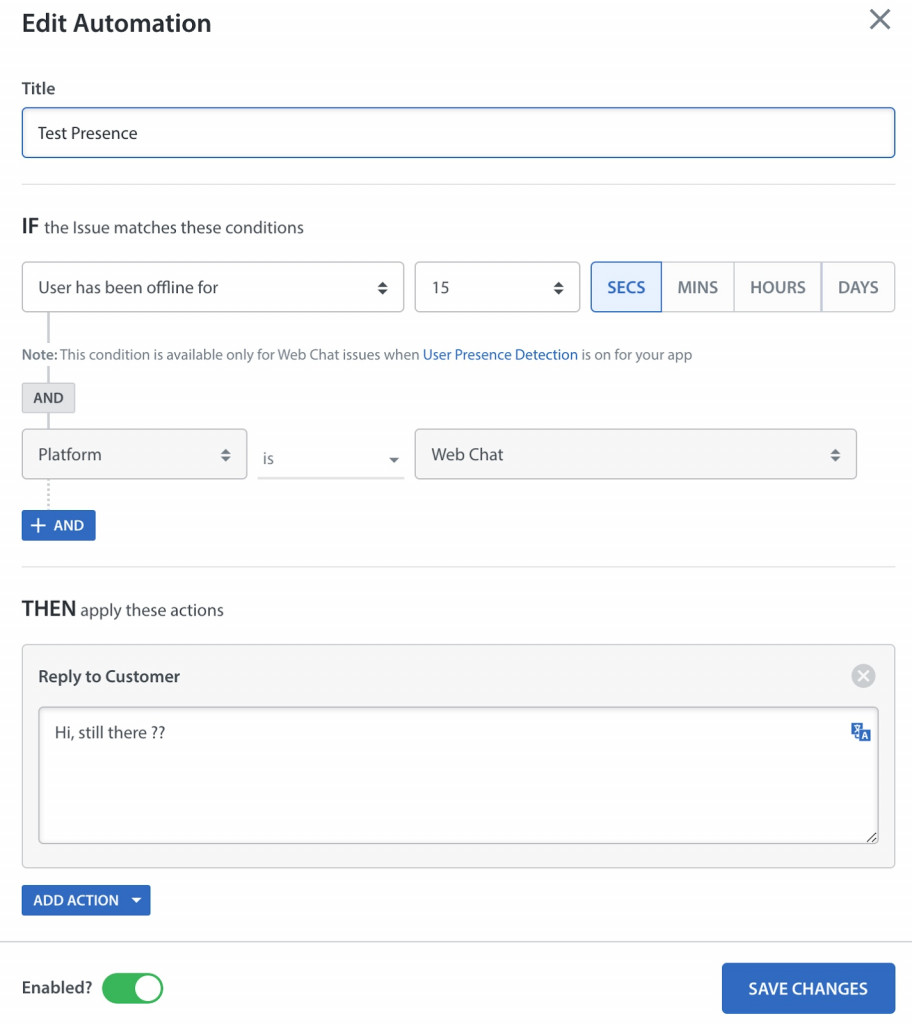
- On the Automations page, click the Time-Based tab. Then, click + NEW AUTOMATION.The Create Automation popup window opens.
- Choose If > User has been offline for condition.
- Specify a duration in seconds, minutes, hours, or days. Then, choose the number of these that counts the full duration.
- Choose an action from the Then list. For example, you might choose Reply to Customer, and then enter the message text to send.
- (Optional) Click Add Action as many times as necessary when your planned workflow includes multiple actions. Then, choose the specific actions to add.
- Click Save.