
Helpshift includes features for a brand to organize, store, and work with its translated text snippets. We call this feature set “text templates”. Text templates serve brands that use multiple languages while supporting a product.
- When your brand offers product support services in one language exclusively, text templates may not be right for you.
- Helpshift, Inc., is not a translation services vendor. Brands are responsible for obtaining any translated text strings that they would store and use.
- Only the users with assigned administrator (or supervisor, in some cases) permissions can manage a brand’s text templates.
- Our platform can render the character sets for more than 180 languages.
The purpose of a text template is to simplify the internationalization of any consumer-facing:
- greeting
- title
- message
- question
- or survey that you may prepare for your brand’s in-app or web-based customer support experience.
You can prepare a text template in either of two ways.
- Use the Text Templates user interface.
- Upload a well crafted CSV file.
Refer to the topics below to read the corresponding procedure:
- Create or edit a text template via the Helpshift user interface
- Create or edit a text template via CSV
- Export and download a text template in CSV format
- Assign the user permissions to create and manage text templates
- Use text templates in custom bots
Create or edit a text template via the Helpshift user interface
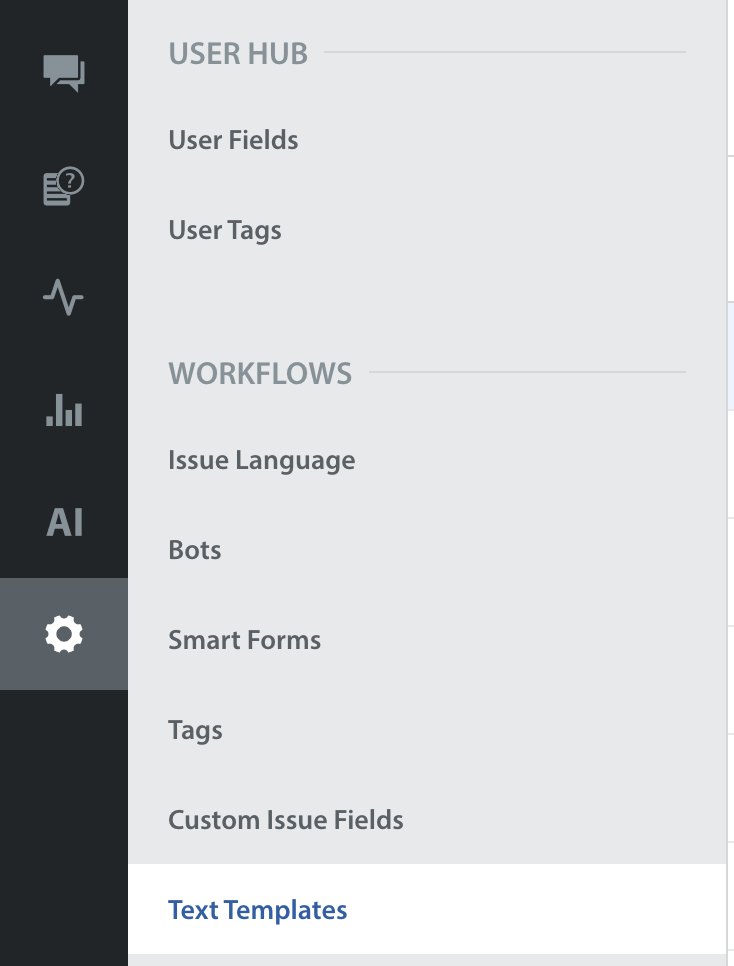
- Navigate to Settings on the Helpshift toolbar, and then click Text Templates in the WORKFLOWS area.
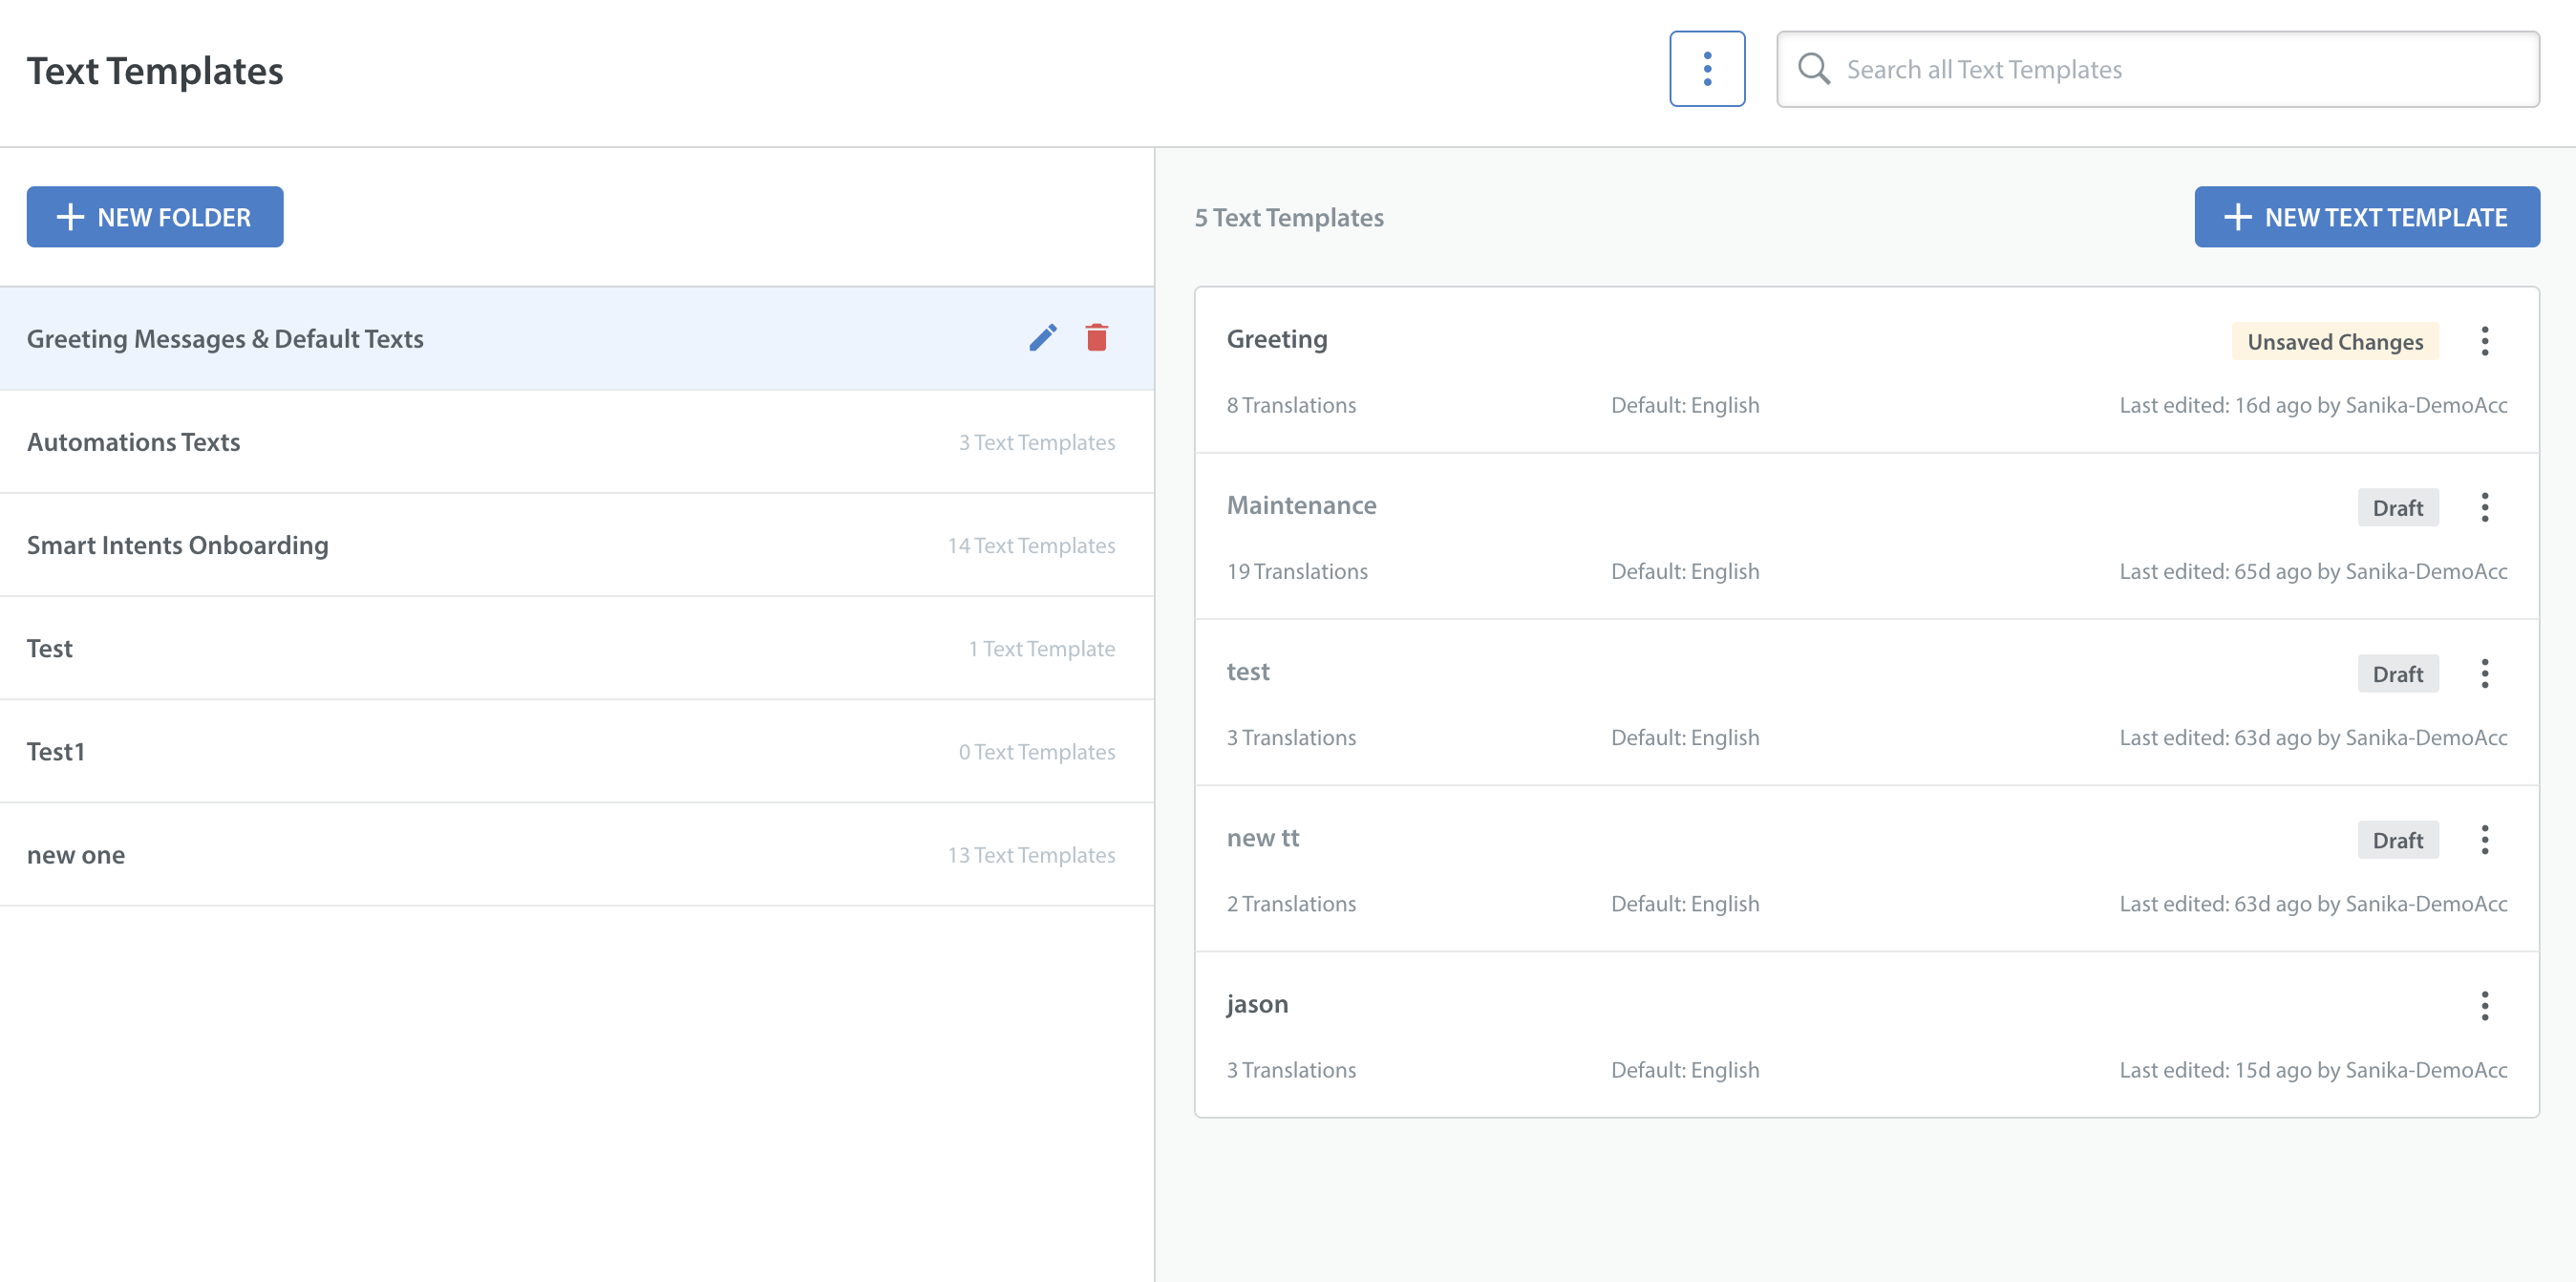
The Text Templates page opens. It lists your brand’s defined folders and text templates.

NOTE: No folders or text templates are available for your use when no folders are listed. You must create at least one folder before creating any text templates. - (Conditional) To create your first folder for text templates, click + NEW FOLDER. Then, enter a folder name and click SAVE.

- (Conditional) Alternatively, to begin editing a text template, click the More Options button (
 ) in the same row that describes the template.

- To specify where Helpshift should create your new text template, choose a folder from the folders list. Then, click + NEW TEXT TEMPLATE.
The Create Text Template dialogue box opens.

- Enter a title for your new text template.
- (Optional) To use a different folder than the one you chose a moment ago, choose again from the folders list.
- Click + ADD DEFAULT LANGUAGE. Then:
- Choose a default language — perhaps English, for example.
- Use the provided text box to enter a brief message in the same language that you chose as the default for this text template. The purpose of this message is to represent one or more ideas or sentiments that could be appropriate and useful during a friendly customer support engagement. Possibilities include “Before I can process your refund, I’ll need for you to verify your home address" or “Let me see if I can restore your access”, That sort of thing.
TIP: You might also include one or more variables in a message, although this is not required. A variable represents a fixed value that can differ from one customer support engagement to another. It may represent a unique database value to one consumer, such as a registered username or email address. When using a variable in a text template, you must also define its fallback value. The fallback value is a literal word or phrase that is not unique to any one consumer, such as “Prestige Elite member” or “guest.” Your text template uses the fallback value as a substitute if the variable does not load its expected value. Consider the case of a personalized greeting, such as: “Good morning, Smiley_Clickmore! How can I help you?” If the variable that should load a username doesn’t actually do so, its fallback value can at least preserve the approachable spirit that you intended, by sending out the generic but still friendly greeting, “Good morning, my friend! How can I help you?”

- Click DONE and the content will be saved as a draft and all the further changes will be auto-saved. Repeat the following for each language your text template should support.
- Click + ADD A LANGUAGE to specify a language in All Translations section.
- Use the provided text box to enter the translated, equivalent text in your chosen language.

- Do the following repeatedly for each language your text template should support.
- Click + TRANSLATION to specify a language.
- Use the provided text box to enter the translated, equivalent text in your chosen language.
(Optional) To use a variable in your text template, click Add variable.
NOTE: When the default language version of a text template includes any variable, each translated version of this same text template must use the identical variable.
TIP: Each time you use a variable in any language, set a fallback value that makes sense in its current context and language.- Click SAVE.
- (Optional) To view your new text template, click its row in the Text Templates table.
TIP: Each template’s summary description in this table cites its default language and counts its number of translations.
Note: A single folder can accommodate multiple text templates.
Saving text templates as draft
All changes made to the text template will be auto-saved as a draft.
If you edit a saved text template and do not save it, an Unsaved Changes tag will be displayed until the content is saved.

Restoring previous versions of text templates
Admins can restore the earlier saved content by discarding the draft version and removing the Unsaved Changes tag.
Follow the steps to restore your content:
Click the RESTORE button at the bottom left corner of the All Translations section.

- A pop-up will appear for confirmation. Click RESTORE.

Once restored, the Unsaved Changes tag will be removed, and the previous content will be shown, removing draft content. When downloaded, the final saved version will be downloaded.Text templates need to be saved for use in other features. i.e., text templates in draft state that are available to be used. Any changes made in the text template are auto-saved as drafts until they are finally saved.
Create or edit a text template via CSV
You can create a text template outside of the Text Templates user interface. However, it cannot be the first text template that your brand creates for use on your Helpshift instance.
This restriction is due to the requirement that you use a specially crafted CSV file. The only way for you to obtain a sample CSV file for this purpose — a file that meets our structural and formatting requirements exactly — is to export a usable text template to CSV.
This procedure explains how to obtain a sample CSV file, edit it to suit your current need, and then upload it to your Helpshift instance for use as a text template.
- Naviagate to Settings on the Helpshift toolbar, and then click Text Templates in the Workflows area.
The Text Templates page opens.
- To prepare one of your defined text templates for export, click the gear icon (
 ) in the same row that describes the template. Then, choose Edit from the list.
 - Do not change any text in the Title field.
- Do not change the active selection in the Folder list.
- If the default language is correct for your current need, do not change it or any of its associated text. But if it is wrong, fix it.
- If the languages for translated versions are correct for your current need, do not change them or any of their associated text. But if any of them are wrong, fix them.
- Click the gear icon () next to the search field, and then choose Export Text Templates as CSV from the list.

The Export Text Templates as CSV dialog box opens. - Complete the “Export and download a text template in CSV format” procedure, elsewhere in this article.
- Open the downloaded CSV file with your preferred spreadsheet software. Then, update or replace its values where appropriate, being careful not to break any aspect of its fundamental organization.
- Save your work in the CSV file, being careful not to save it with any other file format than CSV.
- Return to the Helpshift user interface for text templates.
- Click the gear icon () next to the search field, and then choose Create/Update Text Templates via CSV upload from the list.

The Create/Update Text Templates via CSV Upload dialog box opens. - Click SELECT FILE to locate and choose your edited CSV file for upload.
- Click Verify Changes to view the summary of changes made to the CSV file, as well as any errors.

- Click Confirm Update to upload and apply your work.
TIP: In the event of an error, we recommend that you correct the CSV file and then click Re-Upload. Doing so returns you to the Create/Update Text Templates via CSV Upload dialog box, where you can repeat the same steps as before to upload the CSV file.
Export and download a text template in CSV format
- Click the gear icon ()next to the search field, and then choose Export Text Templates as CSV.

- The Export Text Templates as CSV dialog box opens.
- Click a radio button to choose if the exported file should include only the text from the default language, or if it should also include whichever other language versions your brand has prepared for this text template. Then, click Export.
NOTE: Export all Text Templates is the default selection.
Download then begins for the specified language version (or versions).
Assign the user permissions to create and manage text templates
Administrators can grant supervisors permission to create and manage text templates.
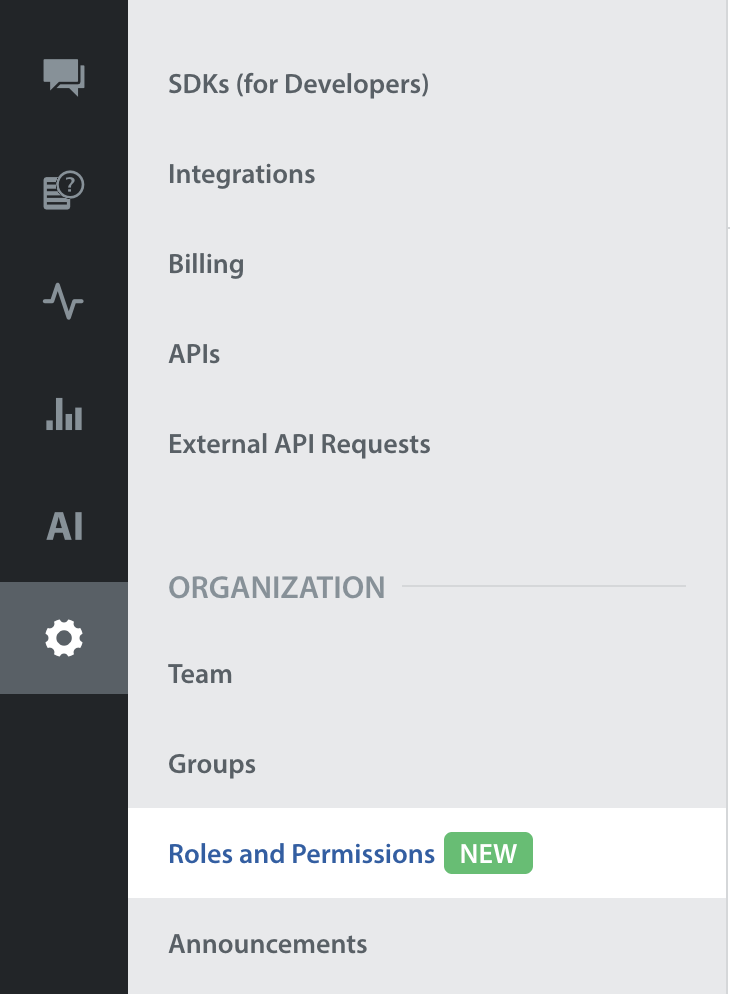
- Click Settings on the Helpshift toolbar, and then click Roles and Permissions in the Organization area.
The Feature Access table lists which permission settings you can toggle on or off for people with certain assigned user roles. Its row for text template permissions helps you to control whether someone with the supervisor user role can manage your brand’s text templates.
 When the toggle is in its rightmost position, and is colored green, supervisors are permitted to manage text templates. Their access is turned On.
When the toggle is in its leftmost position, and is colored grey, supervisors are prevented from managing text templates. Their access is turned Off.
- Click the toggle to switch this permission setting on or off. Supervisors can only see and use features on the Text Templates page while they have permission to manage text templates.
Use text templates in custom bots
Custom bots support the use of text templates. For details, see Localization of Custom Bots.