This FAQ is for Helpshift users who have recently had Power BI activated in their Dashboard. If you are interested in getting Power BI for your support team, please reach out to your Account Manager or to success@helpshift.com. To learn about the benefits of Power BI, please see How can I get more out of Helpshift Analytics with Power BI?
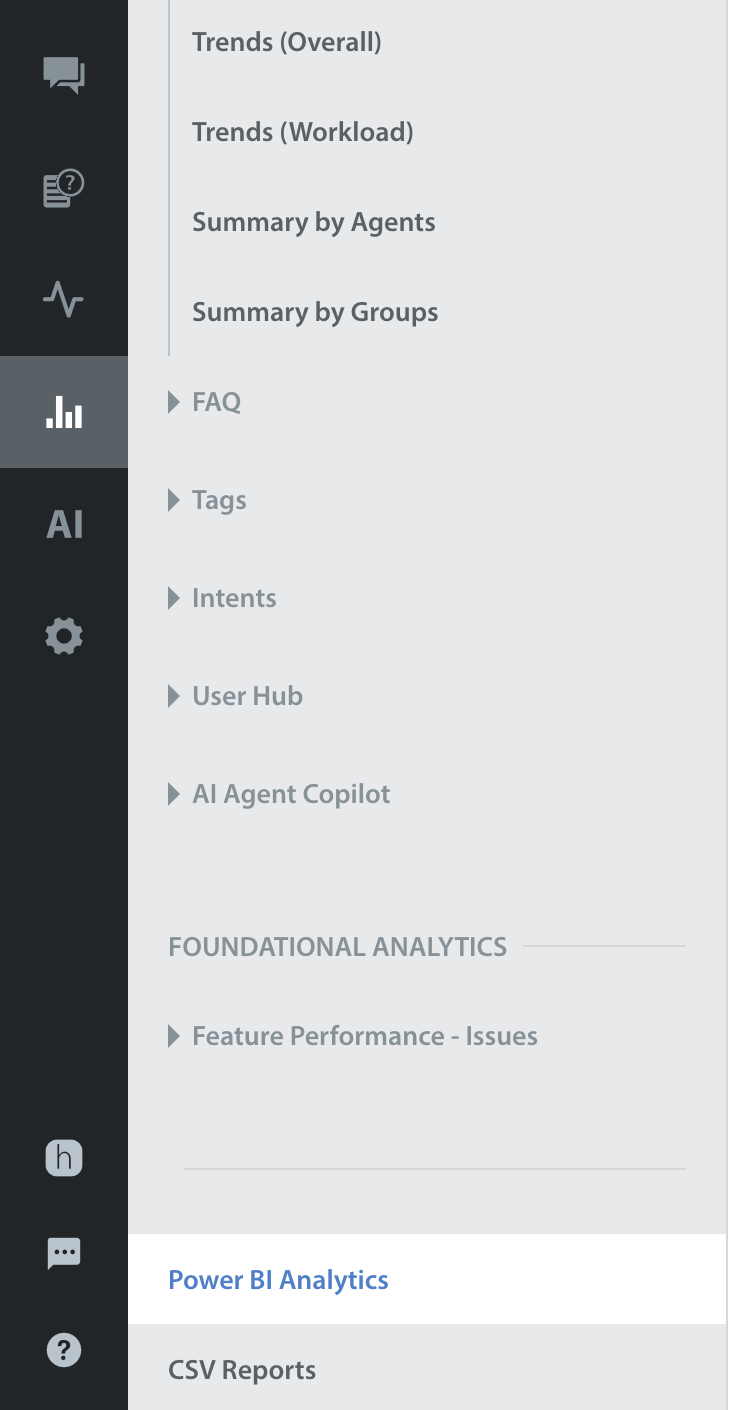
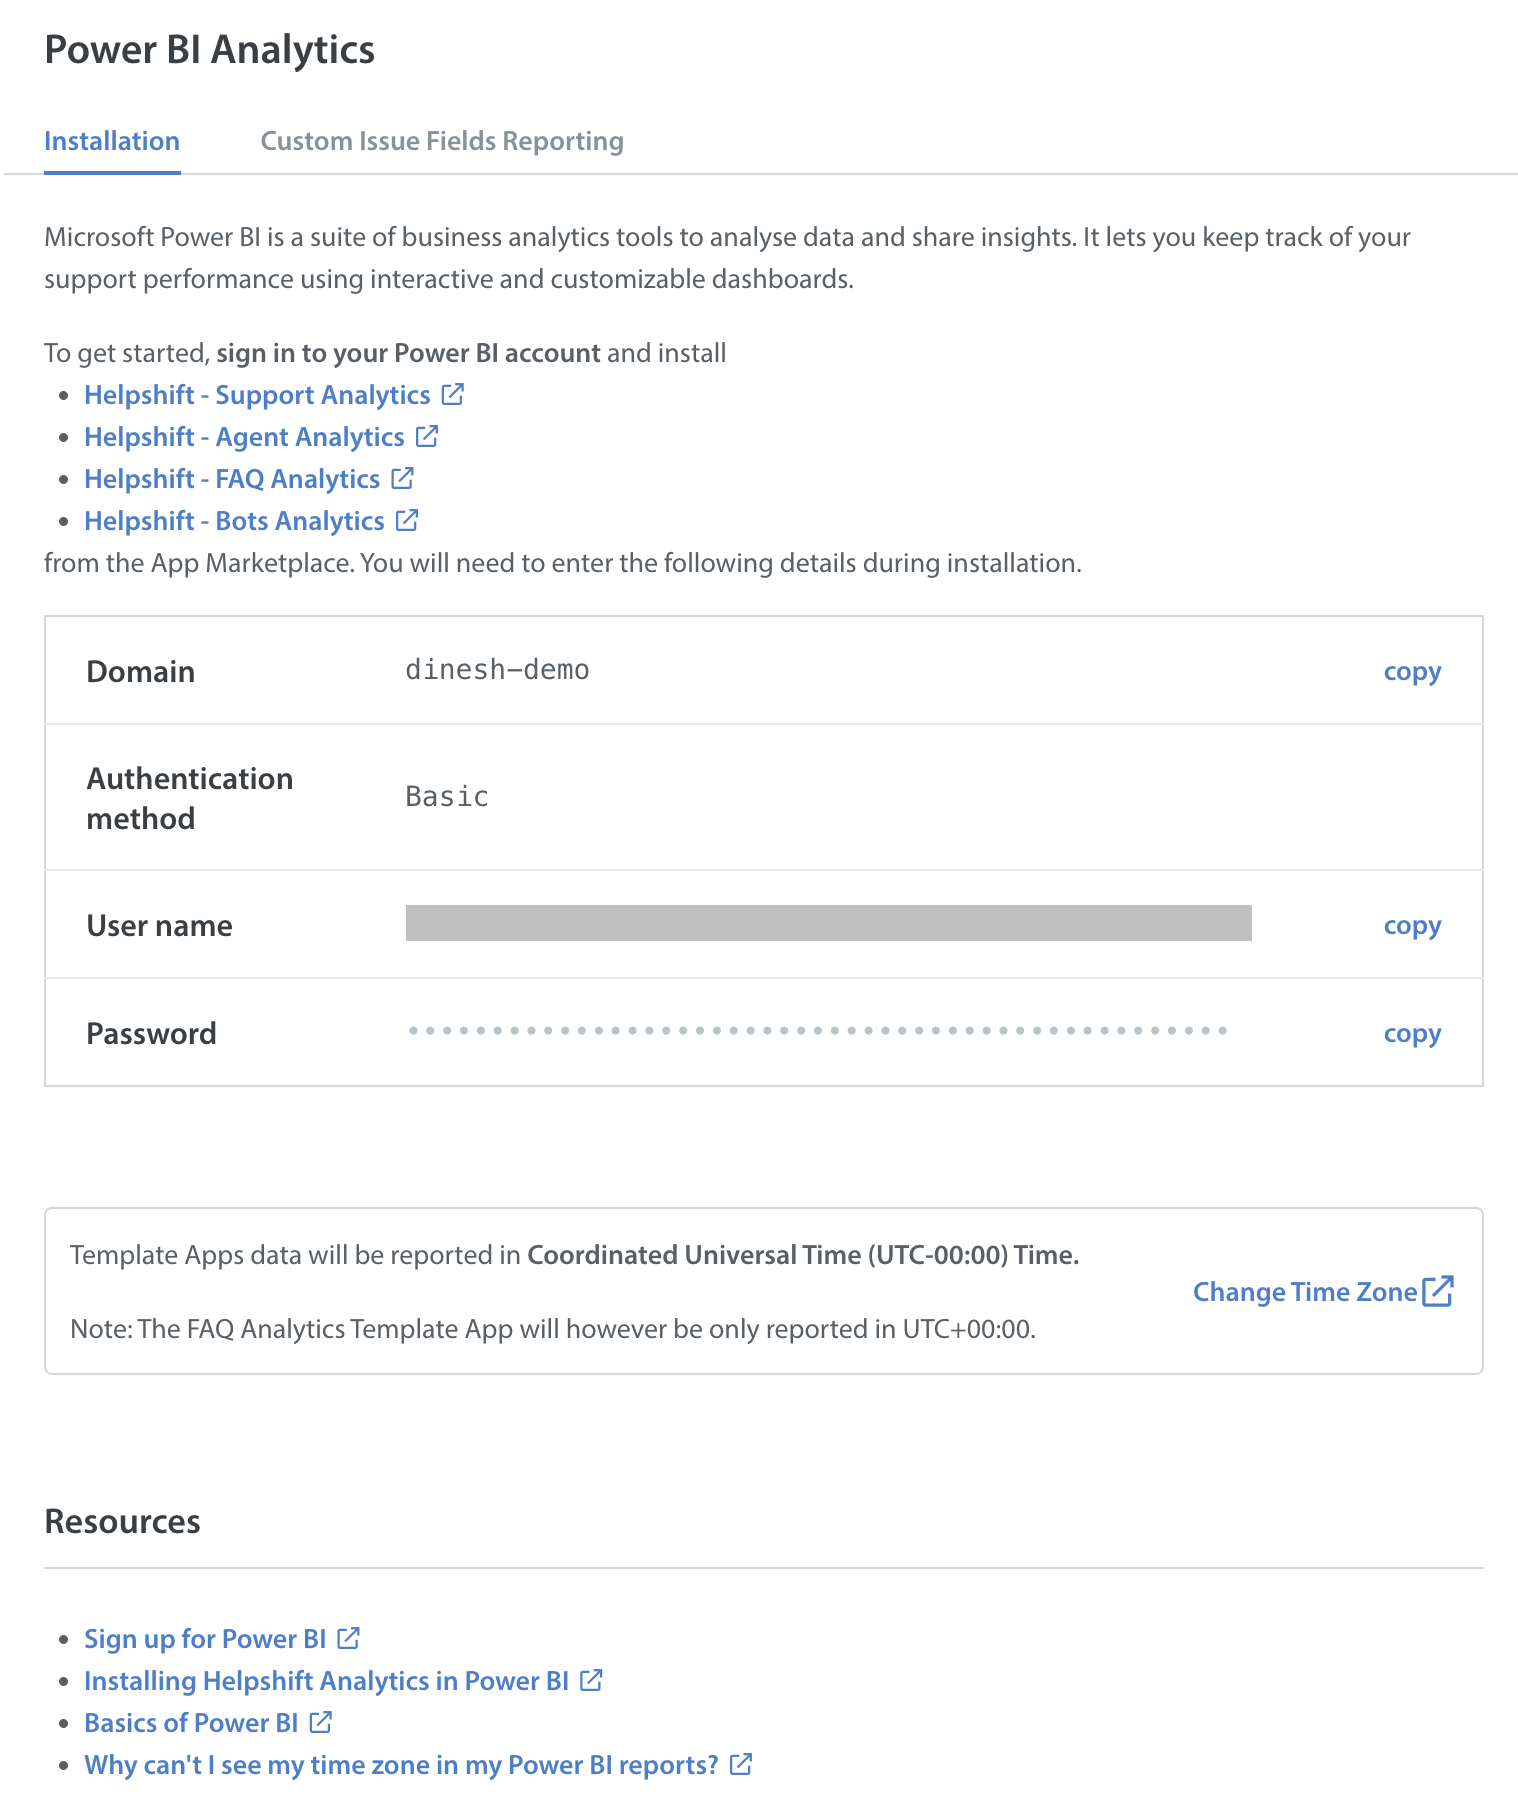
Once your Account Manager has activated Power BI in your Helpshift Dashboard, you will see a new ‘Power BI Analytics’ section under the Analytics tab.
This page will list your Power BI user name. Keep this information on hand as you proceed through the rest of the installation process.
Next, navigate to https://powerbi.microsoft.com/ and, in the top right corner, you’ll see three options: Buy now, Start free, and Sign in. Click Sign in to register your Power BI account.
When signing up, you’ll need to choose between two pricing options: Free and Pro. The Free plan includes most of the same functionality as Power BI Pro, but some sharing and collaboration features are available only with Pro. For a detailed comparison, please refer to Microsoft’s Power BI pricing page.
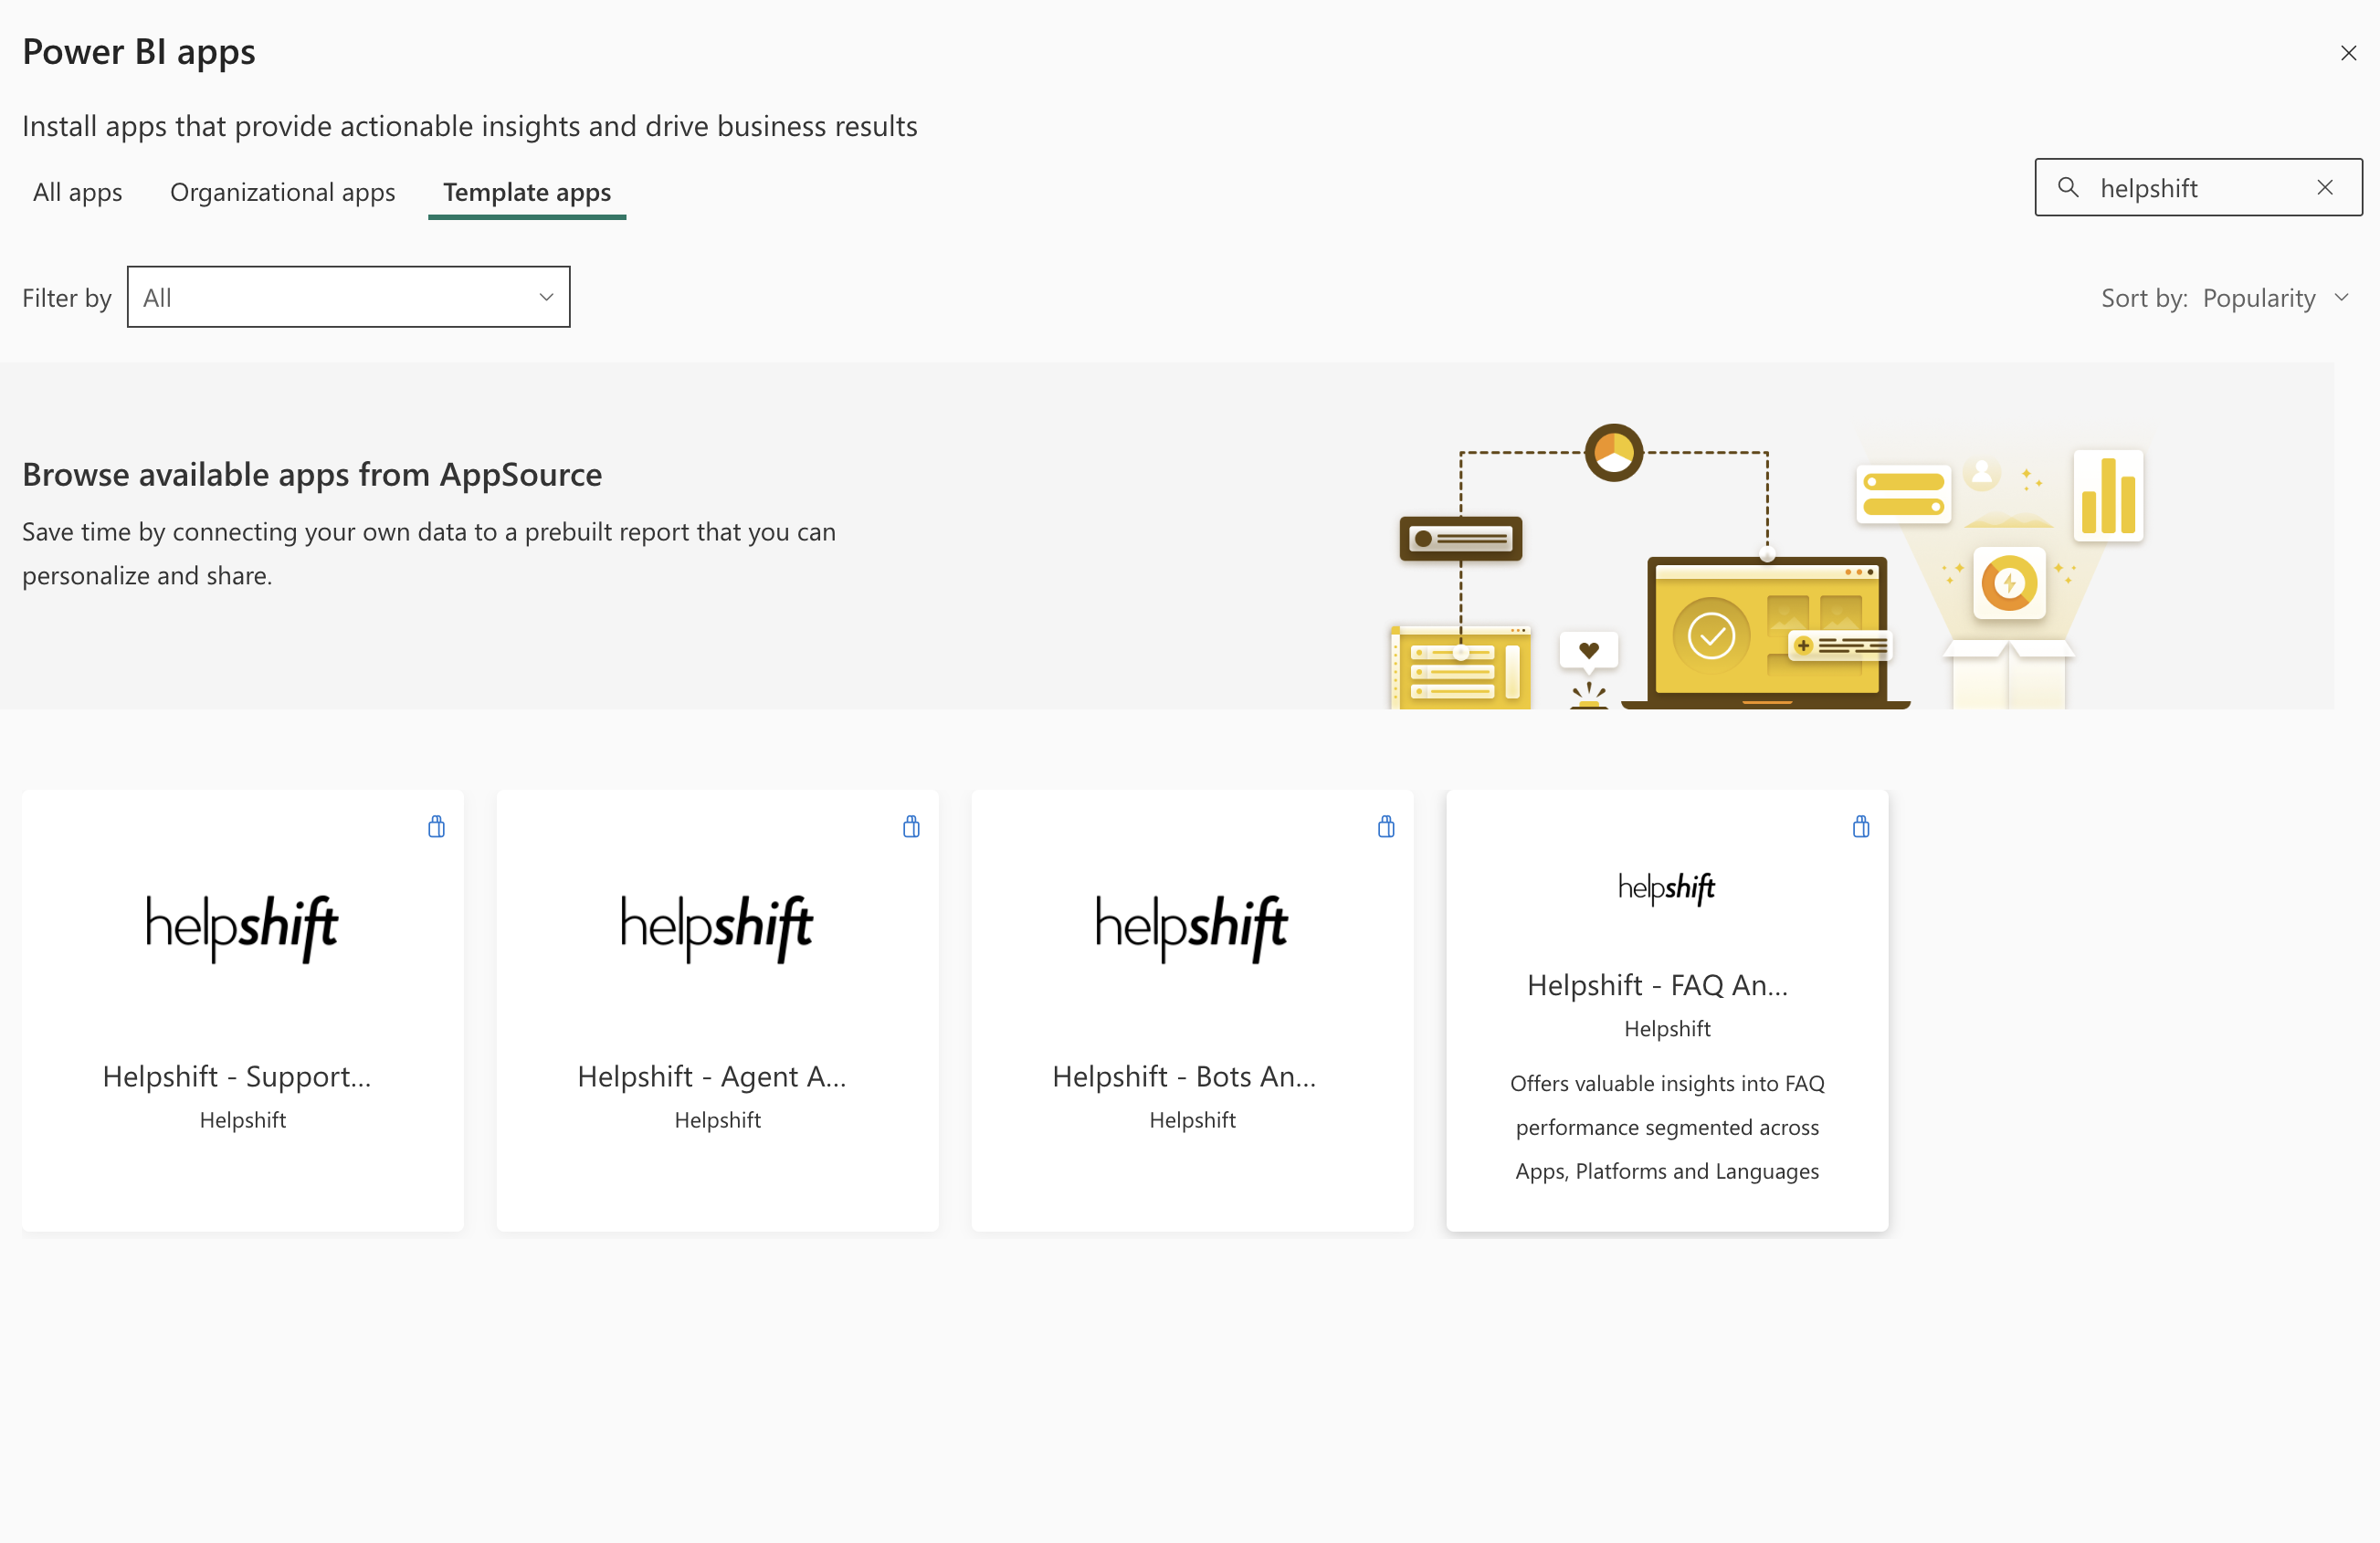
Click Apps and then Get Apps open the App Source marketplace.
Go to Template apps -> In the search bar, type Helpshift to view the available Helpshift Analytics apps. Select the app you’d like to install and follow the prompts. You can repeat this process to download all three apps if needed.
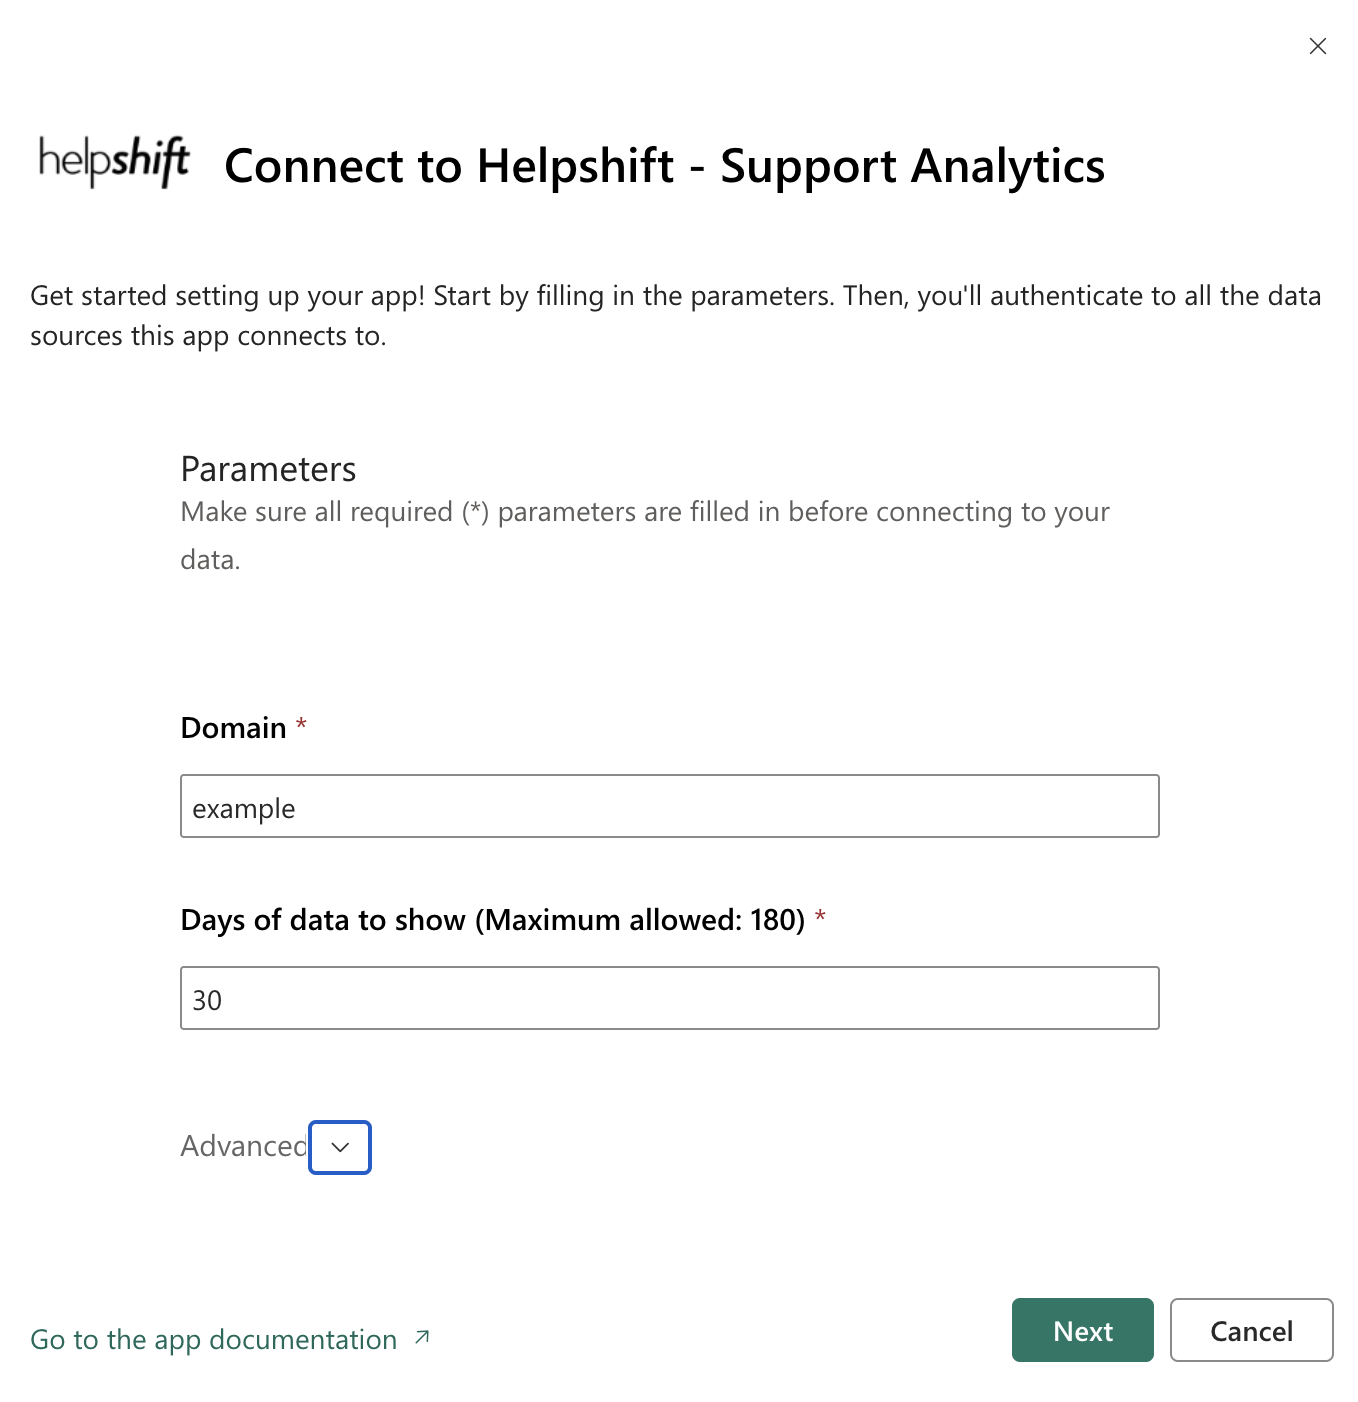
Click ‘Get it now’ to install the content pack, which will connect you to Helpshift’s prebuilt set of reports. This will bring you to the ‘connect to Helpshift analytics’ page.
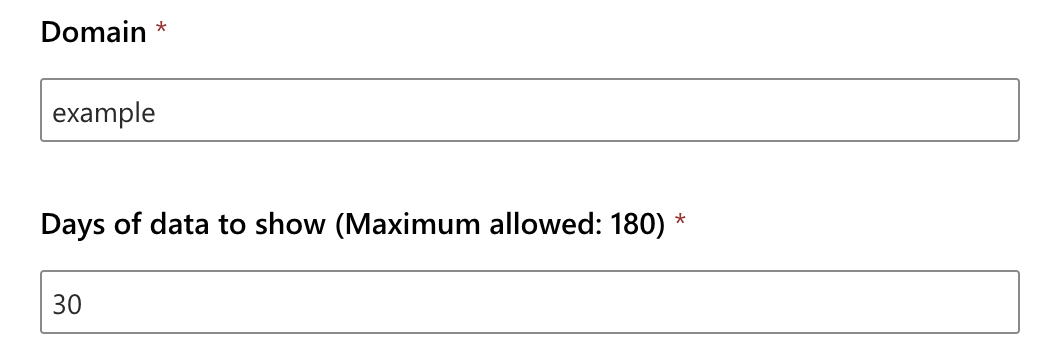
Fill out the fields as follows:
- Domain: enter your Helpshift domain exactly as it is written on your Dashboard. You can check your helpshift url, [domain].support.com for this information if you need it.
- Days of data to show: enter the amount of previous days of data you would like to have retrieved. As stated in the prompt, the maximum is 180.
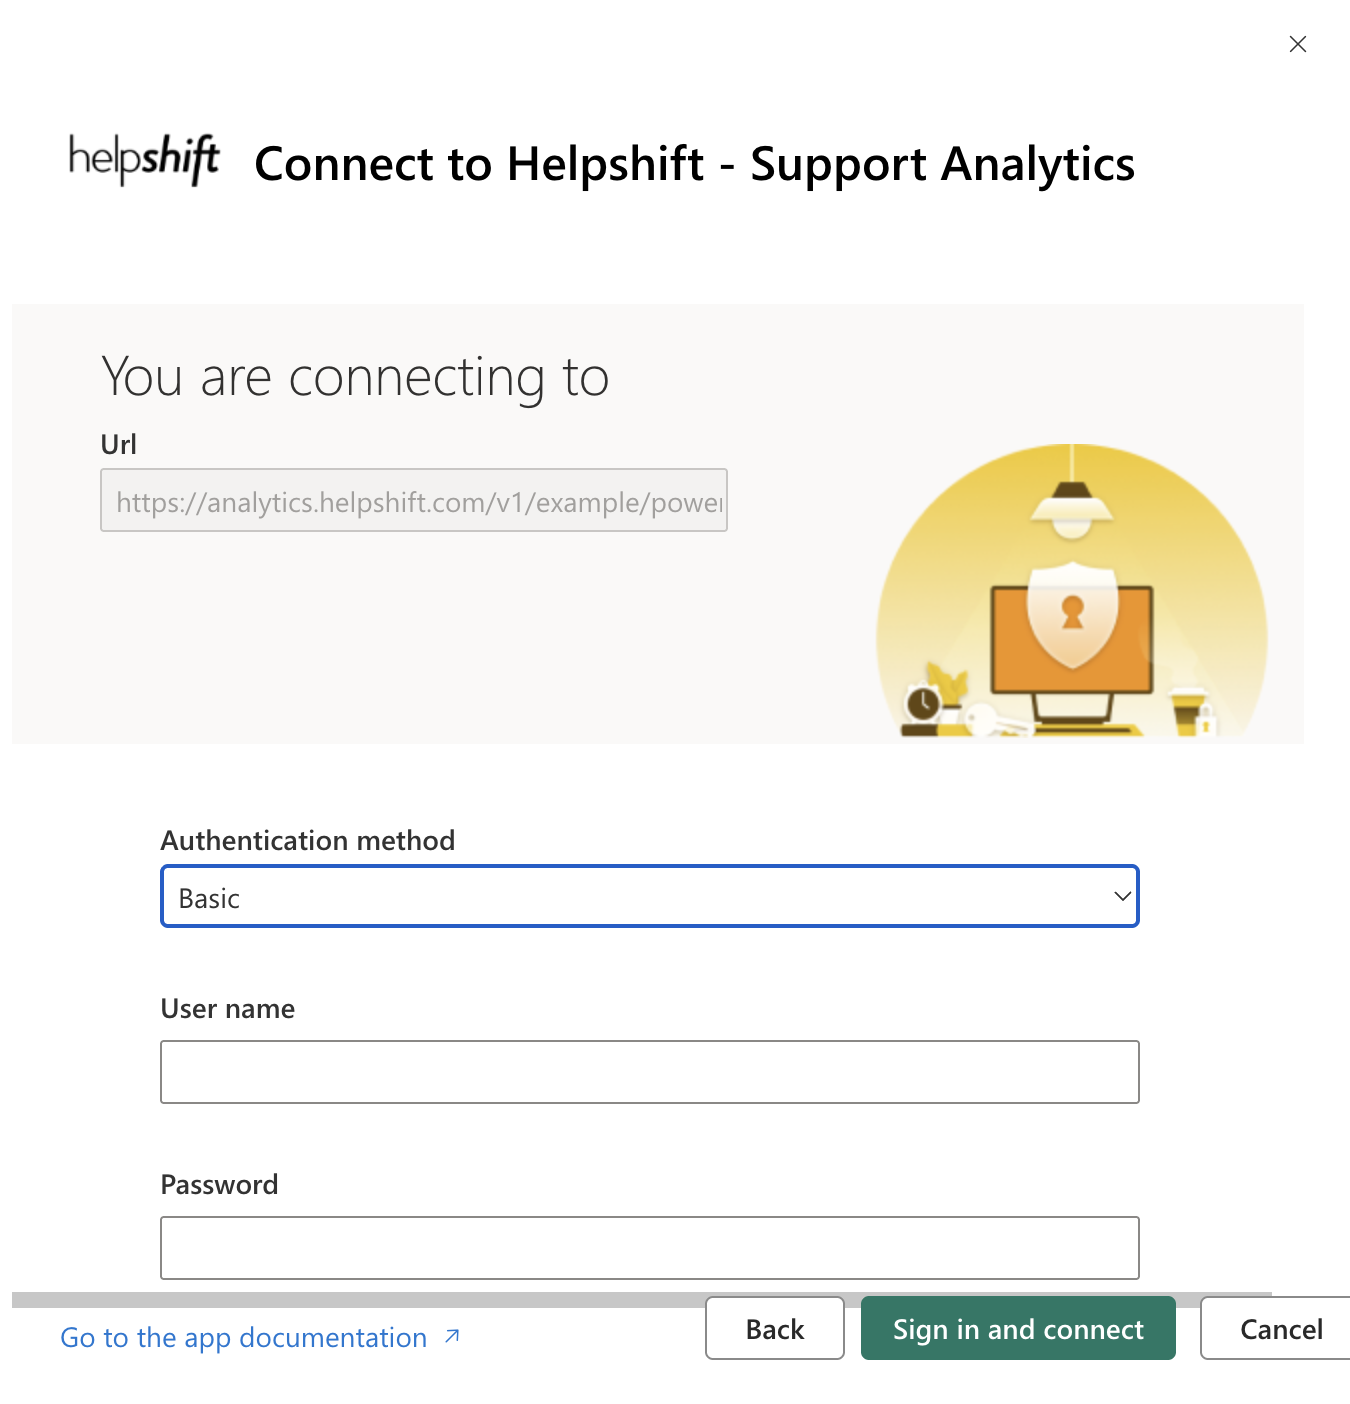
Click ‘Next’ to navigate to the next page, where you’ll be prompted to enter your url and select your authentication method.
- URL: this information will be auto-populated based on your previous selection.
- Authentication method: click the drop-down and select ‘Basic’.
- Privacy level setting for this data source: You can keep it as Organizational.
Once ‘Basic’ has been selected, the username and password fields will appear on this page.
In the username and password field, enter the Power BI user name as listed on the Power BI Analytics page in your Helpshift dashboard. Steps to find this information are provided at the beginning of this article.
Note: The data import can take up to 15 minutes. Additionally, individual reports may sometimes take a few seconds to load.
If nothing is there yet, you’ll need to build a new report from scratch. In Power BI, you create new reports from datasets. To learn how, please see Power BI’s documentation on creating a new Power BI report by importing a dataset.
If you’re on the free version of Power BI, at this point you’ll need to set up a data refresh. If you’re on the pro version, you will not need to complete the next steps.
You will use all the same credentials for setting up the refresh that you did for setting up the content pack.
To set up the refresh, navigate to the gear icon which says ‘Settings’ on the top right, then under ‘Resources and extensions’ select the Power BI settings, select Semantic models.![]()
Select view Semantic model.
Select Refresh tab and you will see all the options including Schedule Refresh.
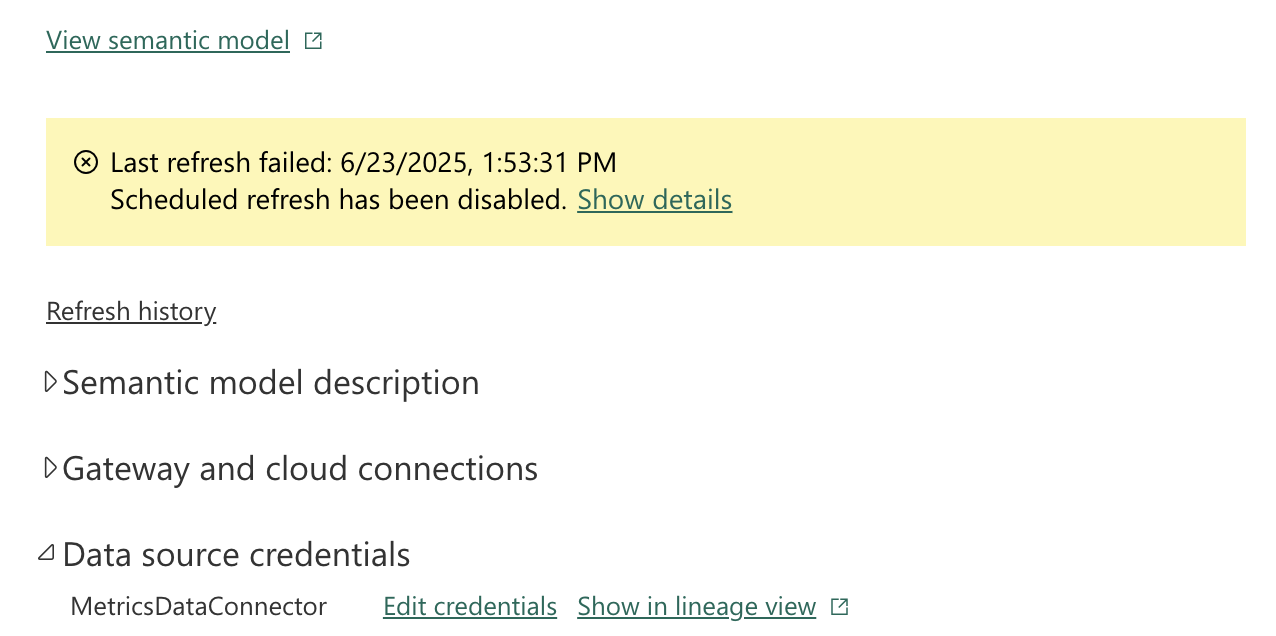
On the page that appears, select the drop-down ‘Data Credentials’ then click ‘Edit Credentials’
On the ‘Configure Helpshift Analytics’ page, enter the exact same credentials you did for the ‘Connect to Helpshift Analytics’ prompt. Please remember that you will need to select the ‘Basic’ option twice.
Once you click ‘Sign In’, you’ll be returned to the Settings for Helpshift Analytics page. Select the ‘Schedule Refresh’ drop-down, then toggle the ‘keep your data up to date’ toggle to ON. You may also set other data refresh settings as you see fit.
We encourage you to review Microsoft’s documentation on Power BI Basic Concepts to become familiar with the dashboard visuals and functionality. Additionally, you’ll want to learn how to set up a data refresh to ensure you are always getting the latest data.
You can also set your time zone from within the Helpshift Dashboard to ensure the timestamps on your data are accurate for your team. To learn how, see How do I remove the arrow and drop-down from the app selection screen in my Web Support Portal?

