
Introduction
User Hub is a unified user identity and profile system that brings all customer data and interactions into a single, real-time view. By consolidating identities across mobile, web, PC, and console, it gives support teams complete context for every interaction and enables more personalized, accurate, and efficient customer support.
With a centralized user profile that includes IDs, custom fields, notes, tags, and user panels, teams can recognize users across platforms, maintain continuity, and deliver truly contextual support.
Getting started on User Hub unlocks future features like:
- It fuels proactive engagement through complex, real-time segmentation to reach the right audience at the right moment.
- As AI becomes central to customer service, User Hub acts as the system of record that AI and automation depend on, providing clean, connected, and secure data.
- Serves as a foundation for workflows, predictive analytics, reporting, and many future AI-powered features.
Getting Started with User Hub
To get started with User Hub feature, follow the steps given below:
Step 1: Integrate using Dev docs
To enable User Hub, you must first complete the technical integration using our Developer Guides. This ensures that user identity data is correctly passed to Helpshift and that User Hub can unify user records across platforms.
Please follow the appropriate integration guide based on your platform:
- Android 10.4: User Hub | Helpshift Developer Guide
- iOS 10.4: User Hub | Helpshift Developer Guide
- Web Chat: User Hub | Helpshift Developer Guide
- Bulk APIs: User Hub Bulk APIs | Helpshift Developer Guide
Once the integration is completed, proceed to Step 2: Grant Access from Teams to enable User Hub within the Helpshift Dashboard.
Step 2: Give access from Teams
After completing the integration, you must grant User Hub access to the required team members.
- Log in to your Helpshift domain as an administrator.
- On the Helpshift toolbar, click Settings.
- In the navigation pane, scroll to the ORGANIZATION area. Then, click Team.
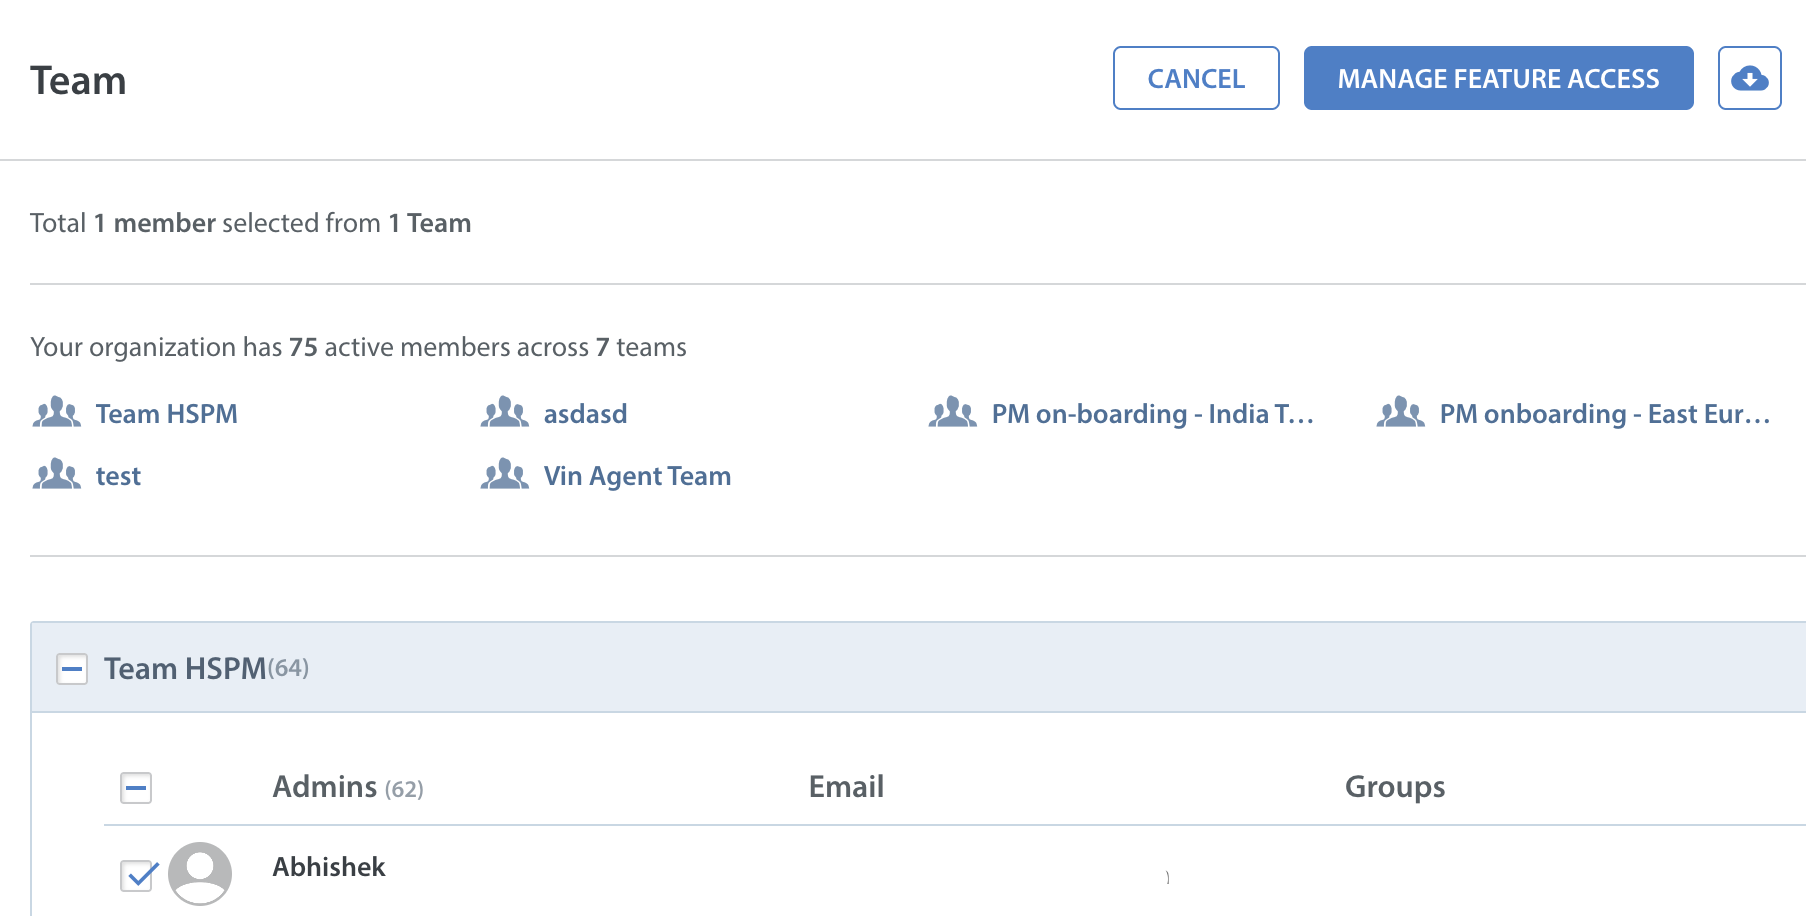
The Team page appears.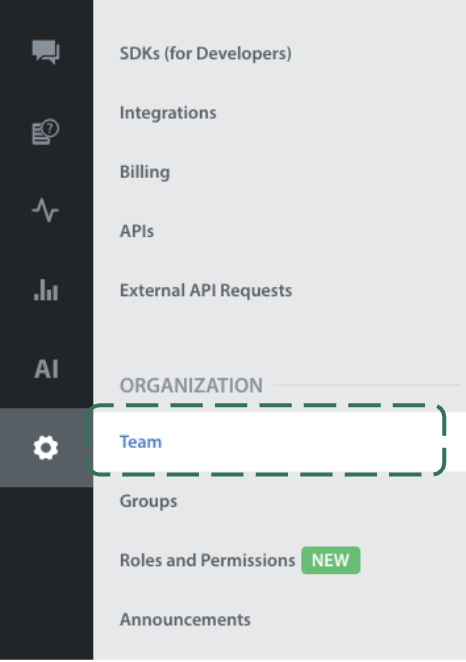
- Select the team checkbox next to the team member's name for whom you want to make changes and click MANAGE FEATURE ACCESS option.
- Select the checkboxes under User Hub Access section.
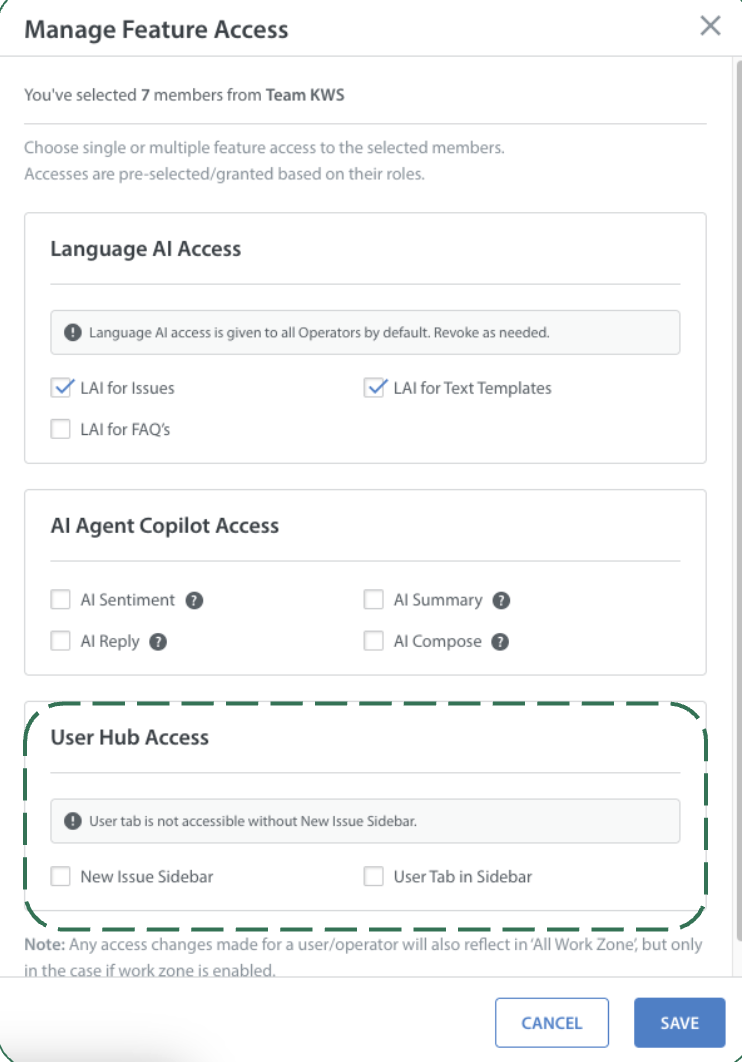
- Click SAVE.
The selected team members will now have access to User Hub based on the permissions granted.
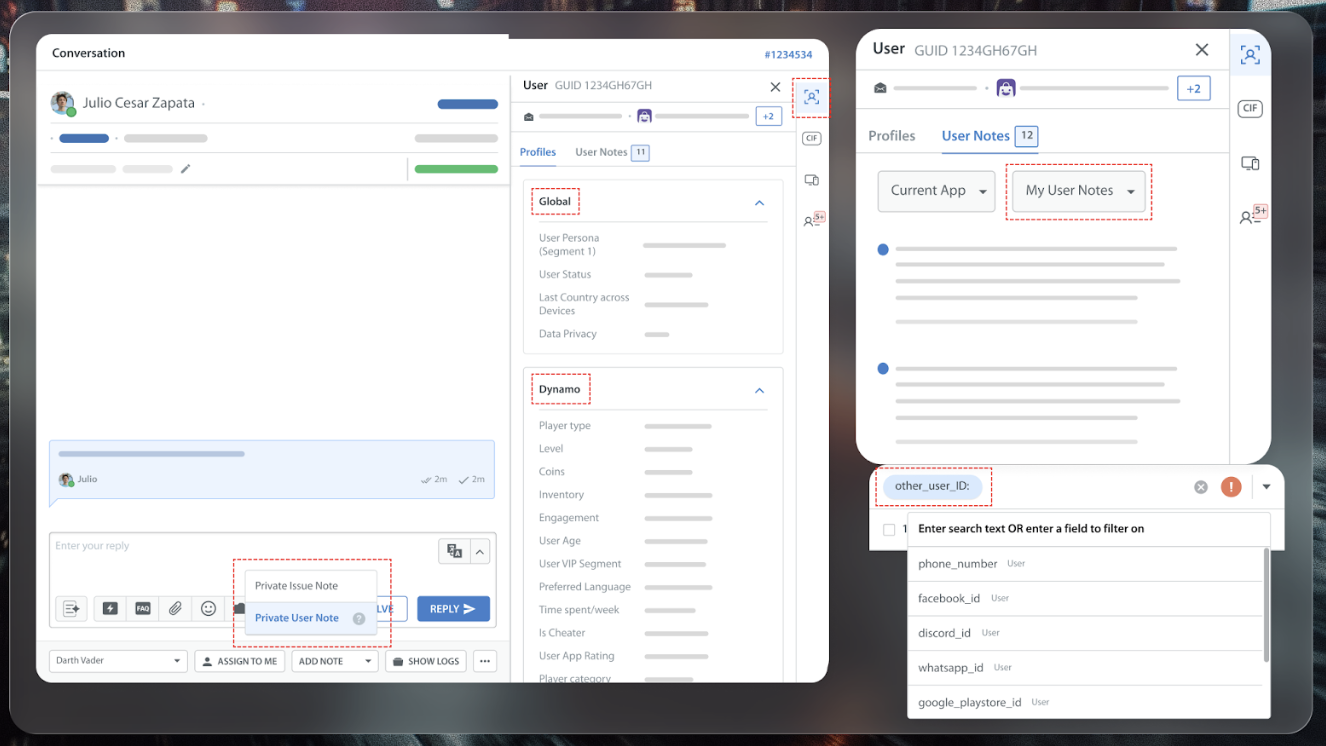
Agent Experience
| Day 0 - Enabled | Day X - Integration done |
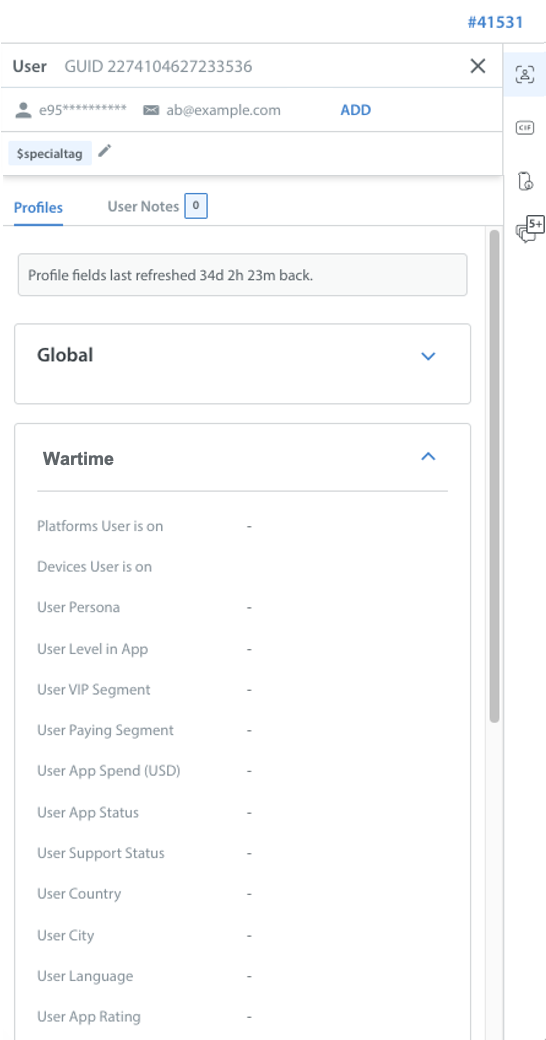 | 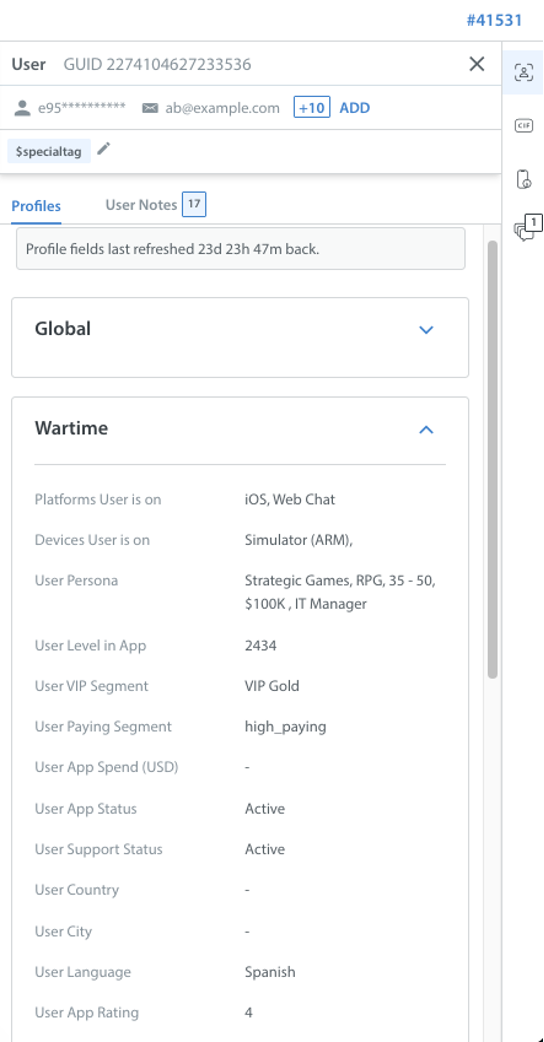 |