
The Knowledge Hub (KH) is the single source of truth for your Care AI Agent.
It centralizes information that may otherwise be scattered across local documents.
- For Care AI Agents: Provides high-quality, structured knowledge for accurate responses via files uploaded into the system.
- For Brand Admins: Offers a unified place to manage policies and important information.
Knowledge Structure
Note: Only PDF files in English are supported.
The Knowledge Hub of Care AI Agent follows a two-level structured hierarchy: App > Folder > Document.
Folders as Segments
- Folders help organize knowledge into logical groups (e.g., Refund Policies, Technical Issues).
- Documents must be uploaded inside folders.
- Documents cannot exist directly at the App level.
Care AI Agent Mapping
- Care AI Agents are mapped to knowledge at the Folder level.
- You can easily include or exclude entire knowledge sets.
- Any updates inside a mapped folder are automatically reflected in the Care AI Agent Knowledge Hub.
Document Stages
Knowledge Hub documents have two stages: Live and Deprecated.
| Stage | Description |
| Live | Accessible to the Care AI Agent. Only Live documents are used by the Care AI Agent in responses. |
| Deprecated | Removed from Care AI Agent access. This action is irreversible and cannot be undone. |
Managing Folders
You can manage the folders by adding and renaming them.
Adding Folder
To add a folder, follow these steps:
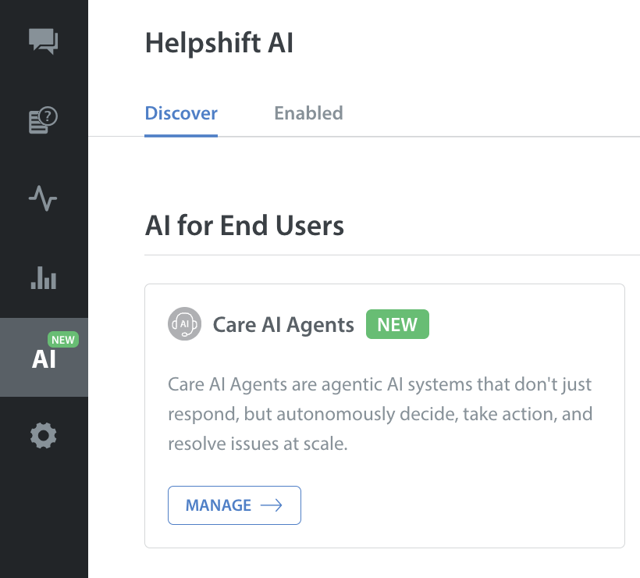
- Log in to your Helpshift domain as an administrator.
- On the Helpshift toolbar, click Helpshift AI.
- Navigate to Care AI Agents under AI for End Users.
- Click MANAGE.
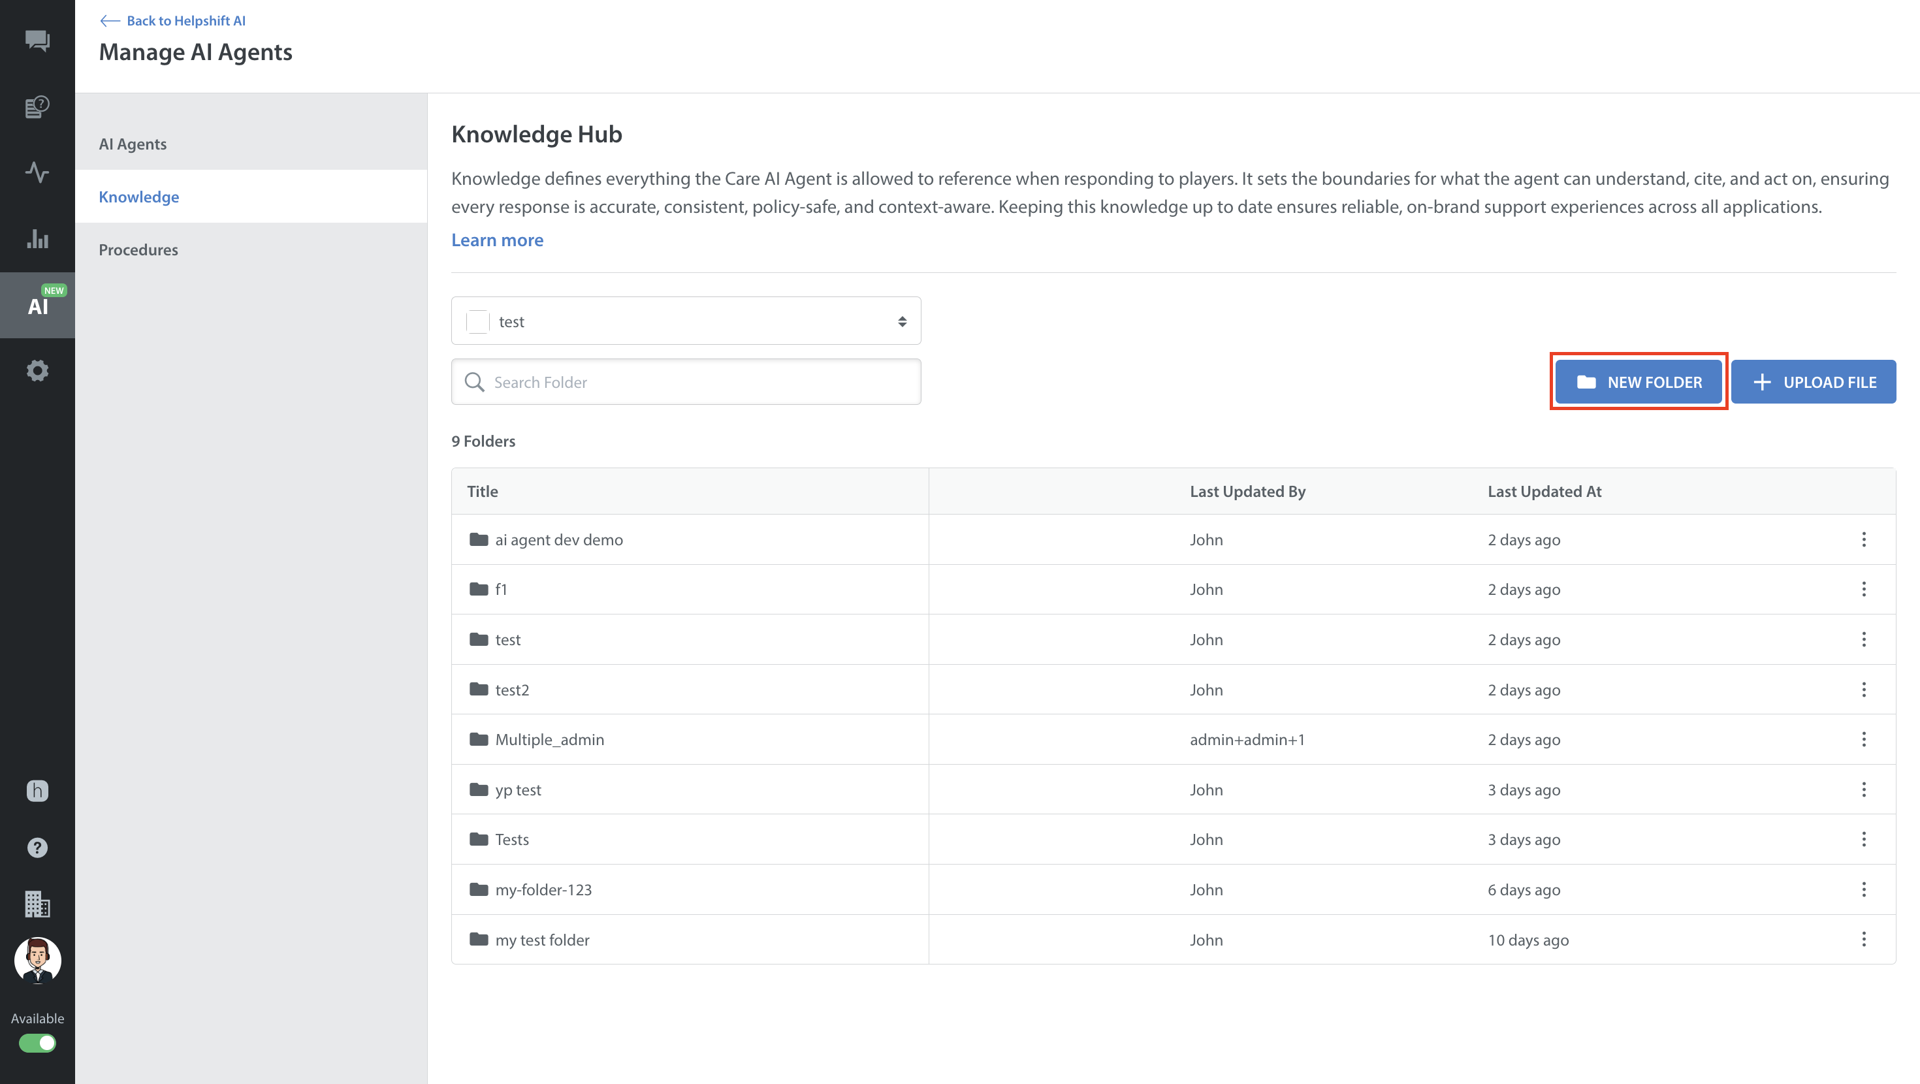
The Manage AI Agents screen appears.
- Navigate to Knowledge in Manage AI Agents.
- Select the app where you want to add your knowledge.
- Click NEW FOLDER.
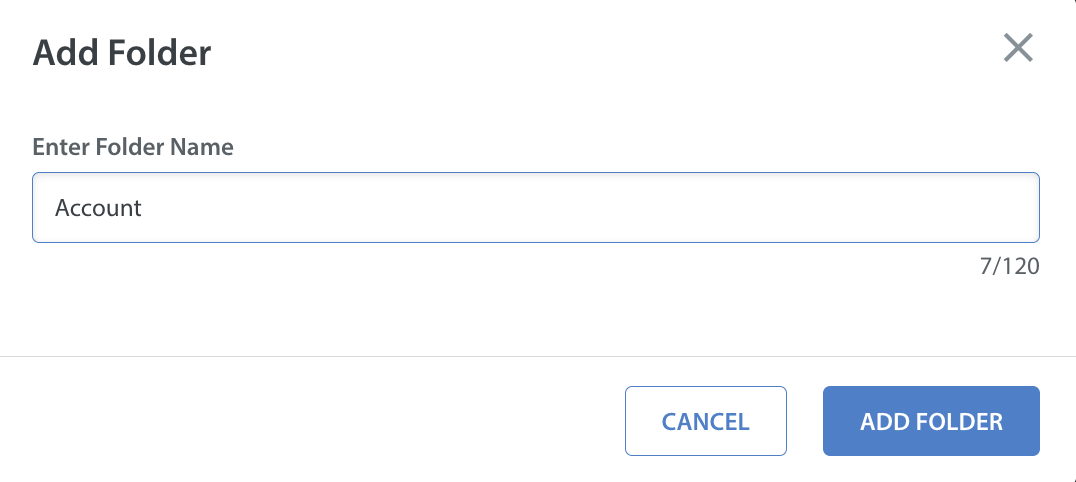
The Add Folder pop-up appears - Enter a folder name.
- Click ADD FOLDER.
Renaming Folder
To rename a folder, follow these steps:
- Navigate to Knowledge in Manage AI Agents.
- Click the More options (⋮) for the folder you want to rename.
The Rename Folder pop-up appears. - Click Rename.

- Enter the new Folder Name.
- Click RENAME.
Your folder will be renamed.
Managing Files
To upload a file (from folder listing), follow these steps:
- Navigate to Knowledge in Manage AI Agents.
- Click UPLOAD FILE.
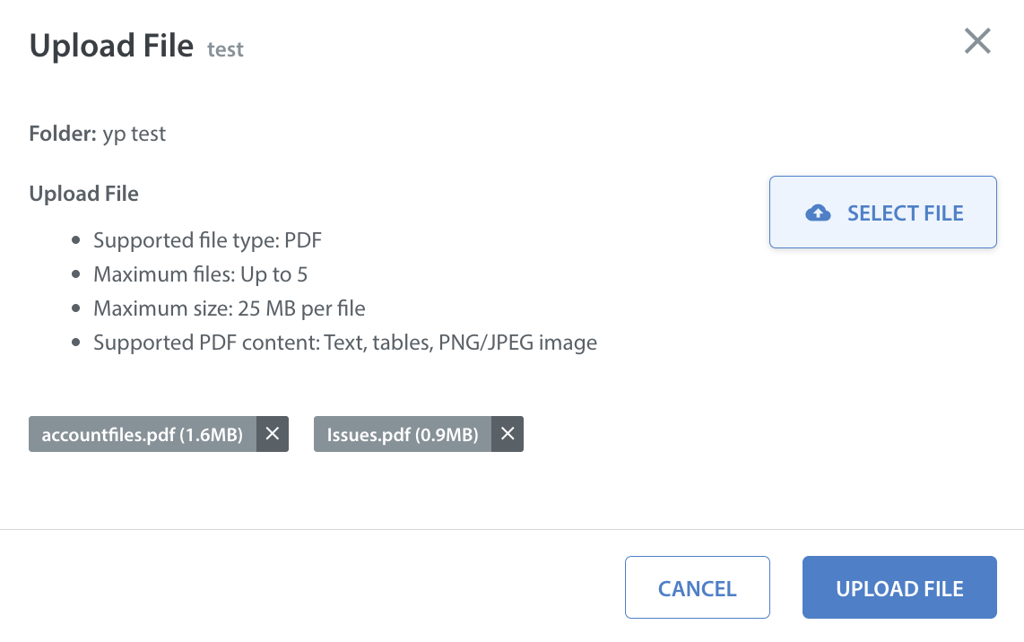
The Upload File pop-up appears.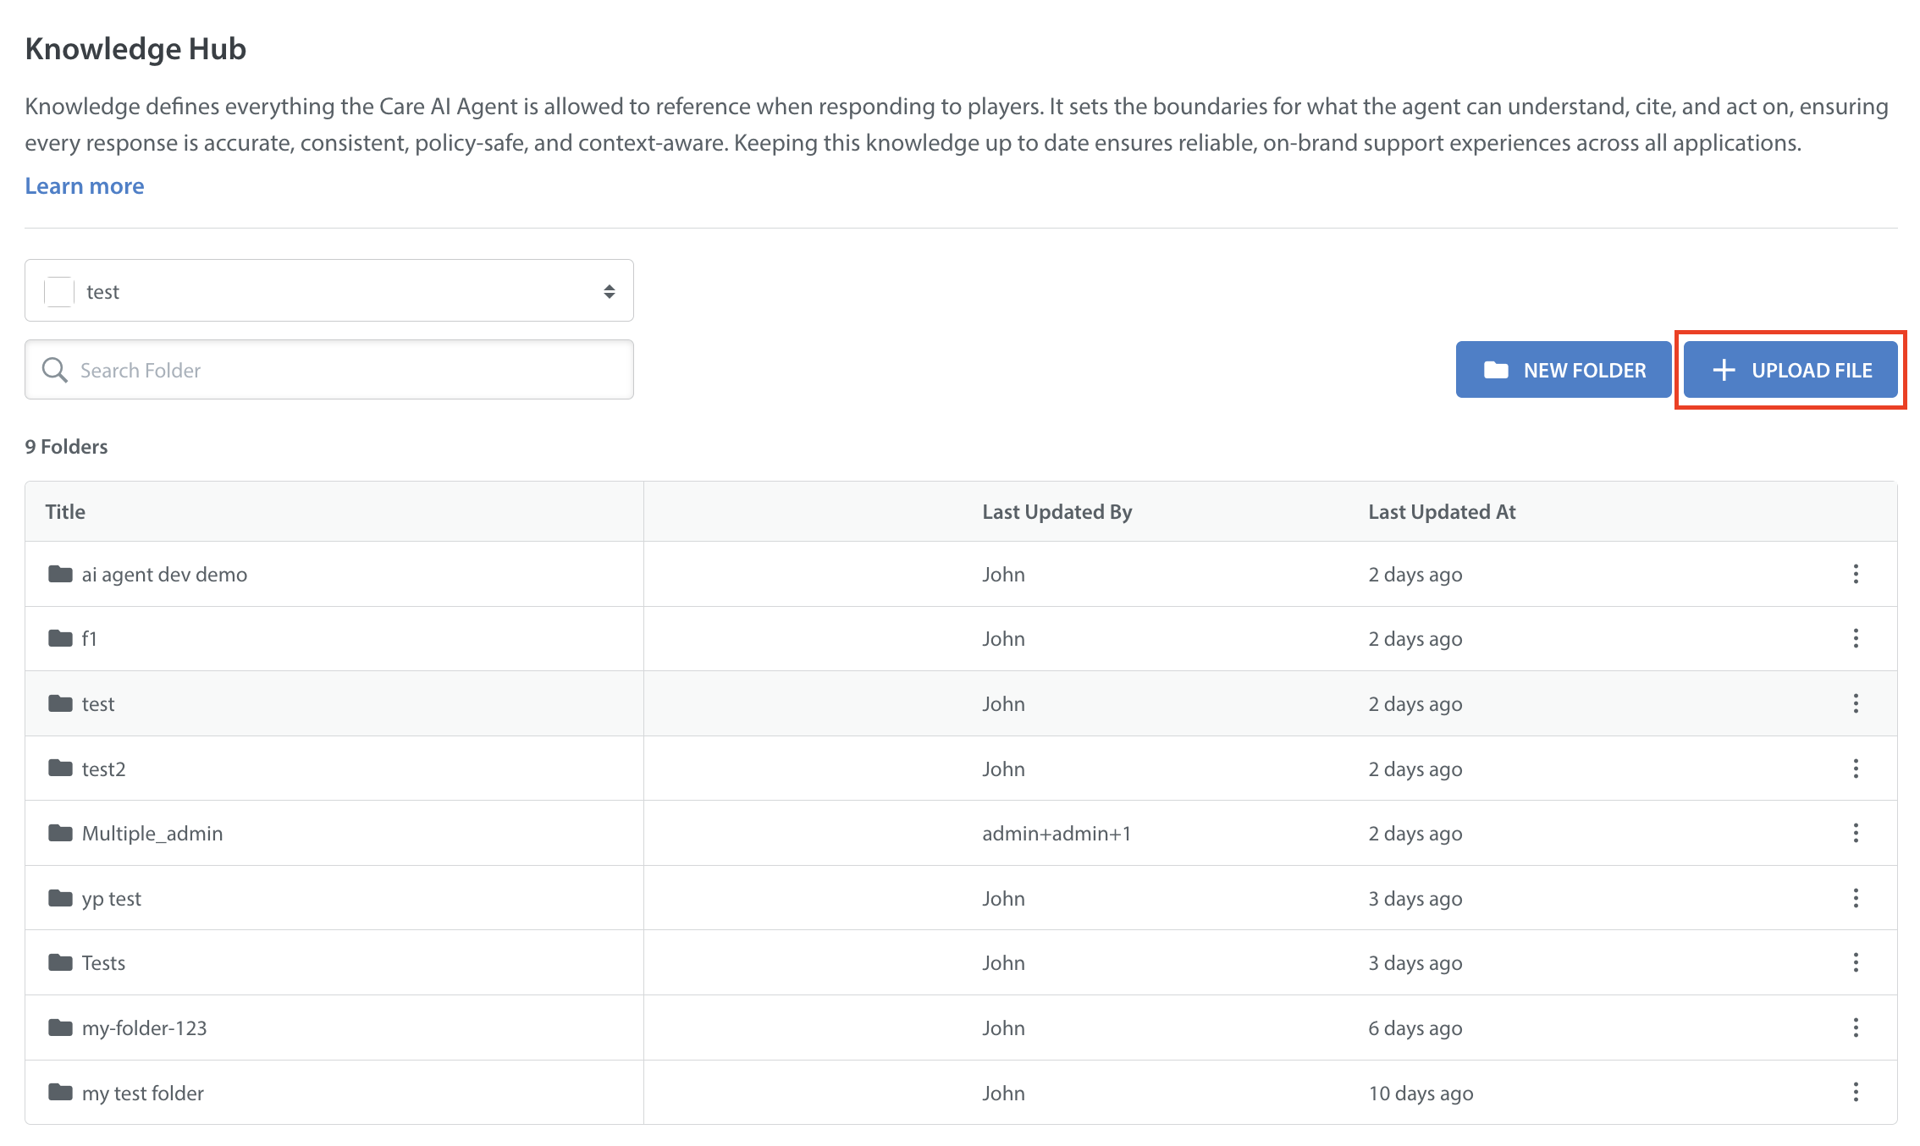
- Select Folder from the dropdown.
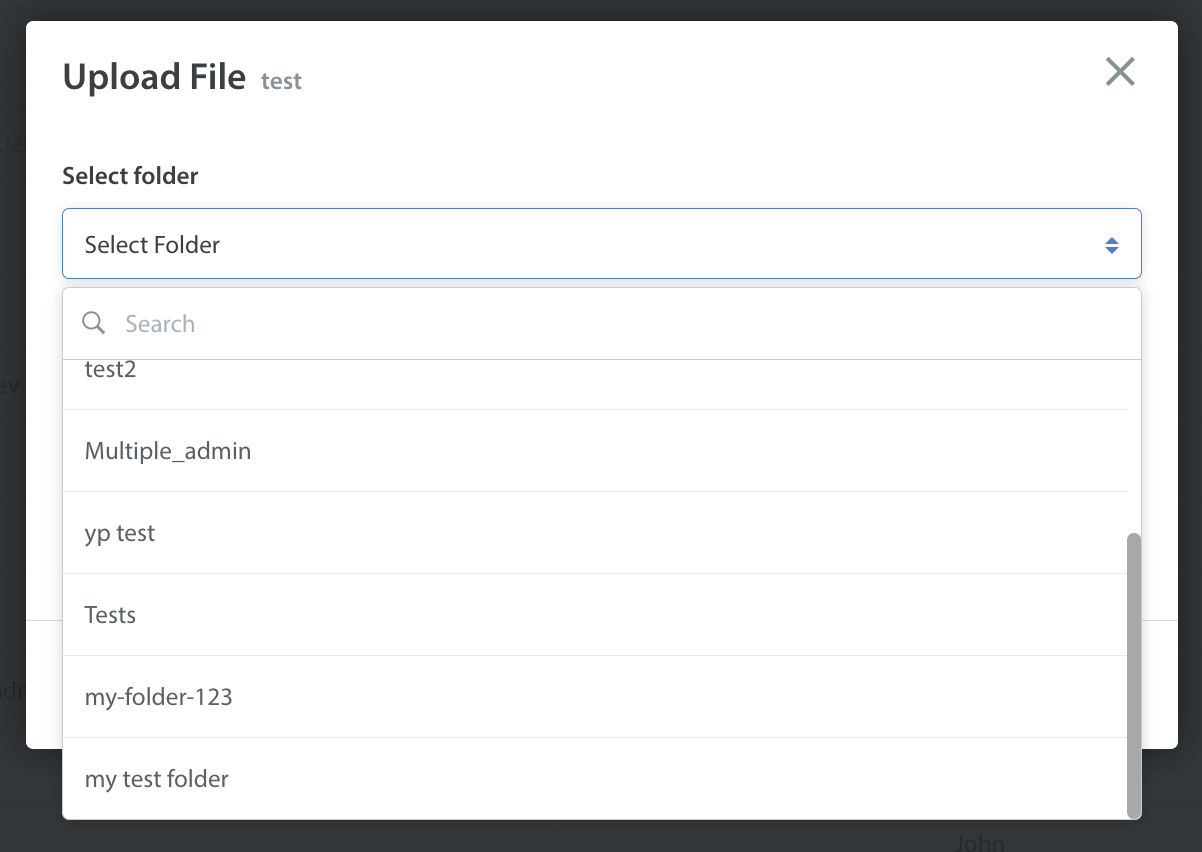
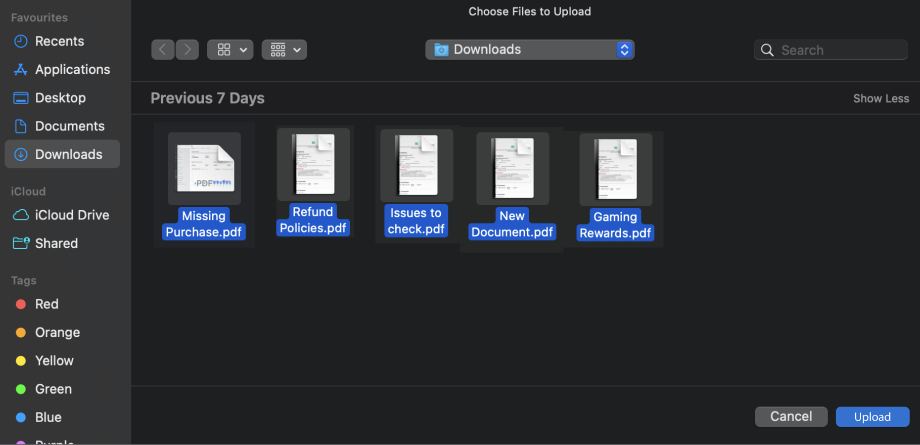
- Click SELECT FILE to upload files from your system.
Note: Ensure that all uploaded files meet the requirements for file size, supported format, and maximum file limit.

- Select the files on your system, then click Upload.
- Once you have uploaded files from your system, click UPLOAD FILE.
Uploading a File (From File Listing View)
To upload a file (from folder listing), follow these steps:
- Navigate to Knowledge in Manage AI Agents.
- Click UPLOAD FILE.
The Upload File pop-up appears.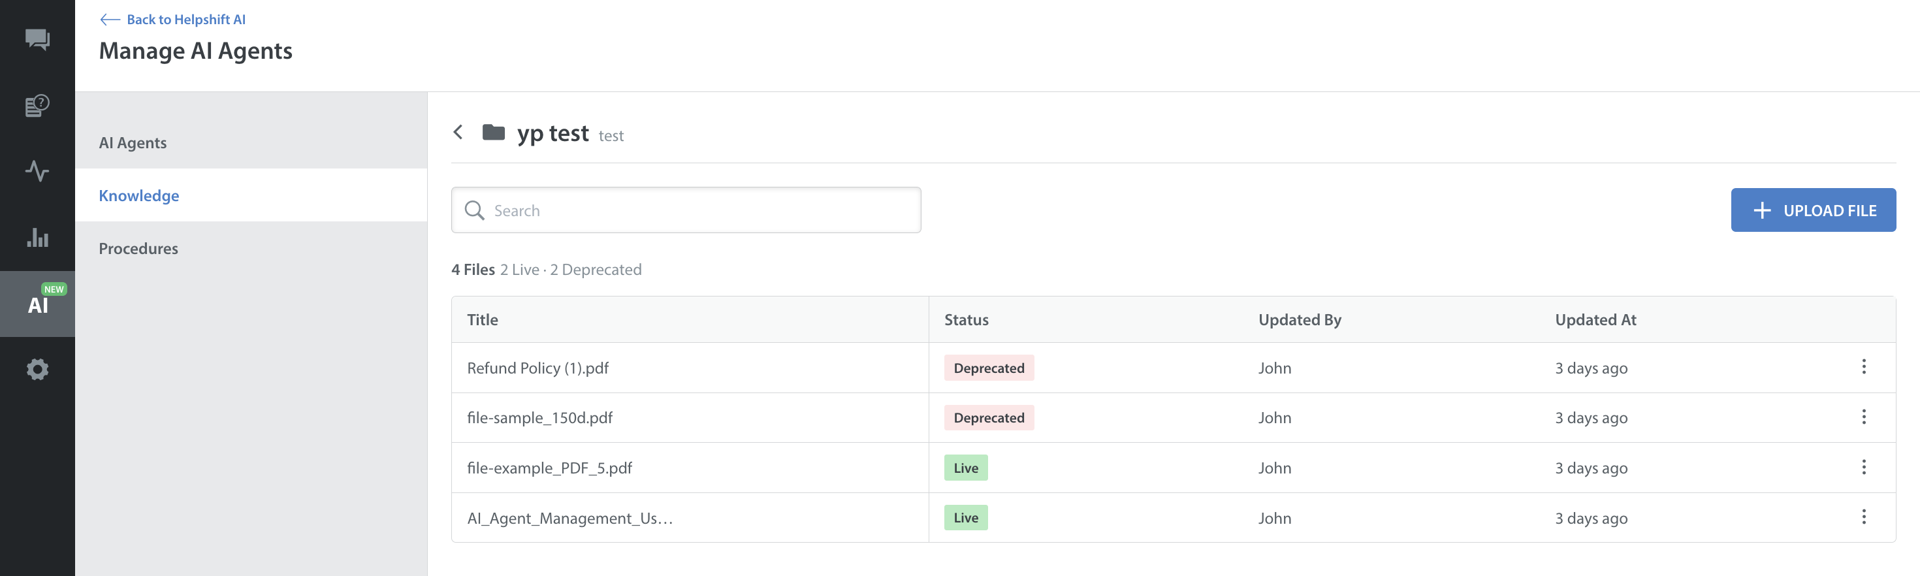
- Click SELECT FILE to upload files from your system.
Here, the folder is pre-selected and added, as you have already chosen a folder to upload the file.
Note: Ensure that all uploaded files meet the requirements for file size, supported format, and maximum file limit.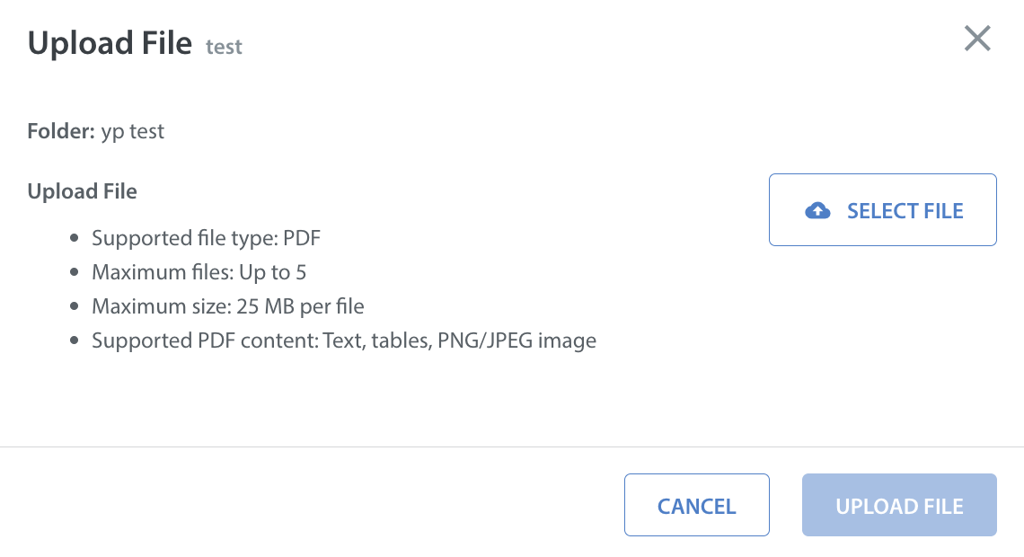
- Select the files on your system, then click Upload.

- Once you have uploaded files from your system, click UPLOAD FILE.

Deprecating a File
You can mark a live document as Deprecated to remove it from Care AI Agent access.
To deprecate a file, follow these steps:
- Navigate to Knowledge in Manage AI Agents.
- Click the More options (⋮) for the file you want to delete.
- Click Deprecate.
A warning appears for confirmation.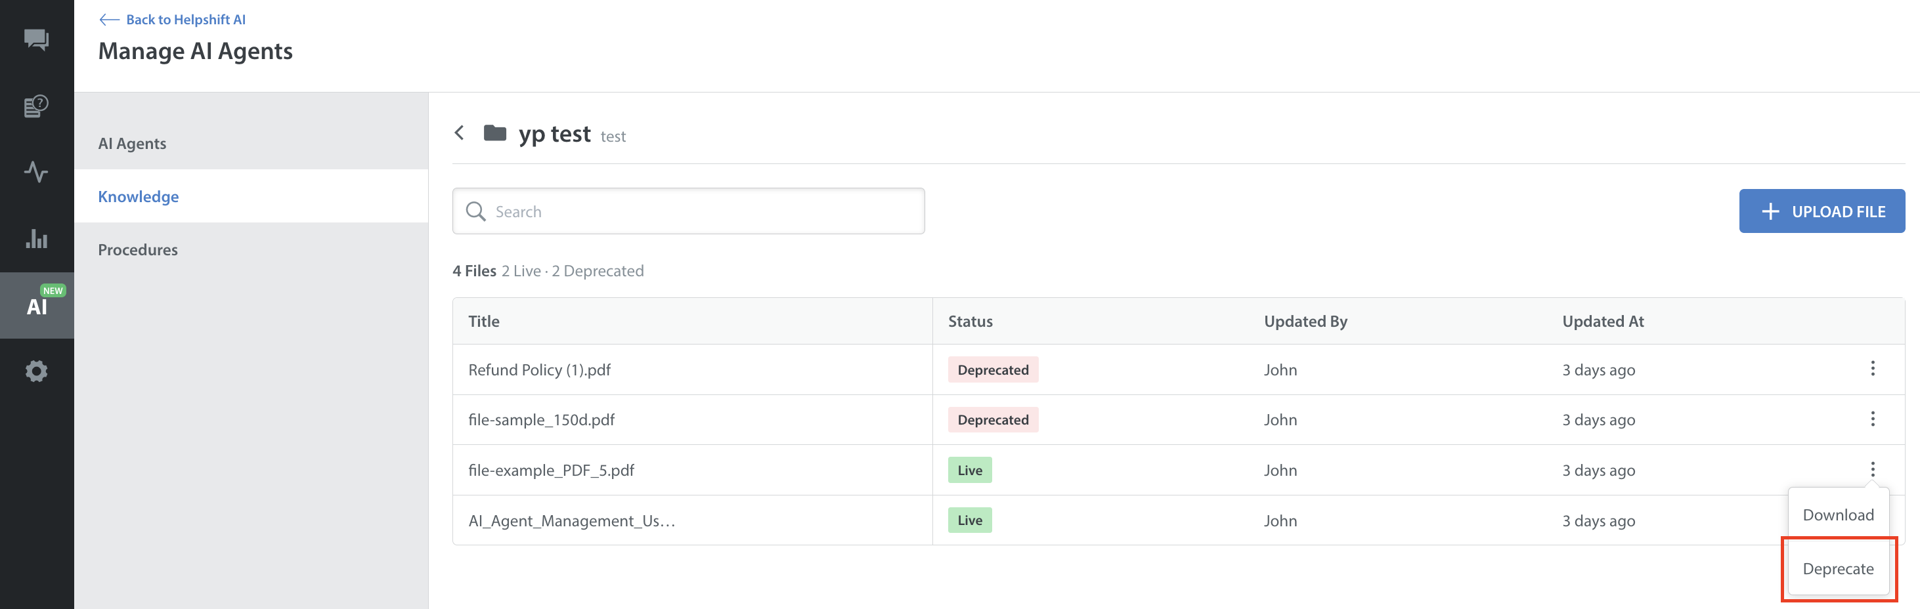
- Click DEPRECATE FILE.
This action is irreversible.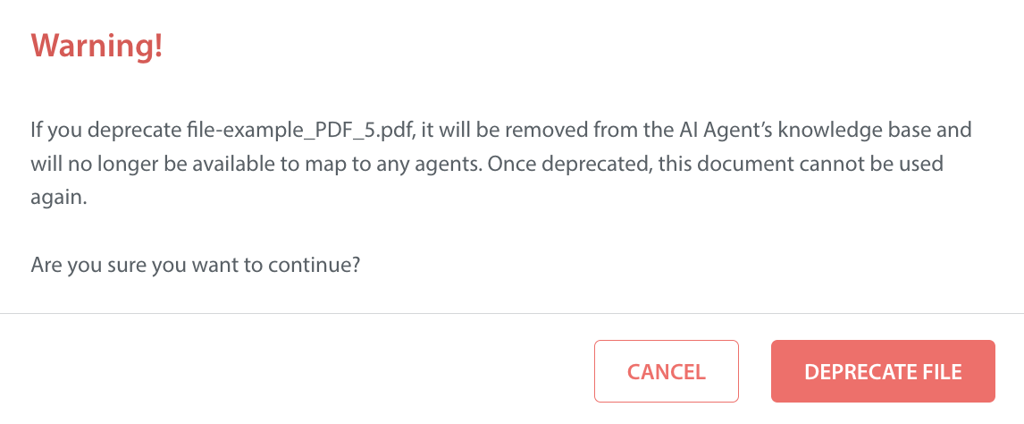
Note: Deprecated documents cannot be made Live again. Only Live documents are used by the Care AI Agent.
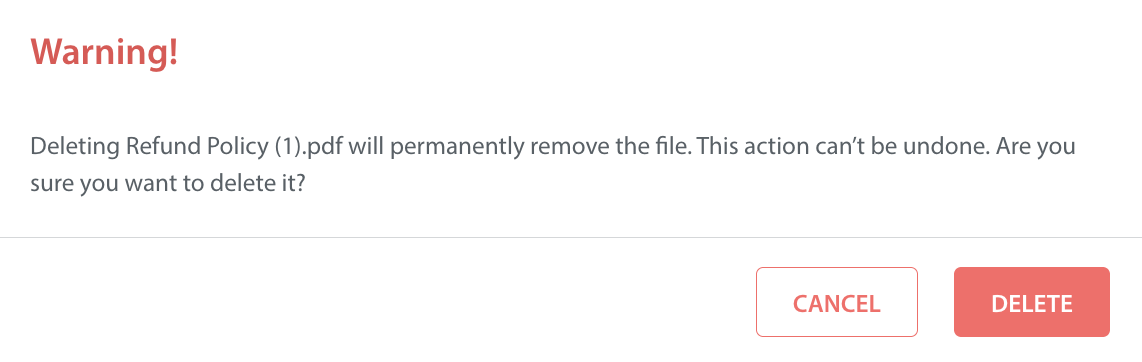
Deleting a Deprecated File
To delete a deprecated file, follow these steps:
- Navigate to Knowledge in Manage AI Agents.
- Click the More options (⋮) for the deprecated file you want to delete.
- Click Delete.
A warning appears for confirmation.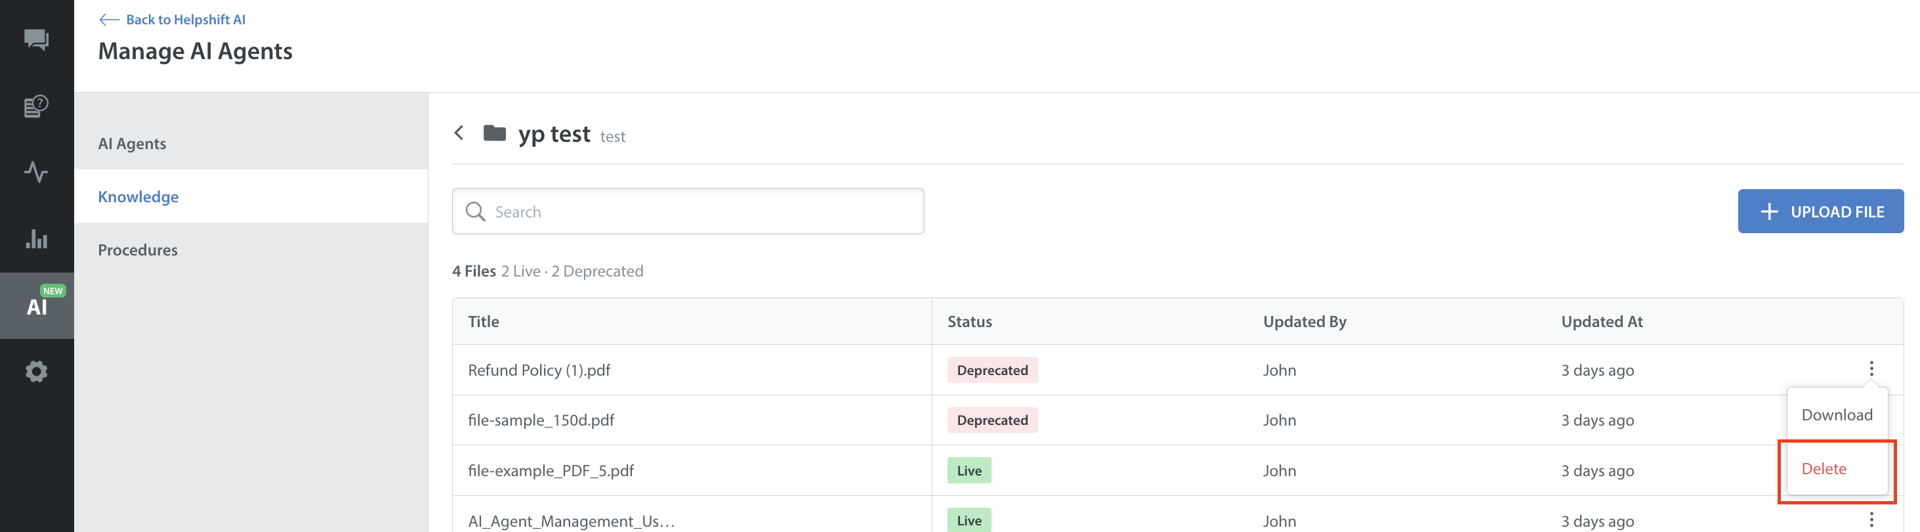
- Click DELETE.
Note:
- Every uploaded document is automatically scanned for malware. If malware is detected:
- The upload is immediately aborted.
- The file is not stored or indexed.
- To update a document, delete the existing file and upload the updated version as a new file.