
You can configure user fields at global and app levels to store relevant user information. This feature allows you to manage user data more efficiently, enabling agents to access important user context during support interactions.
User Fields
User fields let you store and manage important user data across apps and user and app-level profiles. They help you store data on a user independent of any specific issue creation.
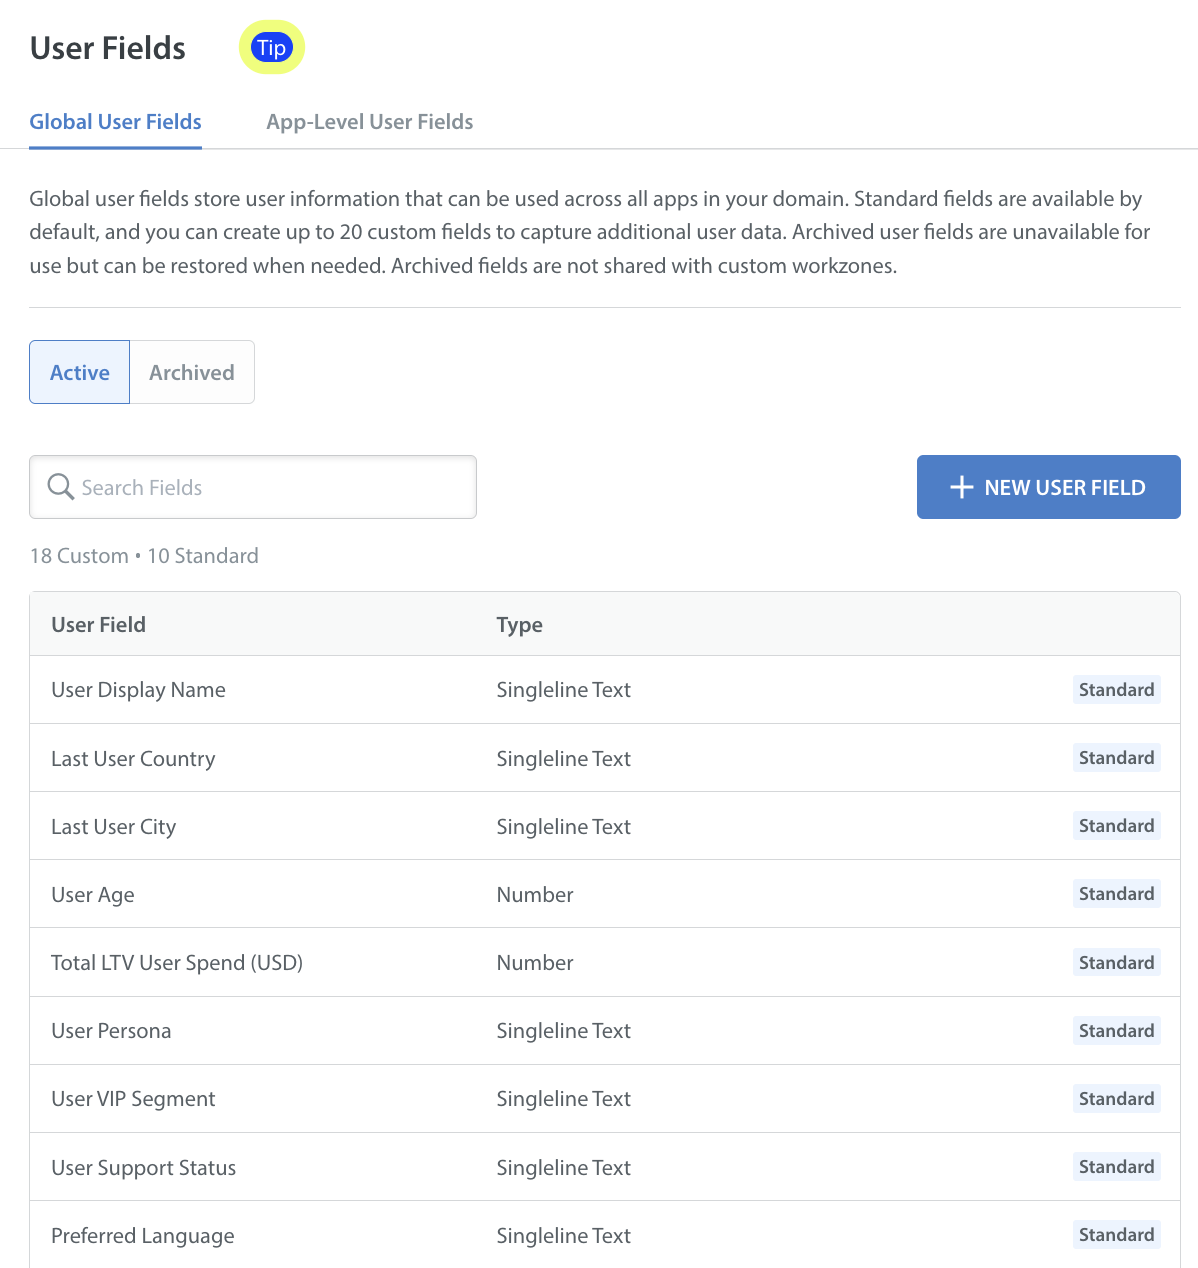
Global User Fields
Global User Fields store information across all apps in your domain.

There are 2 types of global user fields:
- Standard fields: Pre-configured fields available for every user profile.
- Custom User Fields (CUFs): As a brand, you can create and save up to 20 custom user fields at the global level. This field type is useful when you need to show additional user data that is not app-specific. You can also customize the names of these fields to match your requirements.
App-Level User Fields
App-Level User Fields store data specific to each app in your domain.

You can create two types of fields:
- Standard Fields: Pre-configured fields available for every app profile.
- Custom User Fields (CUFs): These fields allow you to collect app-specific information. As a brand, you can create and save up to 50 custom user fields at the app level, in addition to the standard fields. You can also customize the name of these fields according to your preferences.
Creating a Custom User Field (CUF)
To create a custom user field, follow these steps:
- Navigate to Settings.
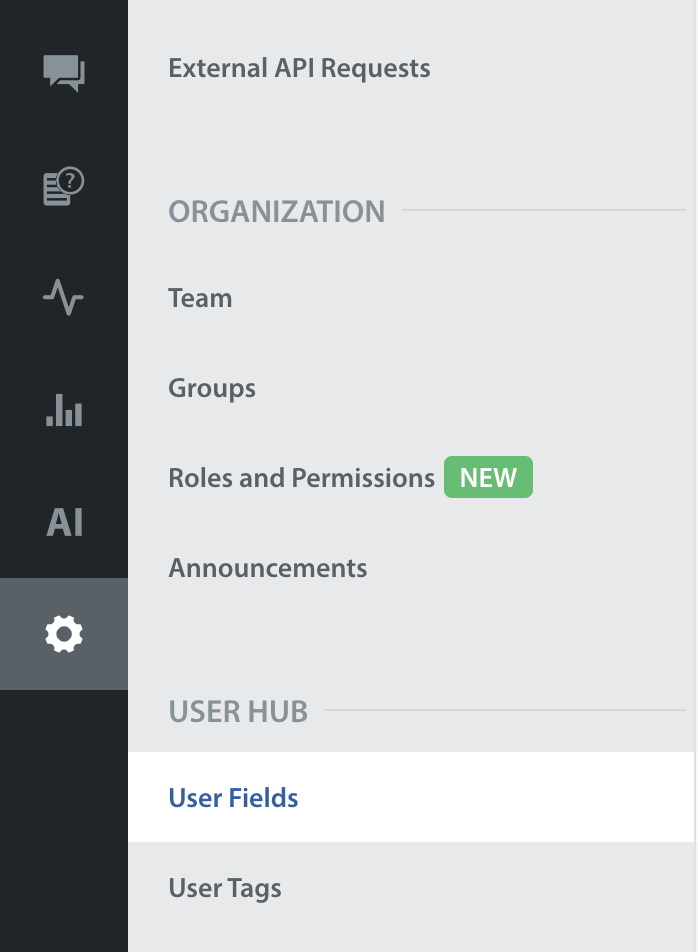
- In the USERS area, click User Fields.
You will see two tabs: Global User Fields and App-Level User Fields.

- Select the type of user field you want to create by clicking one of the tabs.
- Click + NEW USER FIELD. A pop-up will appear where you can select a field type.

- Select the required Field Type.

- Provide a Label and Key for the new field.

- Click SAVE.
Once you've confirmed the field creation, a pop-up will appear to Confirm New User Field.

- Click SAVE to confirm.
Duplicate labels or keys are not allowed at the brand level. The system will throw an error if a duplicate name or key is used.
Label and Key characters should not exceed 255 characters.
The
button will be disabled once the maximum number of custom user fields is reached (20 at the global level and 30 at the app level).
User Field Search
You can easily search for all the configured user fields at the global and app level.

Managing Custom User Fields
Admins can manage custom user fields (Global and App-Level) to ensure redundant or outdated information is not displayed or used by internal teams.
Viewing and Duplicating Custom User Fields
Note: Learn more about how user fields can be viewed within a user’s profile.
To view or duplicate a custom user field, follow these steps:
- Click the More Options button (
 ) next to the user field you want to manage.
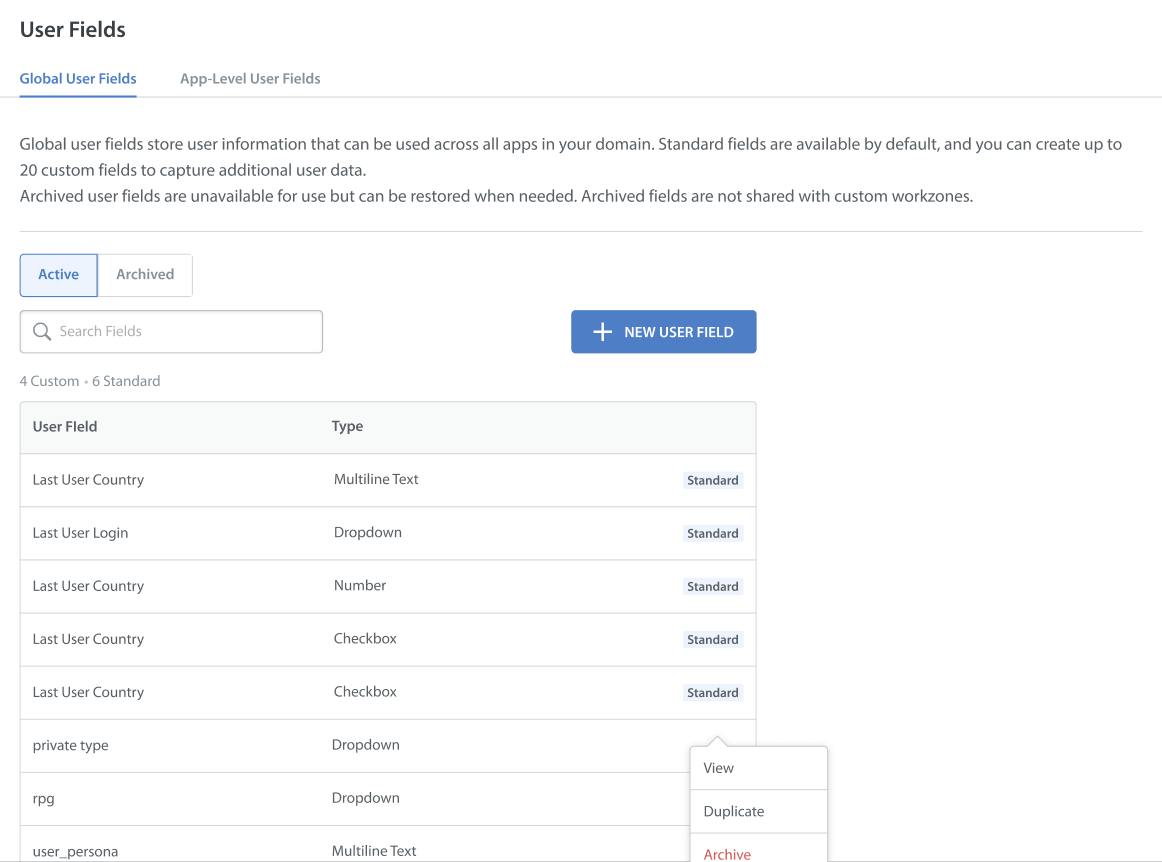
- Select View to see the details of the user field.
- Select Duplicate to create a copy of the user field with similar configuration settings.
Archiving Custom User Fields
Archiving removes outdated custom user fields from active views. If a custom user field is actively used in a bot or automation workflow, archiving is disabled.
To archive a custom user field, follow these steps:
- Click the More Options button () next to the user field you want to manage.
- Select Archive from the menu.
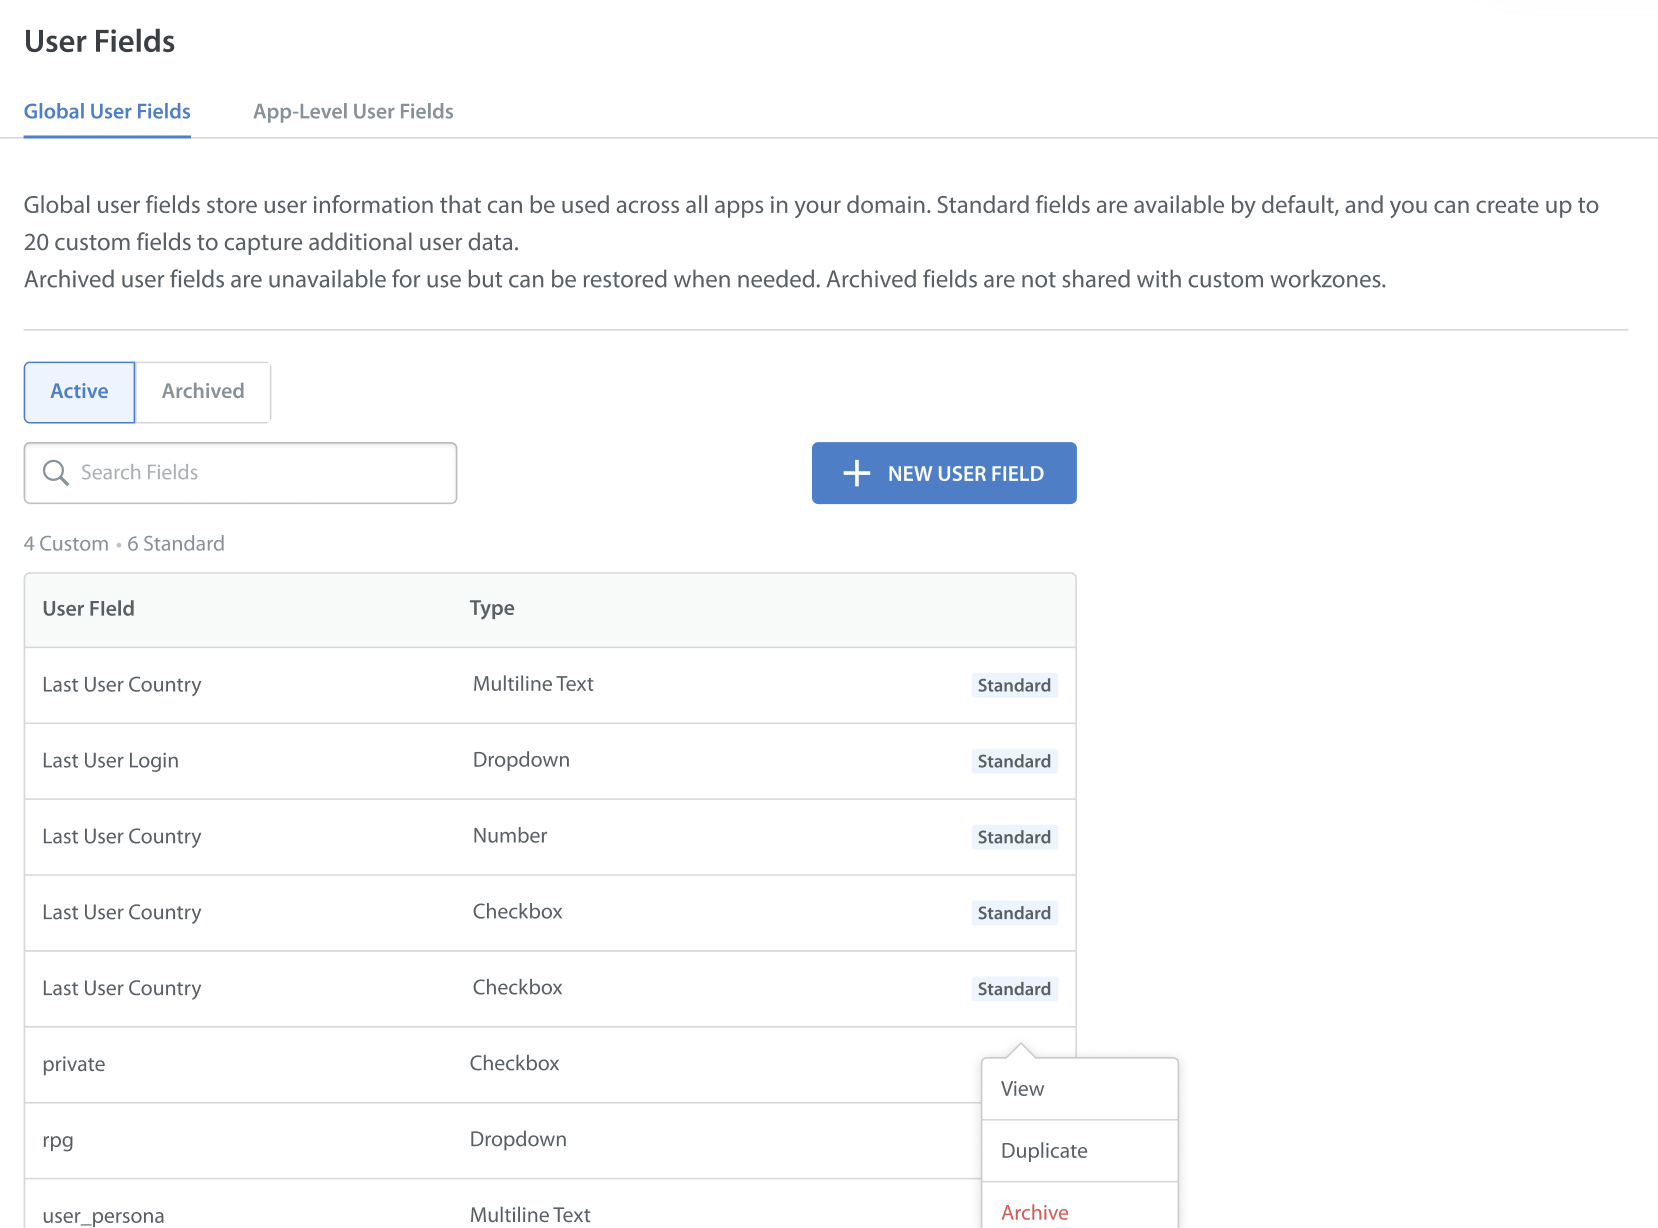
- Click ARCHIVE.
Archived custom user fields move to a separate Archived list tab.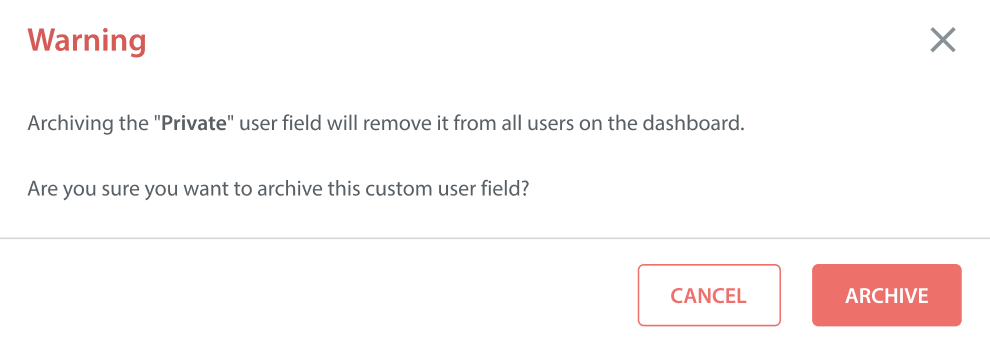
Unarchiving Custom User Fields
Separate Active and Archived lists are maintained for both Global and App-Level fields.
To unarchive a custom user field, click Unarchive from the Archived list of user fields.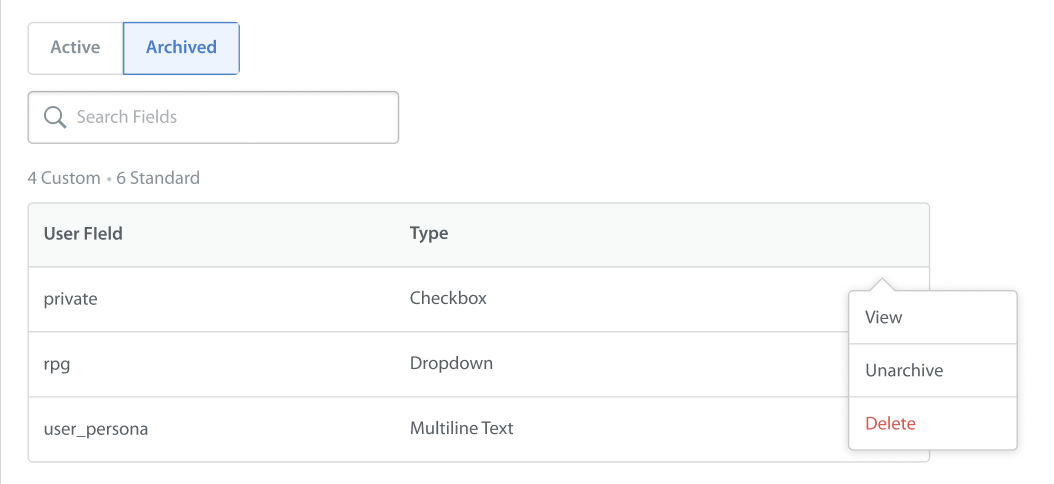
Deleting Custom User Fields
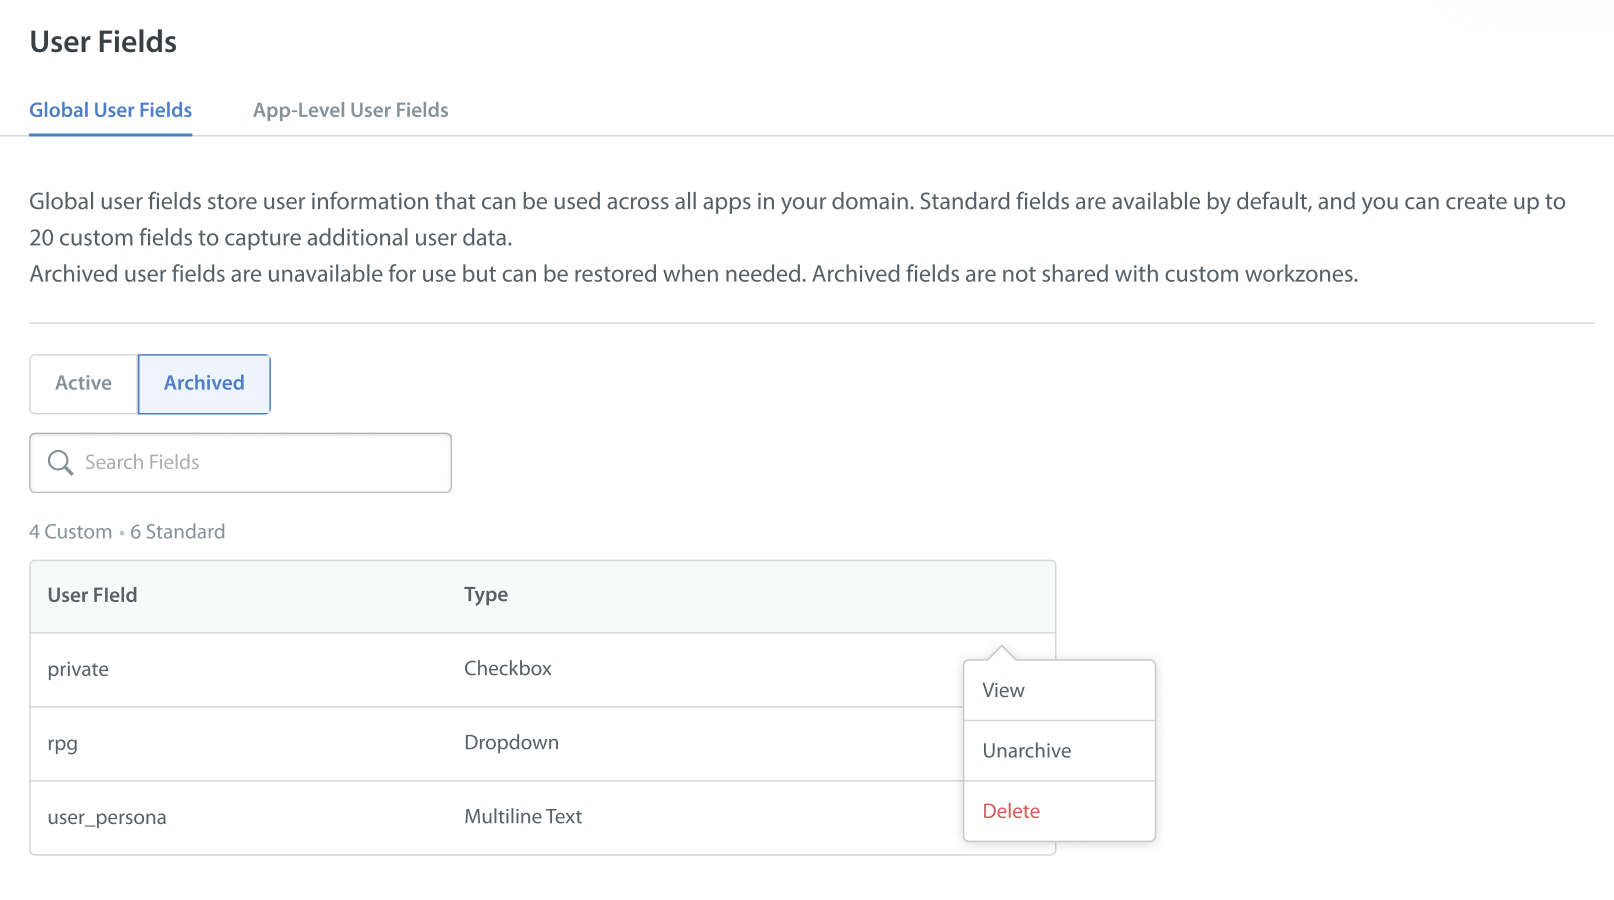
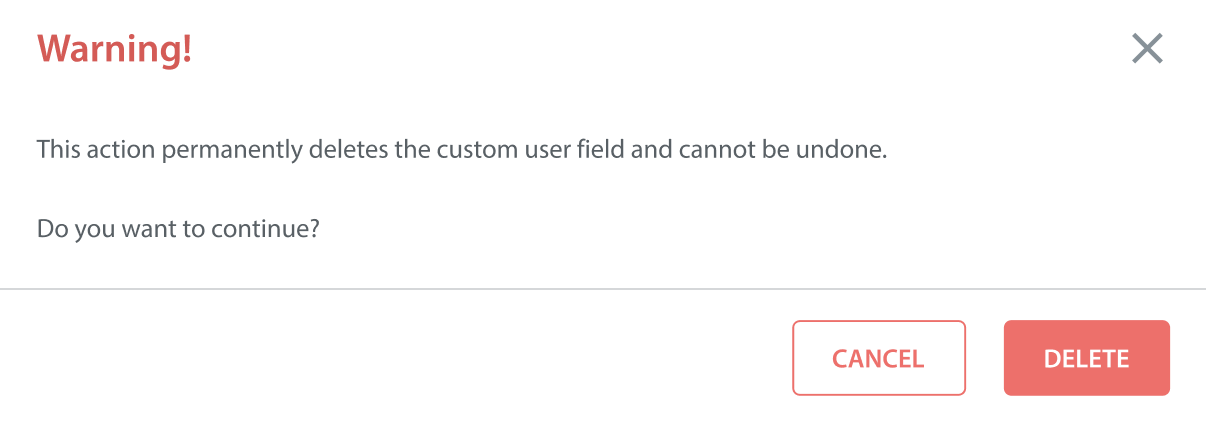
Deleting a custom user field permanently removes it from the user hub. To delete a custom user field, follow these steps:
- Click the More Options button () next to the user field in the Archived list.
- Select Delete.
- Click DELETE.
Note: Standard user fields cannot be duplicated, archived, or deleted.