
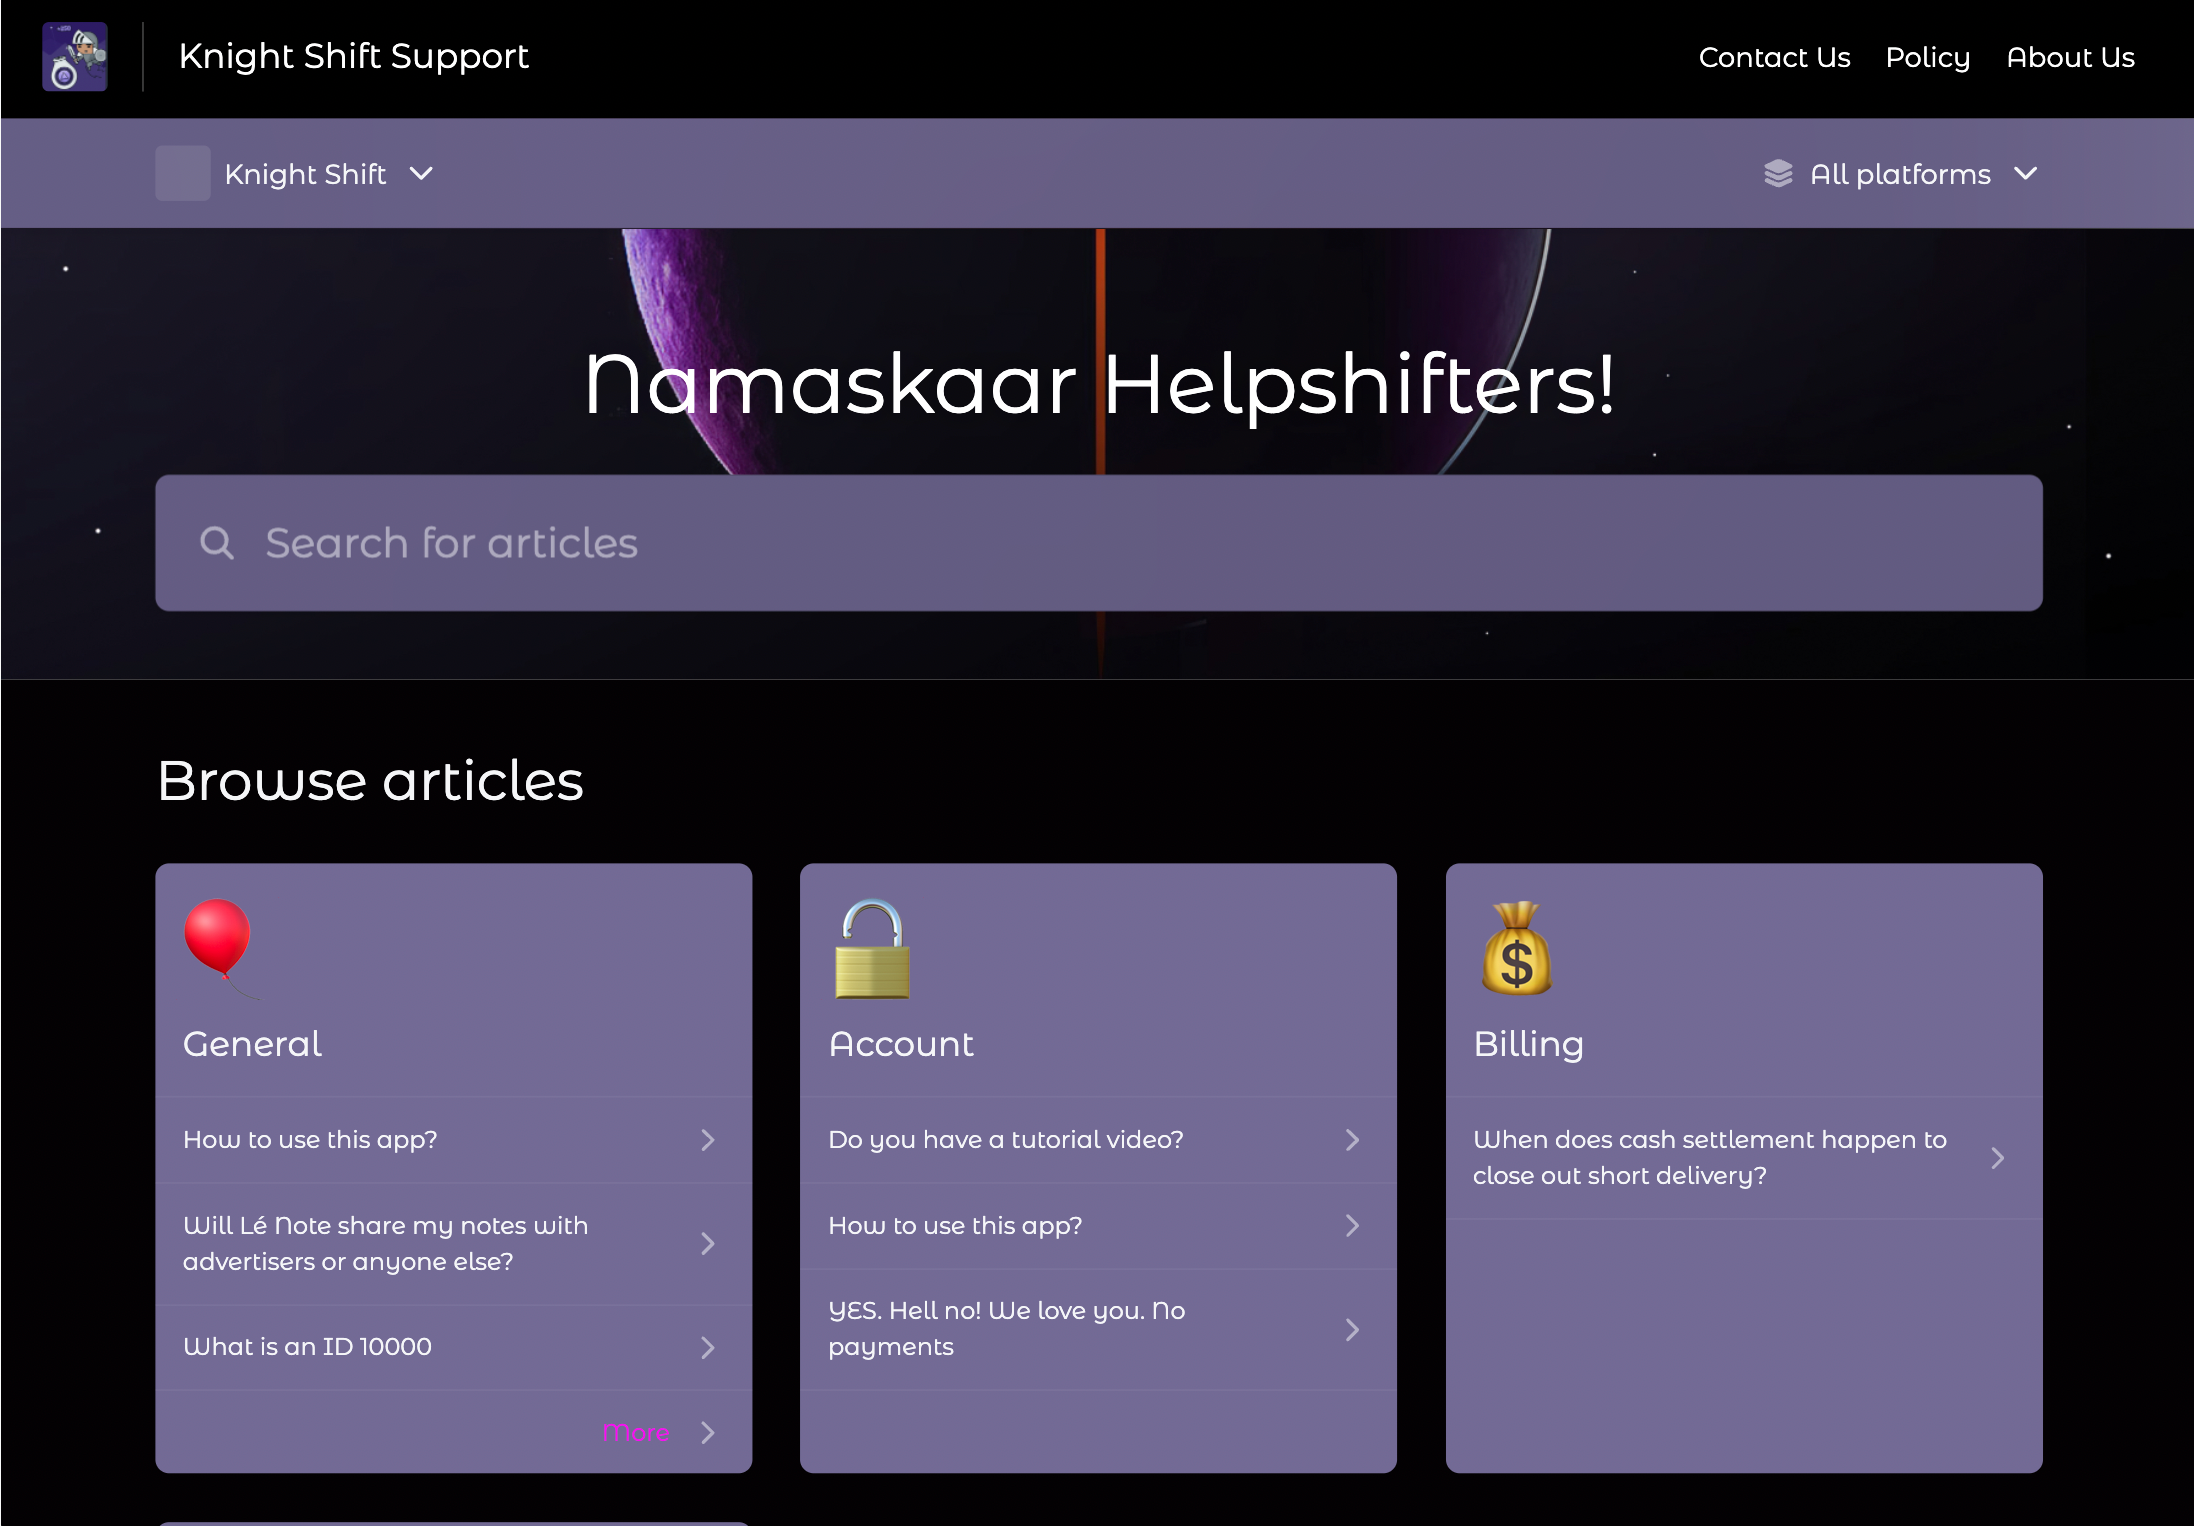
Help Center 2.0 - Configure app header section
On the Branding and Customizations page banner, click the Header tab.
(Optional) Set a site title for your app header section
HOW YOU DO IT
Under the App Header Section heading, in the In App Title text box, do either of the following.Enter text manually.
Click Insert Text Template () to begin choosing a text template for use as title text.

EFFECT
TIP: Your app header section title can be multilingual, in whole or in part, representing itself to your users in a language that they already know.To achieve this effect, use text templates for which you have entered and saved the correct translations.
To choose a text template after clicking Insert Text Template (), you must know and enter its name.
(Optional) Reset your app header section title to the Helpshift system default setting
HOW YOU DO IT
Under the App Header Section heading in the options pane, next to the In App Title field label, click Reset to default.
Help Center 2.0 - Configure web header section
On the Branding and Customizations page banner, click the Header tab.
Toggle for web header section to On or Off.
HOW YOU DO IT
Under the Header heading in the options pane, toggle the web header section On or Off.
TIP: The toggle is colored green while the feature is turned On and colored gray while the feature is turned Off.
EFFECT
Choose whether you want to add the web header sections in your Help Center.When toggle is ON

When toggle is OFF

(Optional) Choose color template for your web header section
HOW YOU DO ITCreate a template
Under the Colors heading in the options pane, click the filled circle next to any Color label.A color picker opens.
In the color picker, choose your preferred action color.
Click anywhere outside the color picker to dismiss it.
Click on Add template icon.
Enter the template name in text box.
Under the different colors labels in the options pane, click the filled circle next to the label.
A color picker opens.In the color picker, choose your preferred color.
Click anywhere outside the color picker to dismiss it.
Repeat above steps to select color for different labels.
Select the check box if you want this template as default.
Click Save.
Edit existing template
Next to the Colors heading in the options pane, click Folder icon to show a template list.
Choose the template from the available list.
Click Edit icon and update preferred changes.
Click Apply.
EFFECT
Choosing a template overwrites any prior selections that you may have made for these values:Background color
Content color
(Optional) Set a web support title for your web header section
HOW YOU DO IT
Under the Web Header Section heading, in the In App Title text box, do either of the following.Enter text manually.
Click Insert Text Template () to begin choosing a text template for use as title text.

EFFECT
TIP: Your web header section title can be multilingual, in whole or in part, representing itself to your users in a language that they already know.To achieve this effect, use text templates for which you have entered and saved the correct translations.
To choose a text template after clicking Insert Text Template (), you must know and enter its name.
(Optional) Reset your web header section title to the Helpshift system default setting
HOW YOU DO IT
Under the Web Header Section heading in the options pane, next to the Web Support Title field label, click Reset to default.(Optional) Set the brand home page link for your company, division, or product line
HOW YOU DO IT
Under the Web Header Section heading in the options pane, find the Brand Home Page Link text box.
In the text box, enter the primary URL where people can learn about your company, your division, or your product line.
(Optional) Configure your web support portal’s page headers to show as many as four links
HOW YOU DO ITUnder the Web Header Section heading in the options pane, in the Header Links area, click + ADD. A form opens, prompting you to supply both a label and a URL.

Do both of the following.
In the Enter Label field, enter free text, choose a text template, or do both.
In the Enter URL field, enter the URL that corresponds to the label.
Note: You can also select the header link template from the available list or create a new template by clicking + ADD and set as a default template.
EFFECT
Help Center 2.0 - Configure the web subheader section
On the Branding and Customizations page banner, click the Header tab.
(Optional) Configure your web sub-headers section
HOW YOU DO IT
Under the Web Subheader Section heading in the options pane, check the checkbox next to the sub-header section label to add the section.
The available subheader sections are:
App dropdown
Platform dropdown
EFFECT
TIP: Language dropdown will not be shown as there is just one language enabled.