Integrating JIRA with Helpshift via Webhooks allows you to create a new JIRA ticket using information from a Helpshift Issue. This can be helpful for collaboration between your Product and Support teams.
We recommend being selective about the types of JIRA tickets being created from Helpshift. For example, you can create a JIRA whenever an Issue is tagged as an “client-side-bug”.
To complete this process, we use Zapier, a tool for integrating web applications. Zapier allows you to configure Webhooks, a service for updating and transmitting data between two applications, such as JIRA and Helpshift. To learn more about how Webhooks interact with Helpshift, please see What are Helpshift Webhooks, and how do I set them up?
Using Zapier does not require developer assistance and can be completed by a support Admin from your team. Please note that to complete the process in this guide, you must first create a Zapier account.
Create Zap and Webhook in Zapier
After you sign up for Zapier, select the ‘Make a Zap’ button at the top of the page.
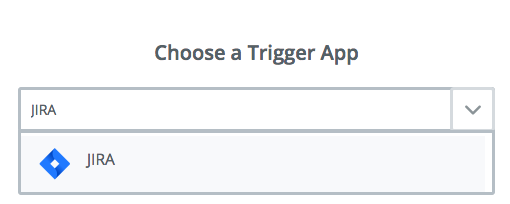
On the page that appears, search for and select the JIRA trigger app.
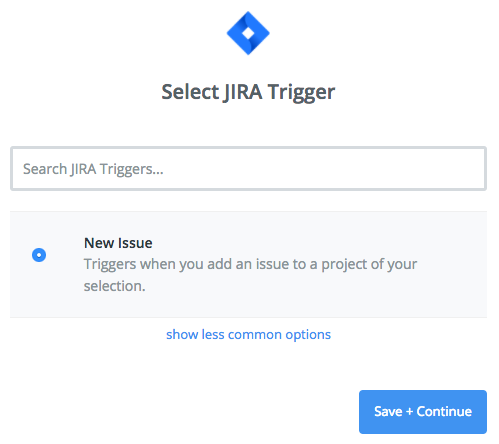
Ensure that the ‘New Issue’ option is selected as the trigger, then click ‘Save + Continue’.
You’ll need to connect your JIRA account to your Zapier one. Complete the pop-up that appears after selecting the ‘Connect an Account’ button.
When you’ve completed this step, the page will update to look like this:
Lastly, you’ll need to select the project you wish to have these JIRAs filed under.
You’ll be prompted to test your setup by looking up an existing JIRA issue. When you’ve completed this step, the page will inform you that it was successful, and offer you a chance to review your issue.
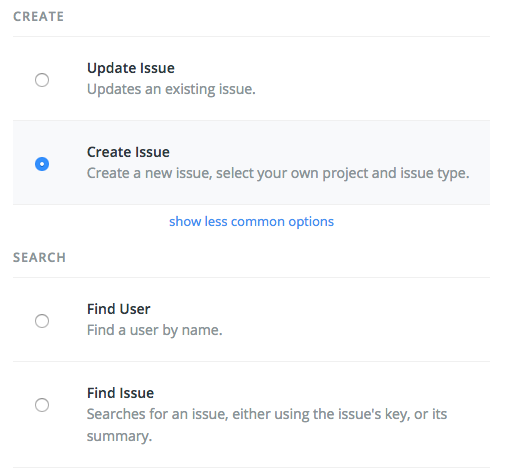
Next, you’ll be prompted to add an action. Depending on what you’d like to use the integration for, select one of the create or search actions, or click ‘show less common actions’ to find another.
Click ‘Save and Continue’ through the next step to reconfirm your selection of JIRA. On the ‘Set up JIRA Issue’ page, prepopulate the Project, Issue Type, and Summary fields, and as many of the optional fields as you’d like.
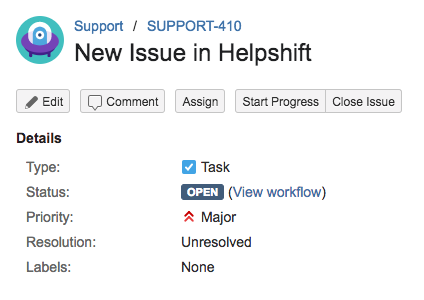
You’ll be prompted to test this step. Once the test is completed, a link will be provided where you can review the test JIRA.
Last, name your zap, then turn it on by enabling the ‘Your Zap is’ toggle to ‘on’.
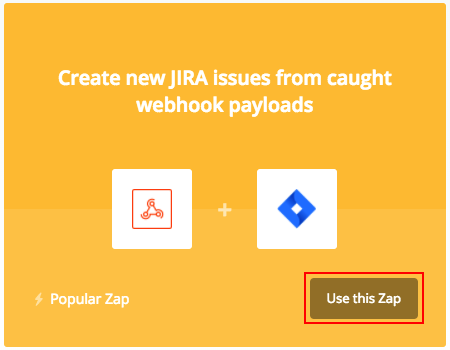
Now that the Zap is created, it’s time to create your first Webhook. Navigate to the Zapier Webhooks page, then scroll down and click ‘Use this Zap’ next to the Zap you just created.
When creating the Webhook, select the ‘Catch Hook’ option, then click ‘Save and continue’ to move past the select fields page.
On the ‘Test Webhooks by Zapier’ page that appears, copy the custom Webhook URL (shown in the image below) by clicking the ‘Copy to clipboard’ button. This will be necessary for use in step 2.
Configure Webhook in Helpshift
To configure the Webhook, navigate to Settings > APIs in your Helpshift Dashboard, scroll down to the Webhooks area, then click the ‘+Add Webhook’ button.
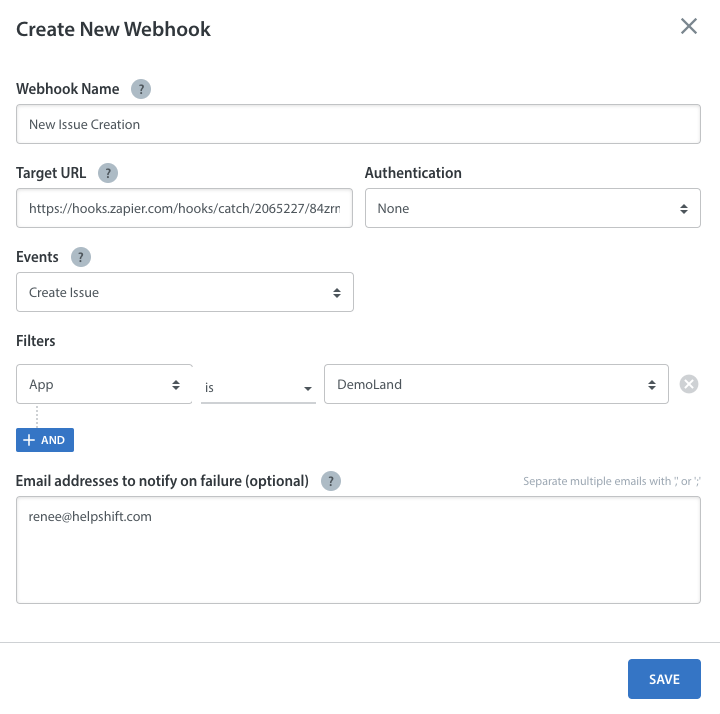
The ‘Create New Webhook’ pop-up will appear. Complete it as follows:
- Webhook Name: Give your webhook a descriptive and intuitive name
- Target URL: Paste the URL from Zapier that you copied in step 1
- Authentication: Select the authentication type required by your server: None, Basic Auth, or Custom Auth (your developer may need to provide this info) Please note that you may need to provide server credentials based on which type is selected
- Events: Define the Webhook to run on new Issues when they are created (Create Issue), or anytime there are updates to Issues (Update Issue)
- Filters: Allows you to apply additional filters for the Webhook to only trigger based off of any of the following:
- App: the app you want this Webhook to apply to as listed in your Helpshift Dashboard
- Status: the status of a Helpshift Issue
- Platform: the platform that your app offers support through, e.g. iOS, Windows, Web Chat, Email, and more
- Issue ID: the Issue ID # associated with the Issue
- Tags: Any tags applied to this Issue
- Language: The language that the Issue is written in
- Custom Meta: Any custom metadata that you would like to filter Issues based on
- Custom Fields: Any Custom Issue Fields that you have added to your Helpshift Dashboard you would like to filter Issues based on
Once you click ‘Save’, a toast will appear confirming that the new Webhook was created, and the Webhook will appear listed on your Webhooks page as active.
Sync Helpshift Webhook to Zapier
After you have saved your new Helpshift Webhook, you’ll need to coordinate a test run between Helpshift and Zapier so you can continue modifying the Zap. For our example, we want to add a tag ‘jira’ to an Issue that has already been created.
Note: You must click the ‘OK, I did this’ button in Zapier before you trigger the new Issue in Helpshift.
After you have clicked the ‘OK, I did this’ button, submit a test Issue which meets the requirements and filters for the Webhook to be triggered.
After you’ve completed the test run, Zapier will return a successful test message, and you can continue working on your Zap.
Associate Information via Webhook
This step establishes the data points in the Helpshift API that you can call upon in Zapier.
In Zapier, add another Webhook step. When adding the step, set it up as follows:
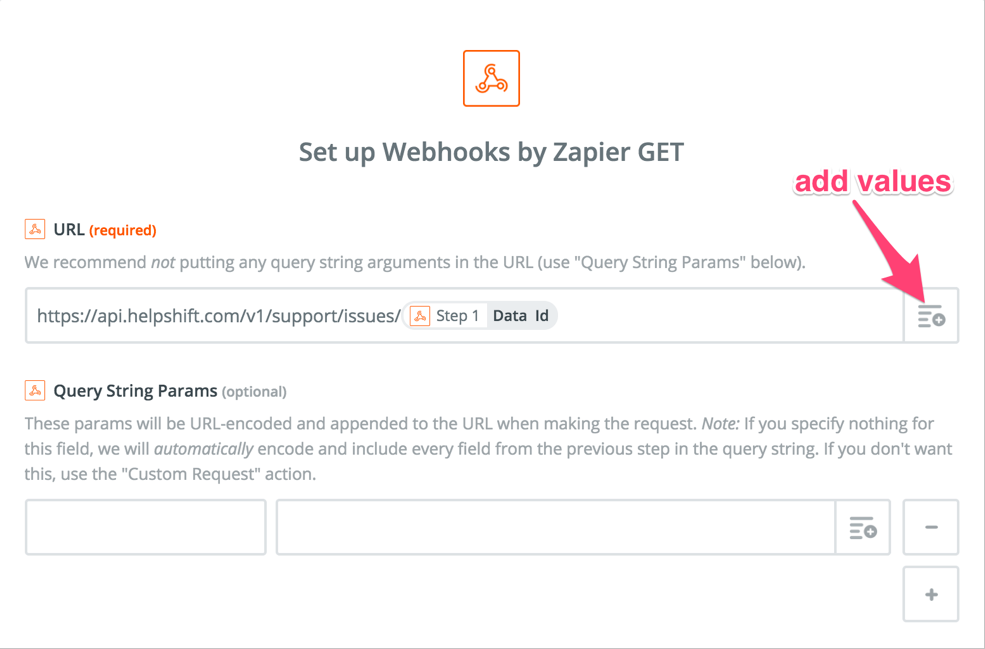
1. Get Hook
2. URL: https://api.helpshift.com/v1/[accountname]/issues/ You can get the Data ID by clicking the ‘Add values’ button, as depicted below.
Scroll down to the ‘Basic Auth’ section and insert your Web API key from the API section of your Helpshift Dashboard.
To learn how to find this information, please see How do I access my Helpshift REST API keys?
Note: Make sure to place a Pipe ( | ) after the API key to ensure it will be processed correctly.
Clean Up Message Information
This step is needed so your JIRA ticket has text that can be easily read. We are going to use Zapier’s text cleanup tool for HTML.
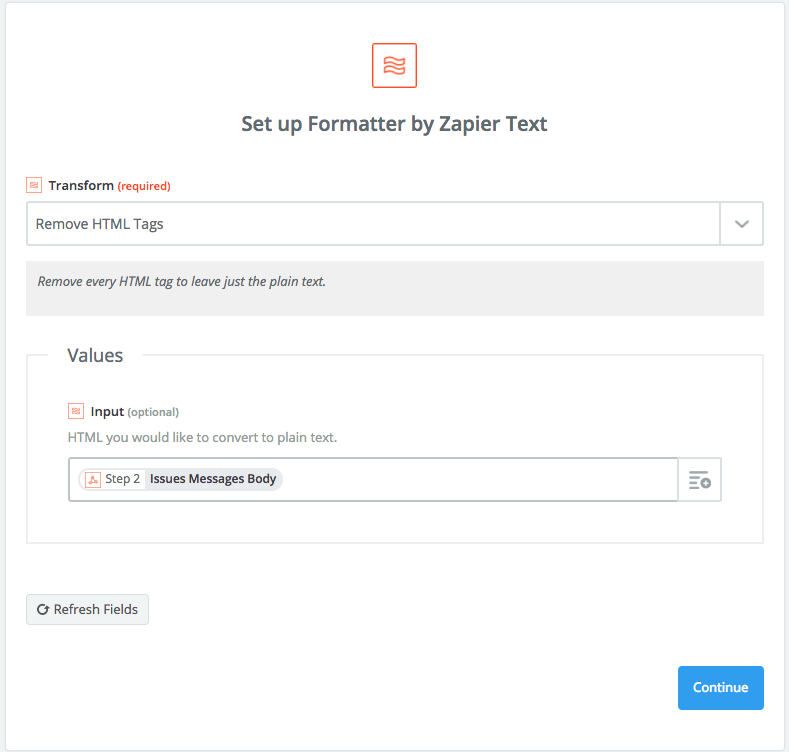
In Zapier, add Formatter by Zapier as the next step. Set it up as the following:
1. Text
2. Transform: Remove HTML Tags
3. Input: Select from your Zapier Step 2 (Get Hook), the “Issues Message Body” value
Safety Check for Zap
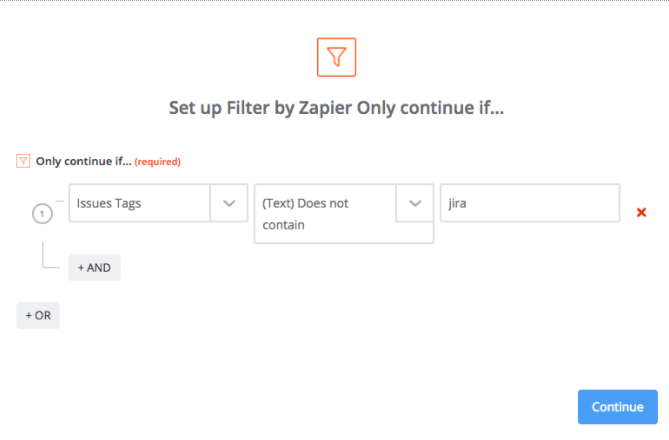
In Zapier, this will be adding a Filter, not a Step. This step is needed so the Webhook doesn’t always run on every update to an Issue. Please add a Filter with the following:
1. Only continue if
2. Issues Tags + (Text) Does not contain + jira (or whatever your Webhook Trigger Tag is)
Create JIRA Ticket
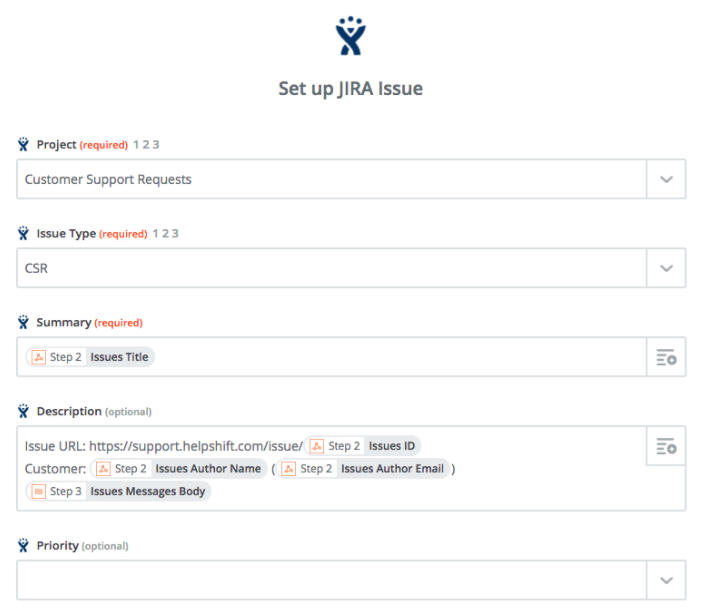
In this step, you’ll connect with JIRA and set your rules for how you want JIRA to handle the information received from the Helpshift API. Since everyone’s JIRA environment is different, this example will show a basic flow that creates a new ticket for a ‘CSR’ branch.
In Zapier, add JIRA as the next step with the following:
- Create Issue
- Project: (Pulled from JIRA)
- Issue Type: (Pulled from JIRA)
- Description: Pull in data points automatically from the Issue, such as
- Issues URL
- Customer Name and Email
- Conversation (Pull from the Text formatter step)
Post JIRA Ticket Link into Slack (Optional)
Some teams prefer to use Slack to track communication between Development and Support. This step posts the newly created JIRA link into a Slack channel so others in the organization can view, track, and comment on it.
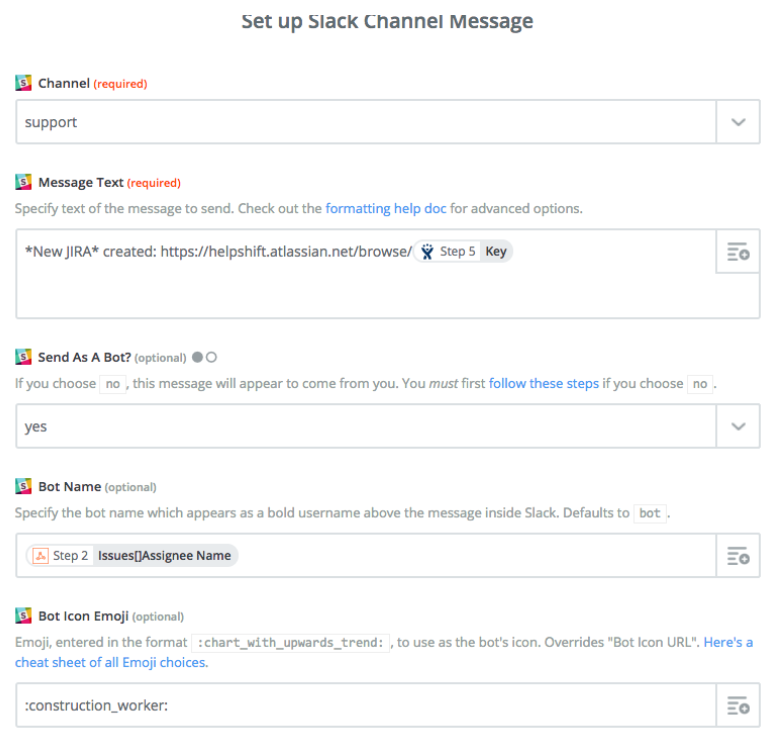
In Zapier, add the Slack step with the following:
- Send Channel Message
- Channel: Which channel do you want the notification to go to?
- Message Text: The content of the notification message in Slack. We can have it post the link in JIRA for the ticket
- Bot: Keep it as a BOT unless you want it to go from only one person in your organization
- Bot Name: The name of the BOT will be the user in Helpshift who triggered the JIRA ticket creation ZAP
- Emoji: Pick a fun emoji for the bot
To set up additional features and learn more about Helpshift best practices, please review our Knowledge Base.


