
Note:
- If you are using the Salesforce package/version below 3.0, we recommend upgrading to the latest version. Please refer to the topic for how to upgrade to the latest version of Salesforce integration.
- If you are upgrading Salesforce package/version to 3.3 and above, please refer to the release notes for additional information.
- You can not roll back the installed package version of Salesforce because it may cause data loss. We highly recommend testing it well on the sandbox before upgrading to production. For more details, click here.
Our Salesforce Integration allows you to manage your Helpshift Dashboard from directly within Salesforce. You can use the app to invite and assign Agents and Admins; sync FAQs, Issues, Custom Issue Fields, and tags; reply to Issues from within Salesforce; and more.
Though this guide uses screenshots and steps for Salesforce Classic, this integration can also be used with Salesforce Lightning.
Salesforce Classic Experience:
Salesforce Lightning Experience:
To get started with the Helpshift plugin for Salesforce, please review the steps below. You can also get a full overview by watching this video:
1. Installing the Helpshift Package
2. Configuring Permissions
3. Page Layouts & Helpshift Messenger
4. Setting Up Your Helpshift Account
5. Knowledge Base/FAQ Mapping
6. Syncing Issue Fields & Statuses
7. Adding Salesforce Quick Texts
8. Cases handled by Bots
9. Resolving a Case in Salesforce
10. Send/Read receipts in Messenger
11. Optional: Sync App Specific Issues to Salesforce
1. Installing the Helpshift Package
Note: You must be a Salesforce administrator to install the package.
To download the managed package, navigate to the Helpshift App via the Salesforce app exchange. Click the ‘Get it Now’ button to launch this installation.
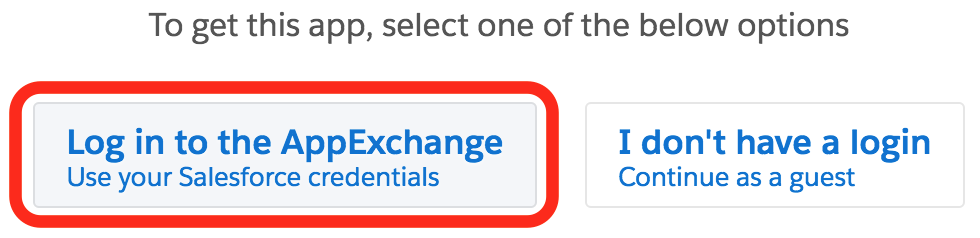
You may be prompted to log into the app exchange. Click the ‘Log in to the AppExchange’ button and login with your Salesforce Administrator credentials.
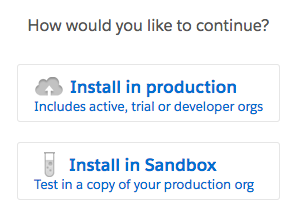
Next, select ‘Install in Production’ or ‘Install in Sandbox’ depending upon the org type in which app needs to be installed.
Finally, you’ll need to accept the Terms & Conditions, then click ‘Confirm and Install’.

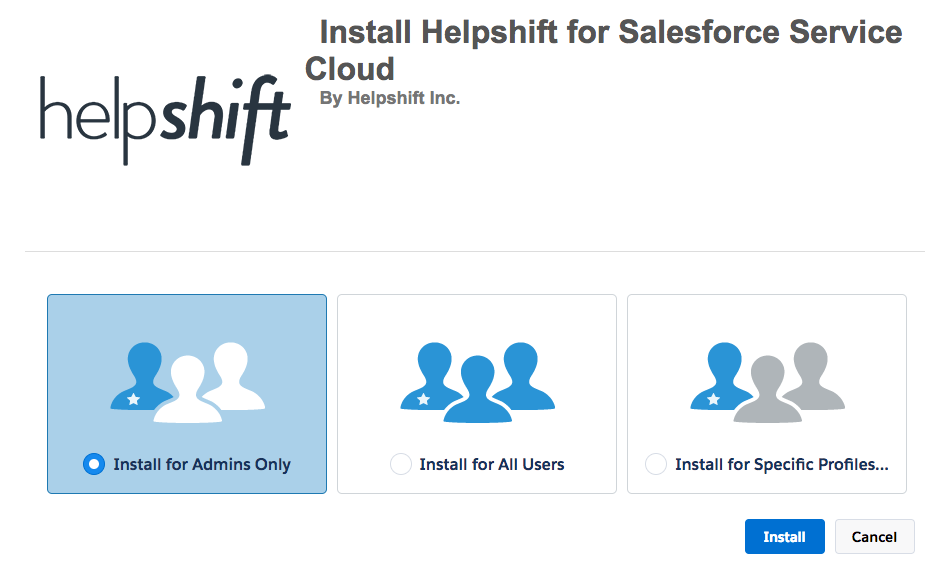
On this page, select ‘Install for Admins Only’ or ‘Install for All Users’ depending upon your use case. If the application is being installed for testing purposes, you may want to limit it for Admin users. Select the appropriate option and click ‘Install’.
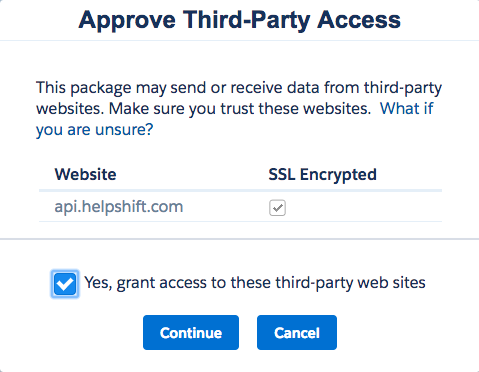
Finally, a pop-up will appear prompting you to approve Third-Party Access. This allows Salesforce to communicate with Helpshift API’s. Check the permissions box and click ‘Continue’ to complete this step.
With that, the Helpshift app is installed.

2. Configuring Permissions
This section goes through the setup process for essential configurations to use the Helpshift app, including configuring permissions and Connected App. All of these steps are critical to achieving success with the app, so please take the time to review and implement them.
2a. Configure Permissions
The app will be used by two types of users: Helpshift Admins and Helpshift Agents. To correctly enable permissions, there are two permission sets included in the Helpshift Package that must be assigned to your Salesforce users depending upon their role.
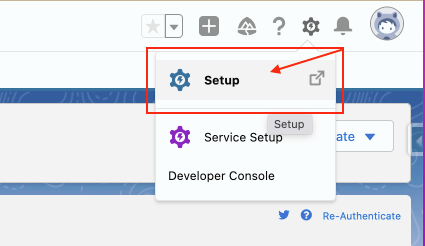
To set up these permissions, navigate to the Permissions page by clicking on the gear icon in the top right and select ‘Setup’.
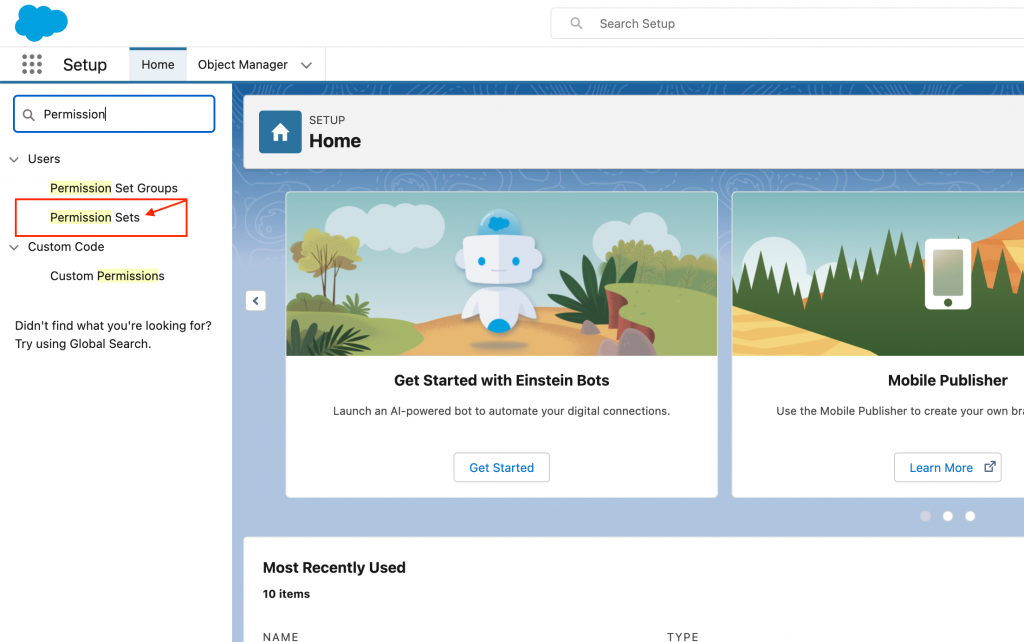
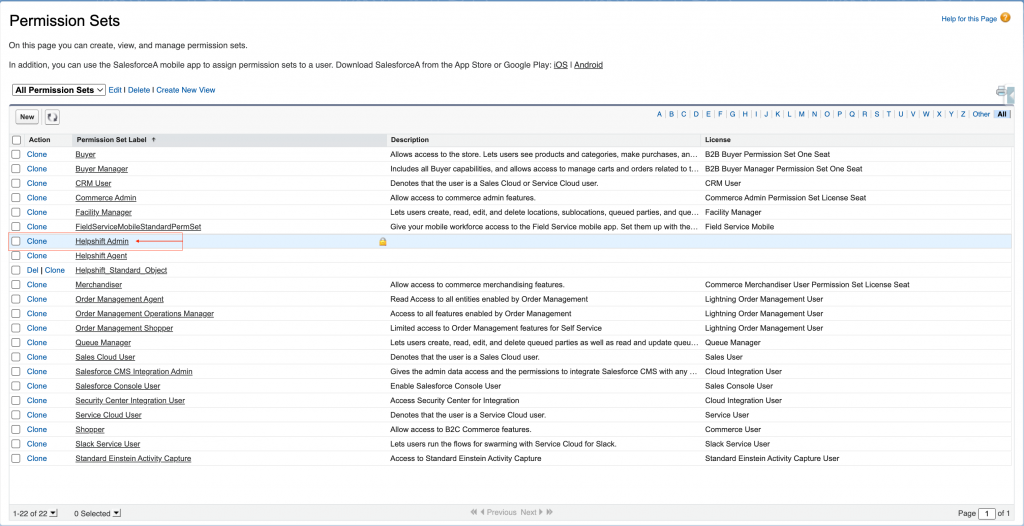
From here, search ‘Permissions’ in the Quick Find box, then click ‘Permission Sets’.

Click ‘Helpshift Admin’ from the Permission Set Label.
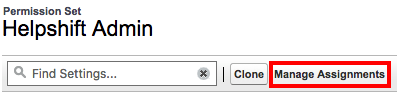
On the page that appears, click the ‘Manage Assignments’ button.
Next, click the ‘Add Assignments’ button. This will take you to a list of your Salesforce users.
Select the checkbox to the left of the user’s name, then click the ‘Assign’ button to grant Agent or Admin permissions to that user.

A summary page will appear highlighting the changes you’re requesting. Click ‘Done’ to confirm this change.
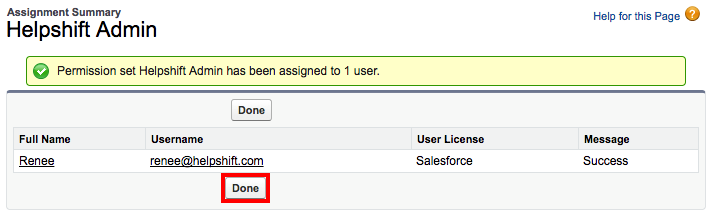
When the page refreshes, you will now see this user on your list of Helpshift Agents/Admins.
2b. Configure Connected App
Once you’ve configured permissions for Agents and Admins, you’ll need to configure the Connected app.
Next, search for ‘Connected App’ in the quick find search bar.

Clicking ‘Connected Apps’ will take you to the app configuration page.
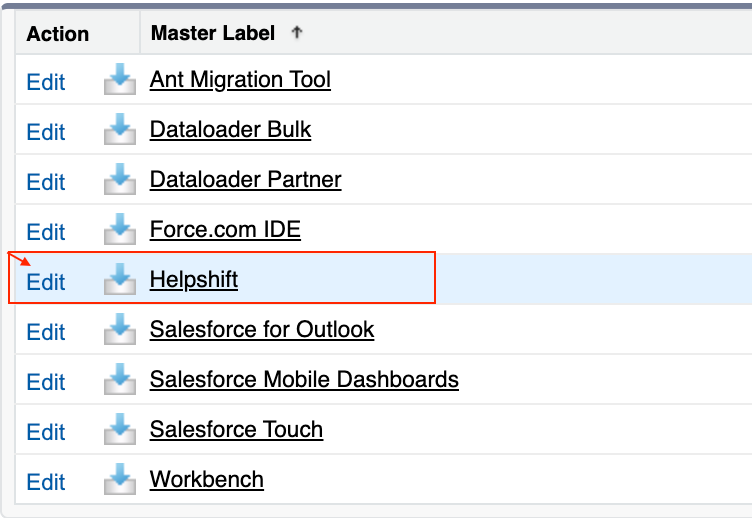
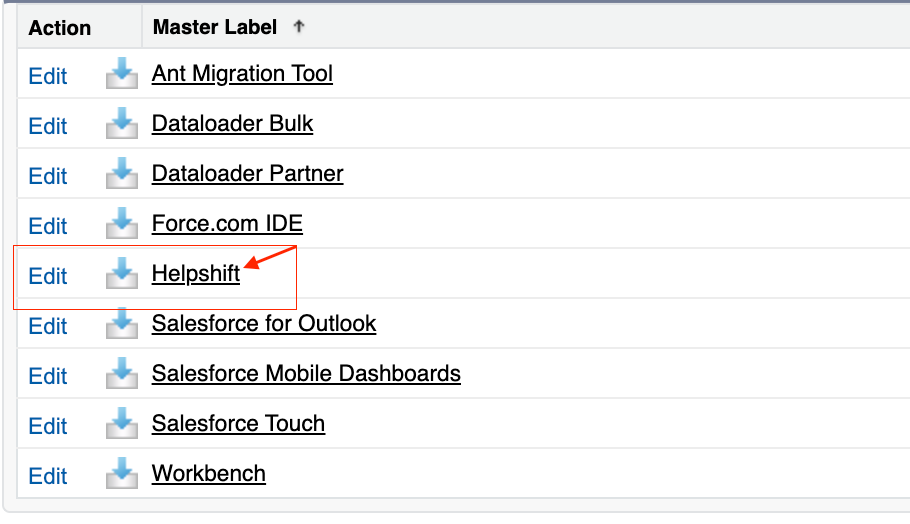
Find Helpshift in the list of apps, then click ‘Edit’ on the left.
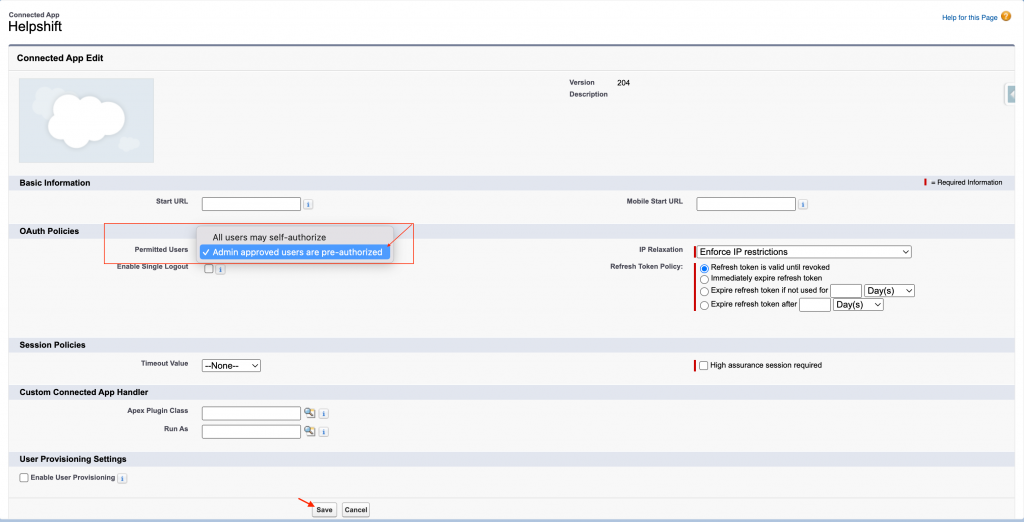
On the page that appears, under OAuth policies, set the value of ‘Permitted Users’ to ‘Admin approved users are pre-authorized’ then click ‘Save’ at the bottom of the page.
From here, click the name ‘Helpshift’ in the list of apps to get to the Connected App Details page.
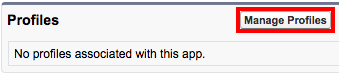
In the profiles section, click the ‘Manage Profiles’ button.
On this page, Select all the profiles who will be using the Helpshift Dashboard through Salesforce by clicking the checkboxes on the left. Be sure to add System Administrator profile permission so the Admin can perform registration.
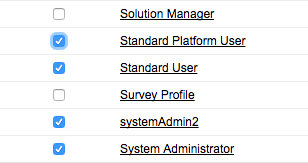
Click ‘Save’ in the bottom right to make these changes.
3. Configure Case Layout & Helpshift Messenger
This section will go through steps to configure your page layouts and add the Helpshift tabs to your top navigation bar.
The next step of configuration is to configure the page to show the Helpshift packaged fields. Before completing this step, Please make sure the Salesforce user who is installing the app has Field Level Security (FLS) enabled for those fields that are mapped between Helpshift and Salesforce case. Otherwise, case creation in Salesforce will fail.
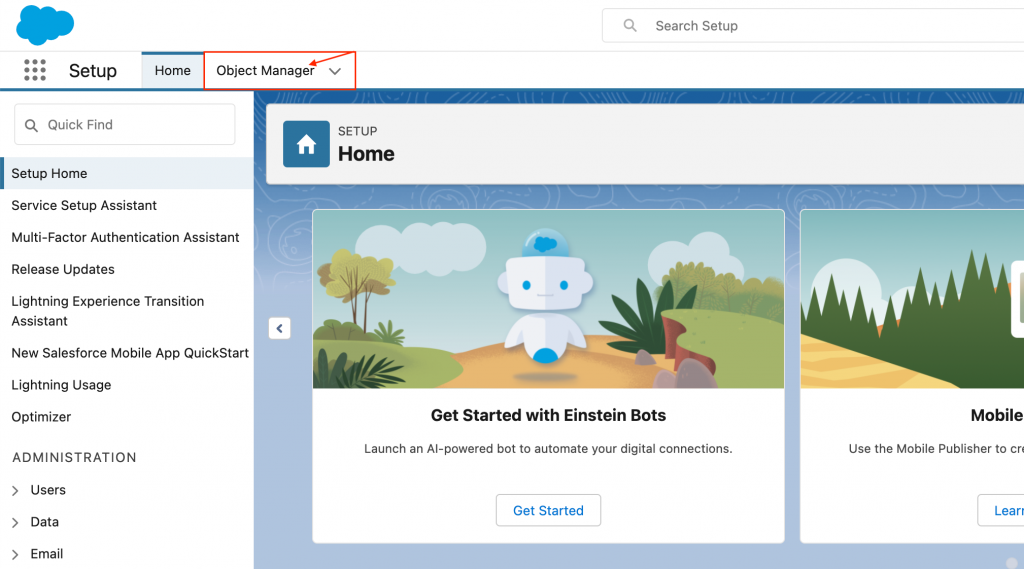
Navigate to the Cases page by clicking ‘Setup’ from within the menu in the top right.

Next, click on ‘Object Manager’ from the top bar.
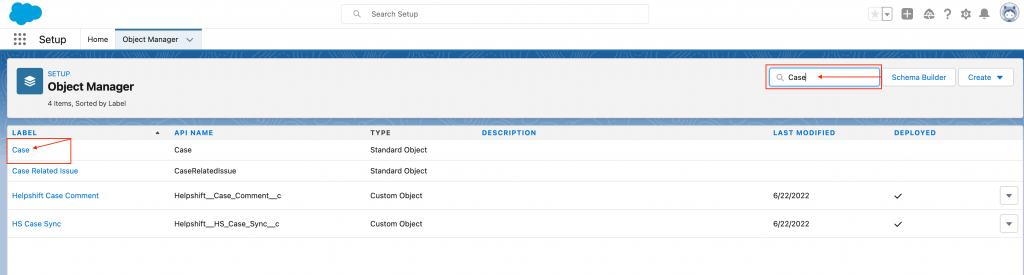
Search for ‘Case’ from the top right, and select the Case label as below.
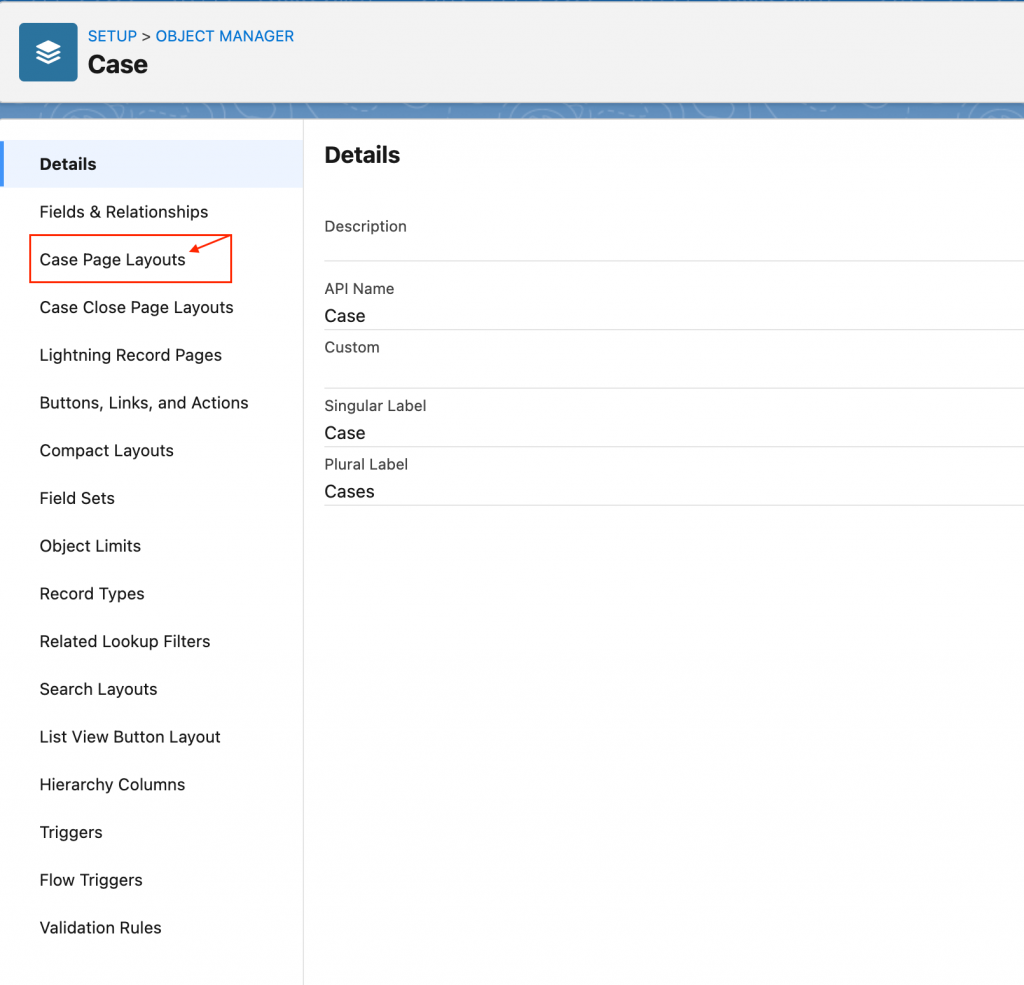
Click on Case Page Layouts.
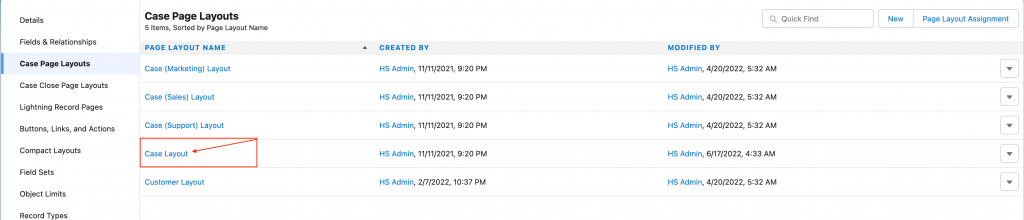
Select ‘Case Layout’ to add Helpshift app-related fields and related objects.
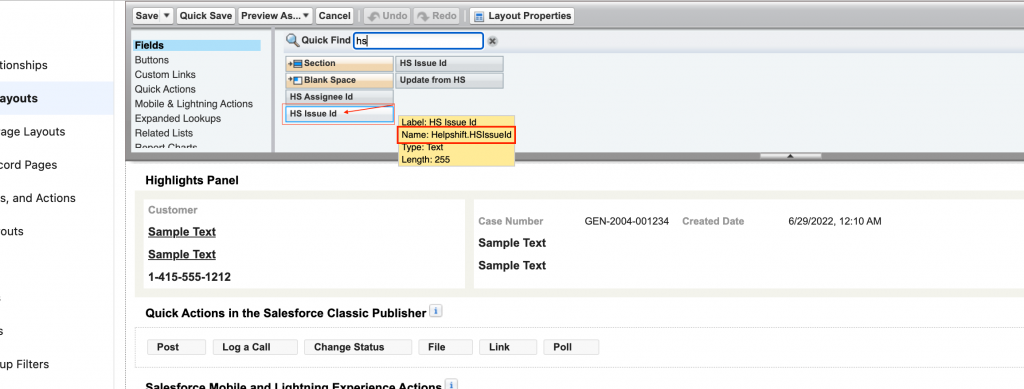
Add the ‘HS Issue Id’ field to the layout by dragging it to the desired position, and make sure the Name of the field is ‘Helpshift.HSIssueId’ same as below.
Click on ‘Related Lists’ and then drag ‘Helpshift Case Comments’ the Related Lists section of the Case Page Layout.

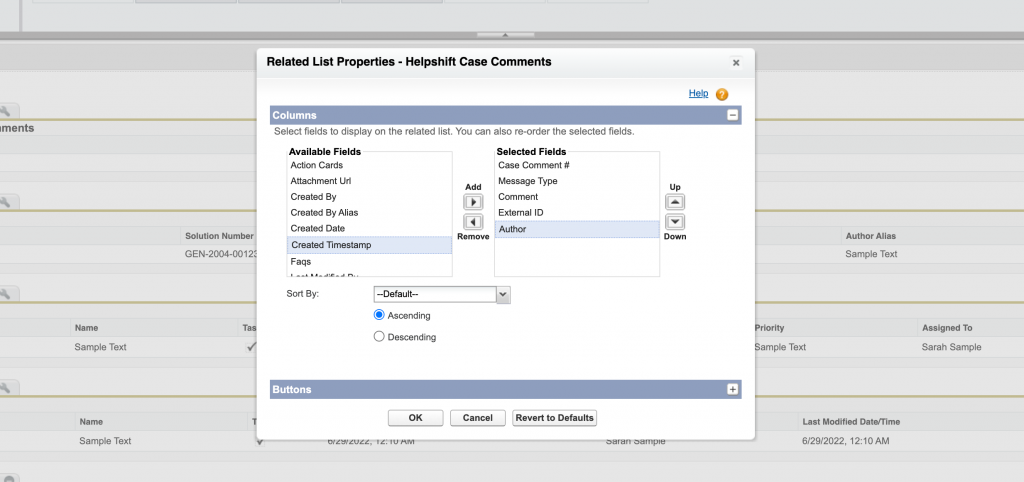
Click on the 'Settings' icon to edit fields on the related list UI.

A pop-up will appear where you can modify the available fields. At least add ‘Message Type, Comment, External ID, and Author’ in the Selected Fields section and click ‘OK’.
Click ‘Save’.

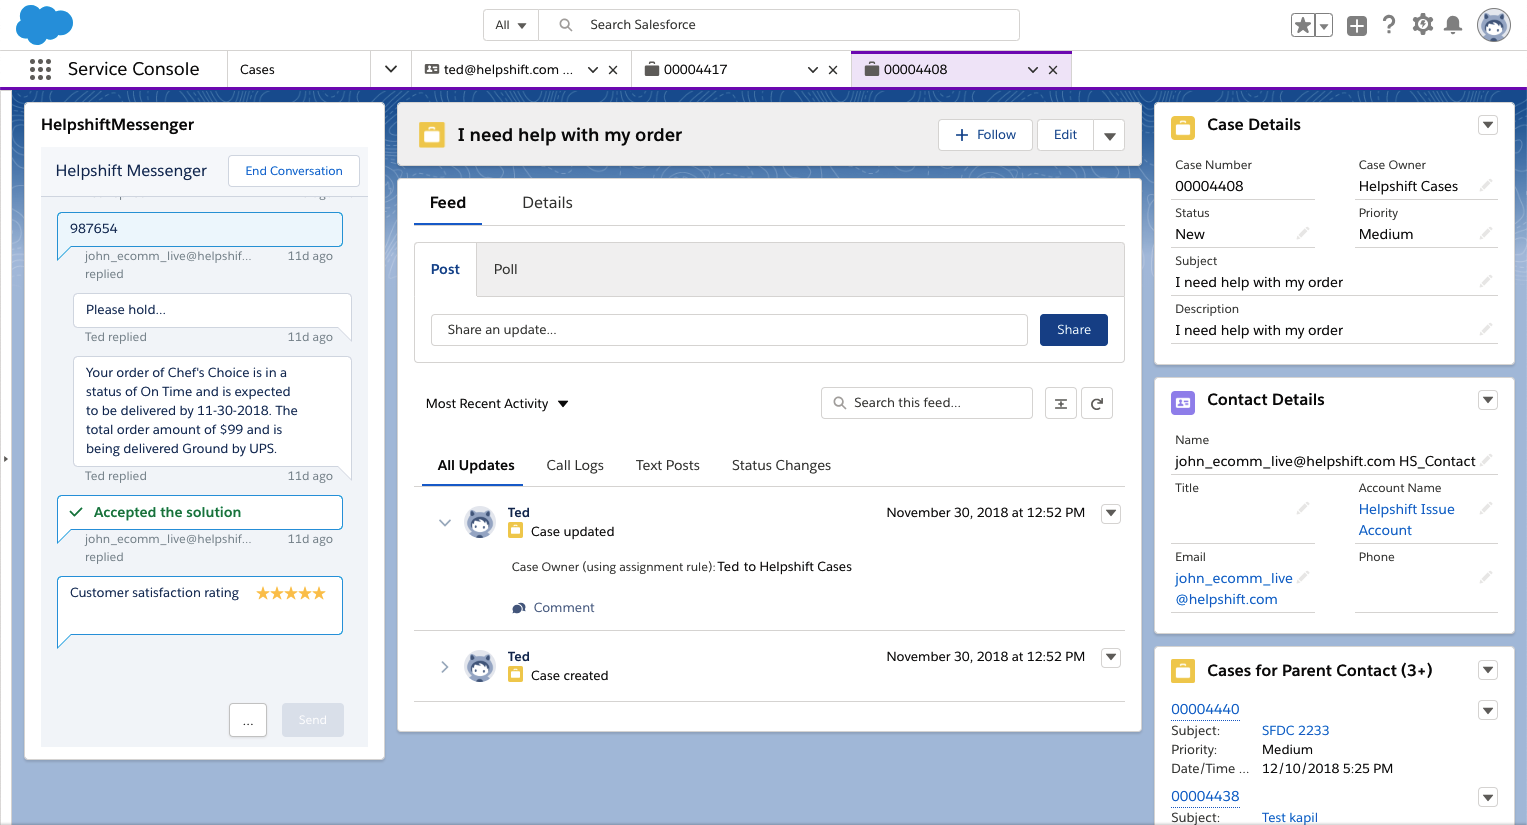
Helpshift Messenger
Helpshift Messenger allows Agents to work on Helpshift Messages right from the Service Cloud console. The steps below outline how the Salesforce Admin can add the messenger to the Case Layout.
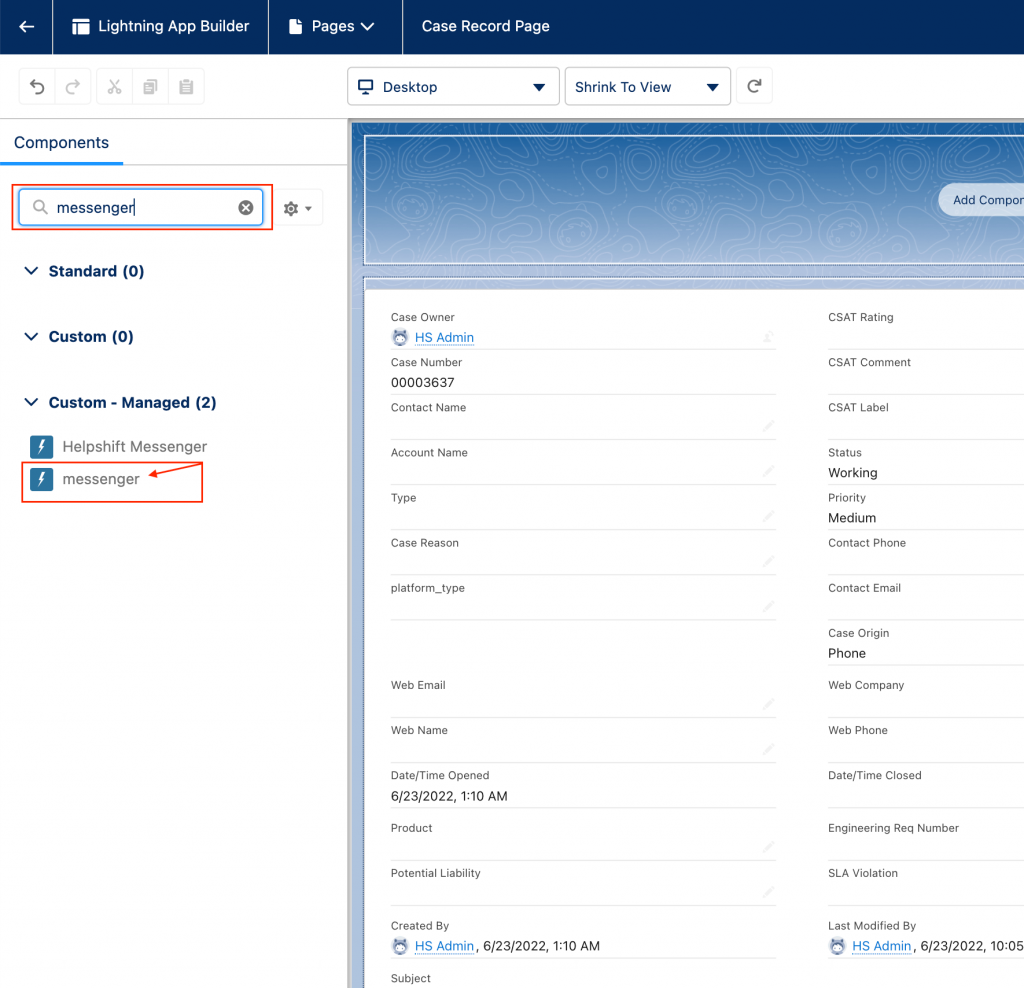
Click on ‘Lighting Record Pages’ from the left pane and then Select ‘Case Record Page’.

Next, click ‘Edit’ and then you will be landed to Lightning App Builder of Salesforce.

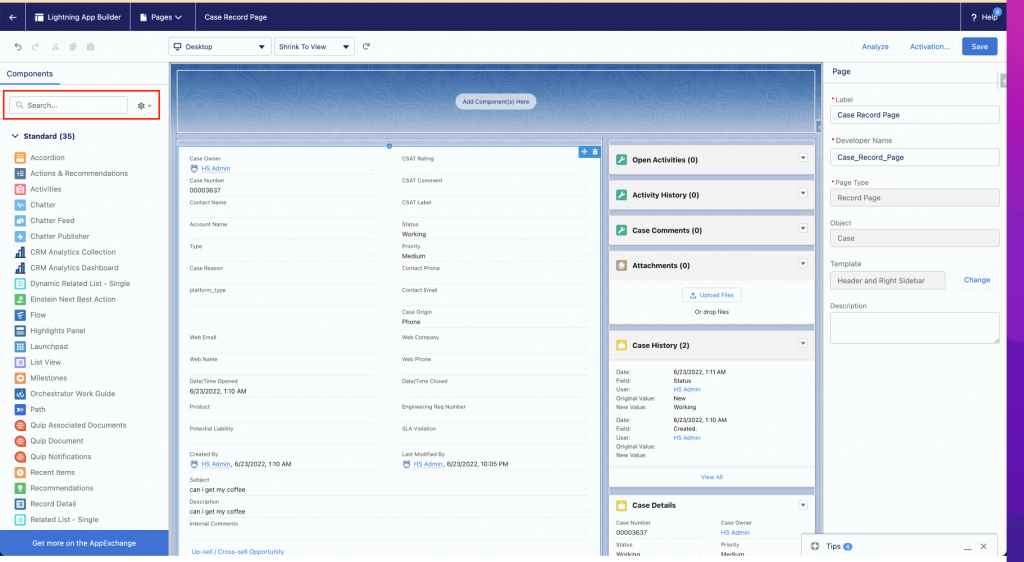
In the left section search for Helpshift Messenger(Aura).
Note: If you are installing version 3.0+ then search for messenger(LWC)
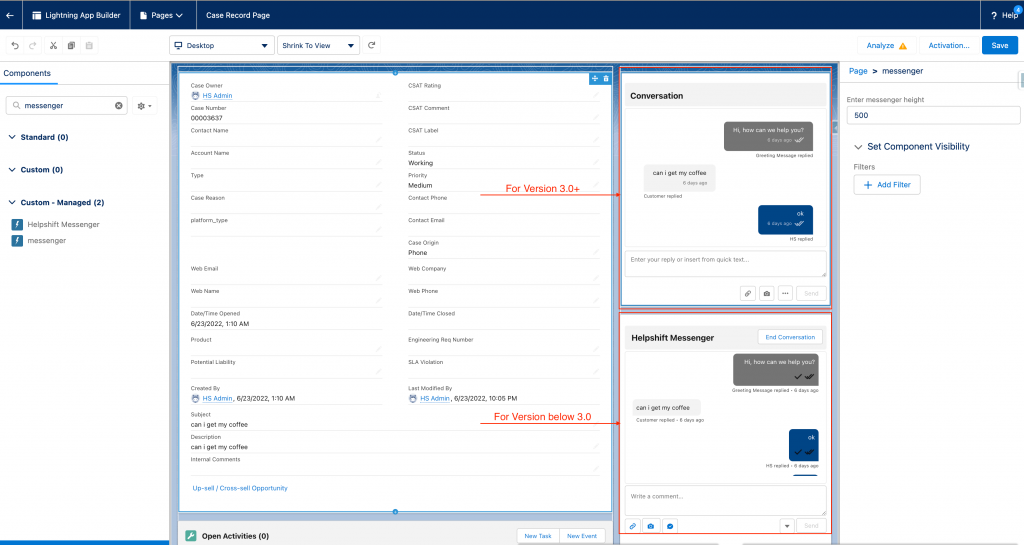
For Version below 3.0
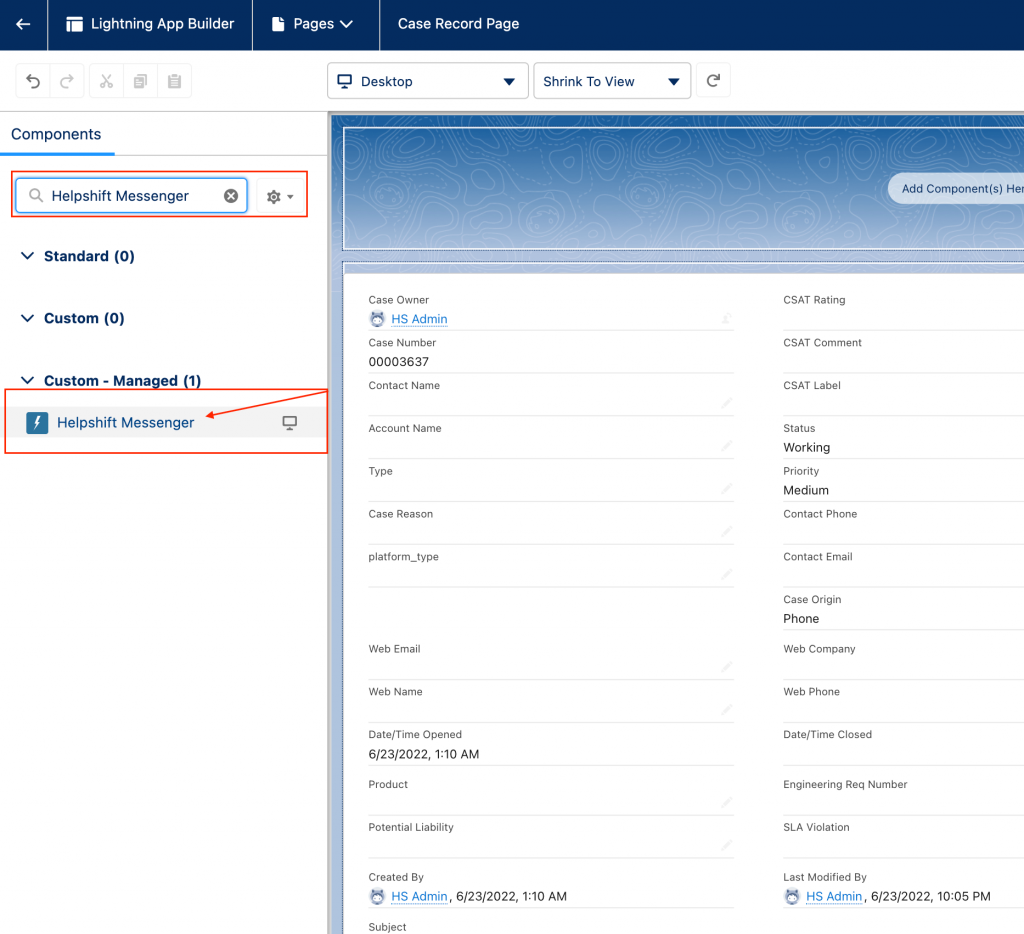
For version 3.0+
Drag the component and add it to the desired position.
4. Setting Up Your Helpshift Account
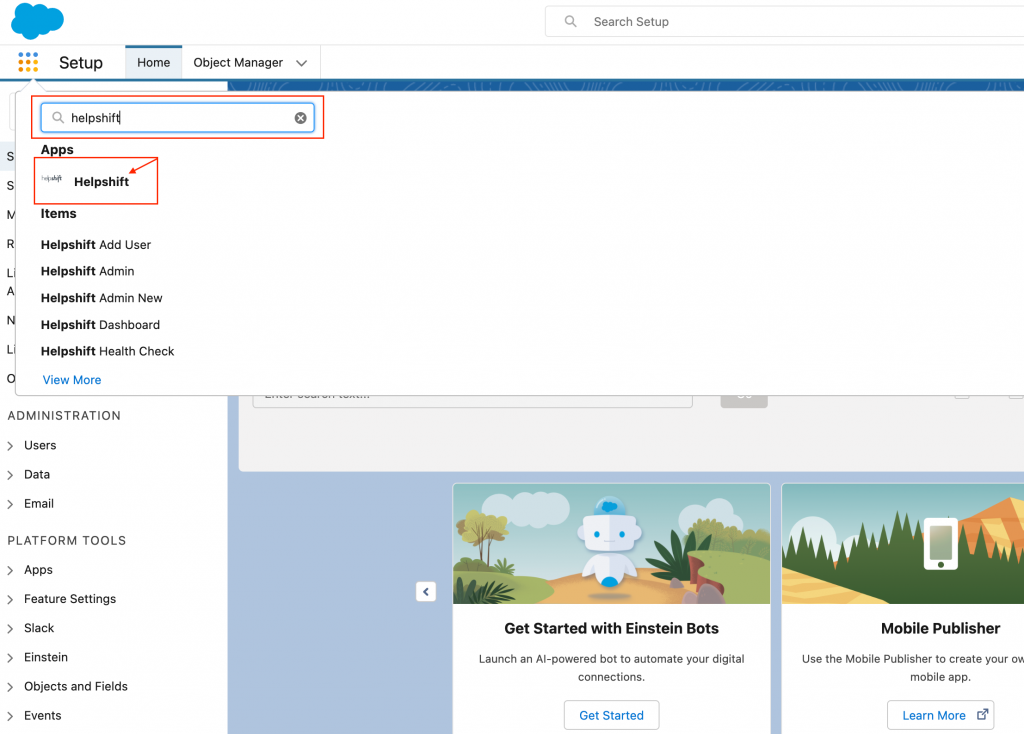
Click on App launcher icon at the top left corner, and type Helpshift to open the App.
Navigate to Helpshift Admin Tab, and click Login.
Enter the domain name by reading the instructions on the page, and click on ‘Submit’ button.
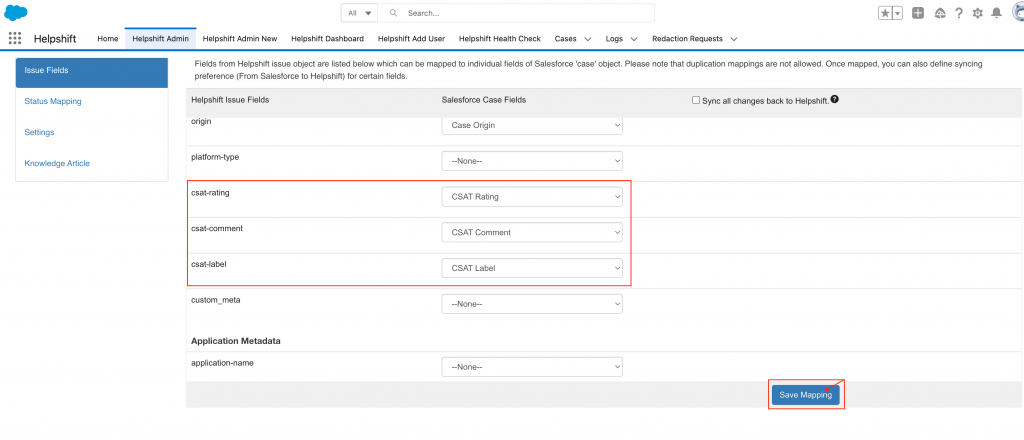
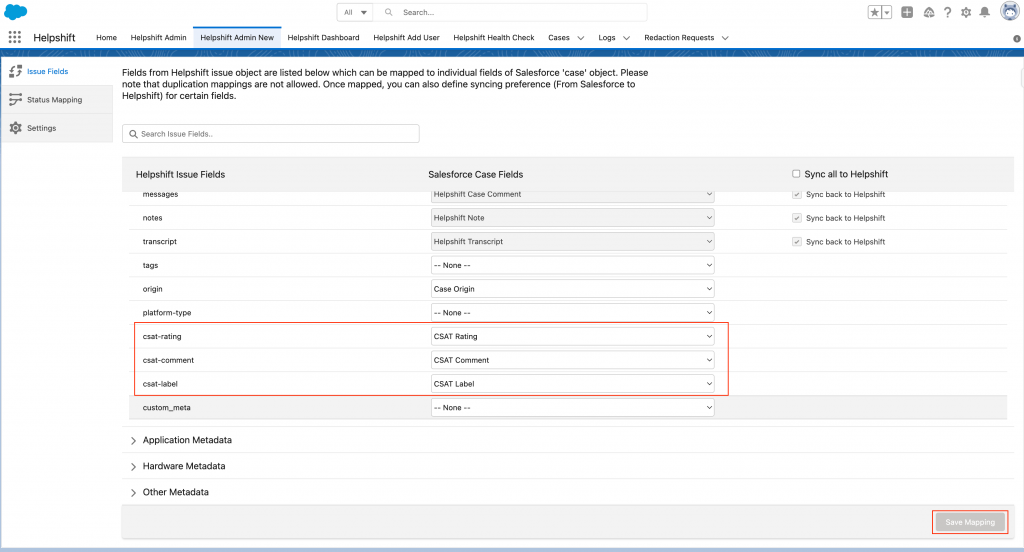
Issue Field Mapping
Scroll down in the issue fields section and choose fields for csat-rating, csat-comment, and csat-label.
Select any available fields from the case based on your processes, we suggest creating separate fields for each of them with field types as Number, Text, and Text Area.
For package below 3.0:
For package 3.0+:
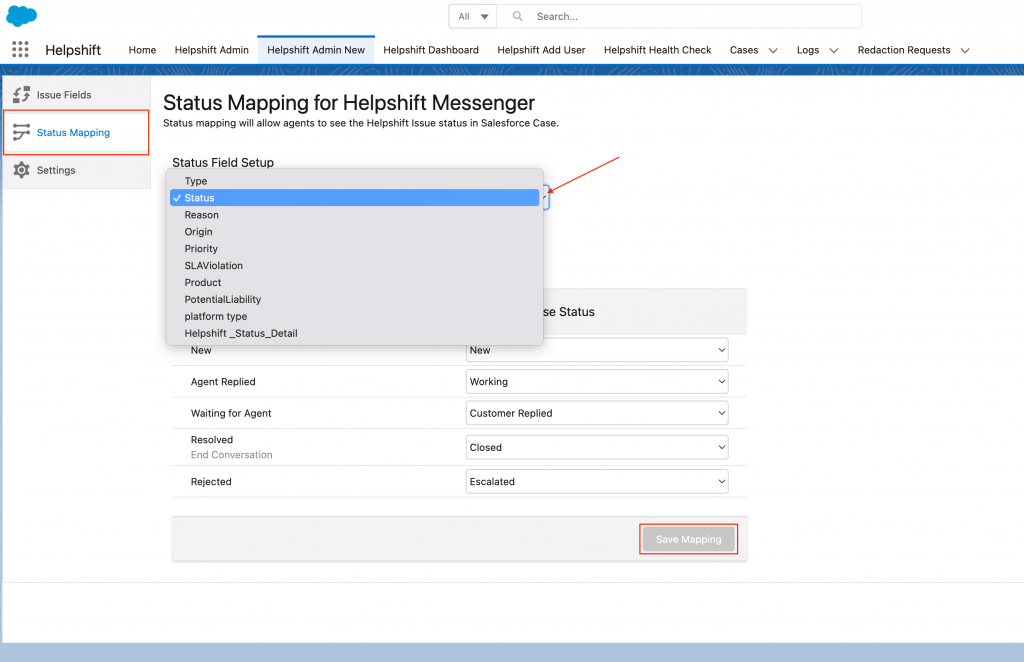
Status Mapping
In the status mapping section, select the field which will be mapped with Helpshift’s Issue status. All the picklist fields are available, choose based on your processes and hit the Save Mapping button.
For package below 3.0:


For package 3.0+:
Settings
For configuring Helpshift Admin Use the ‘Change Admin’ tab from the ‘Settings’ section. Also, required permissions can be assigned to the agents using a single click through the Assign Permission tab.
For package below 3.0:
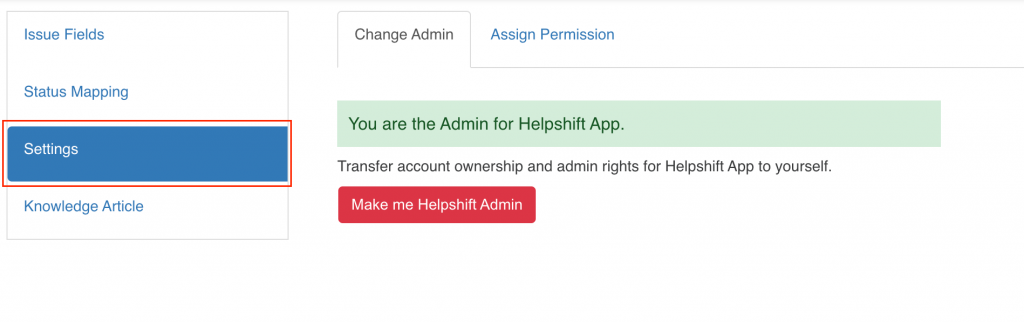
For package 3.0+:

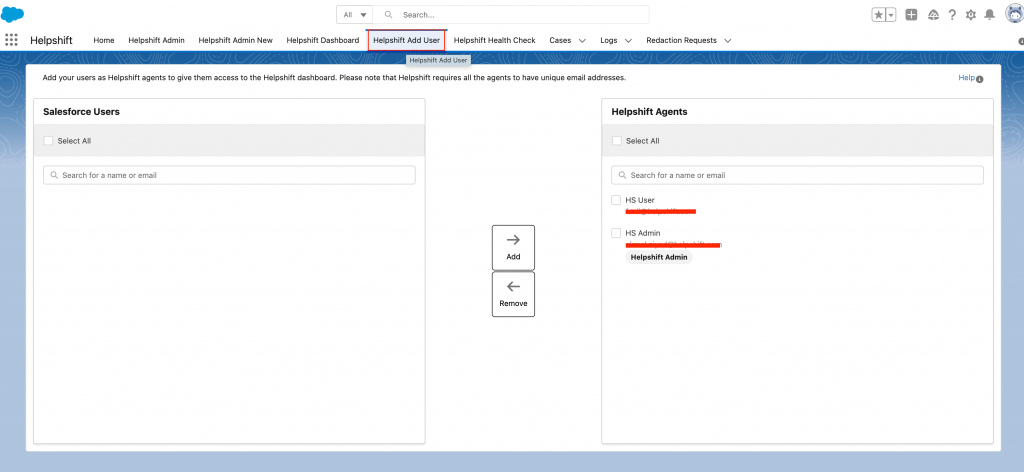
Add User
Click on the ‘Helpshift Add User’ tab to add them as Helpshift Agents, this will automatically assign permissions to the Salesforce Users.
You can use Add and Remove by selecting the checkbox before the User’s name.
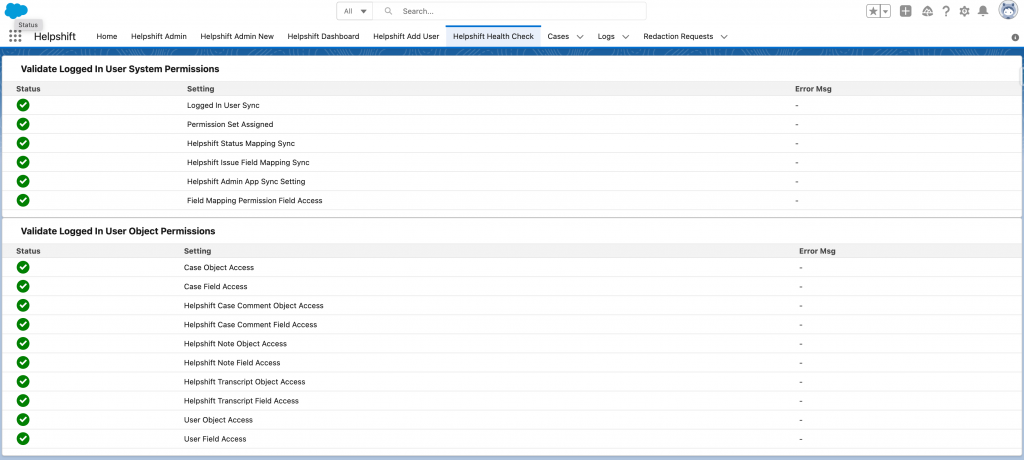
Health Check
Click on the ‘Helpshift Health Check’ tab to check that the permissions and configurations are correct.
5. Knowledge Base/FAQ Mapping
To allow you to maintain one source of user-facing information, you can configure your Salesforce Knowledge Base to automatically sync with your Helpshift FAQs via the Sync Knowledge Article tab.
Note: Once Knowledge articles from Salesforce are mapped to Helpshift, there is no way they can be unmapped. However, if you make a mistake, you can always re-make the Knowledge Base to overwrite the old article content.
Connect your Helpshift FAQs to your Salesforce Knowledge base as follows:
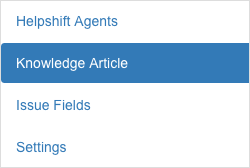
1. Click the ‘Knowledge Article’ tab in the left navigation bar under the Helpshift Admin tab
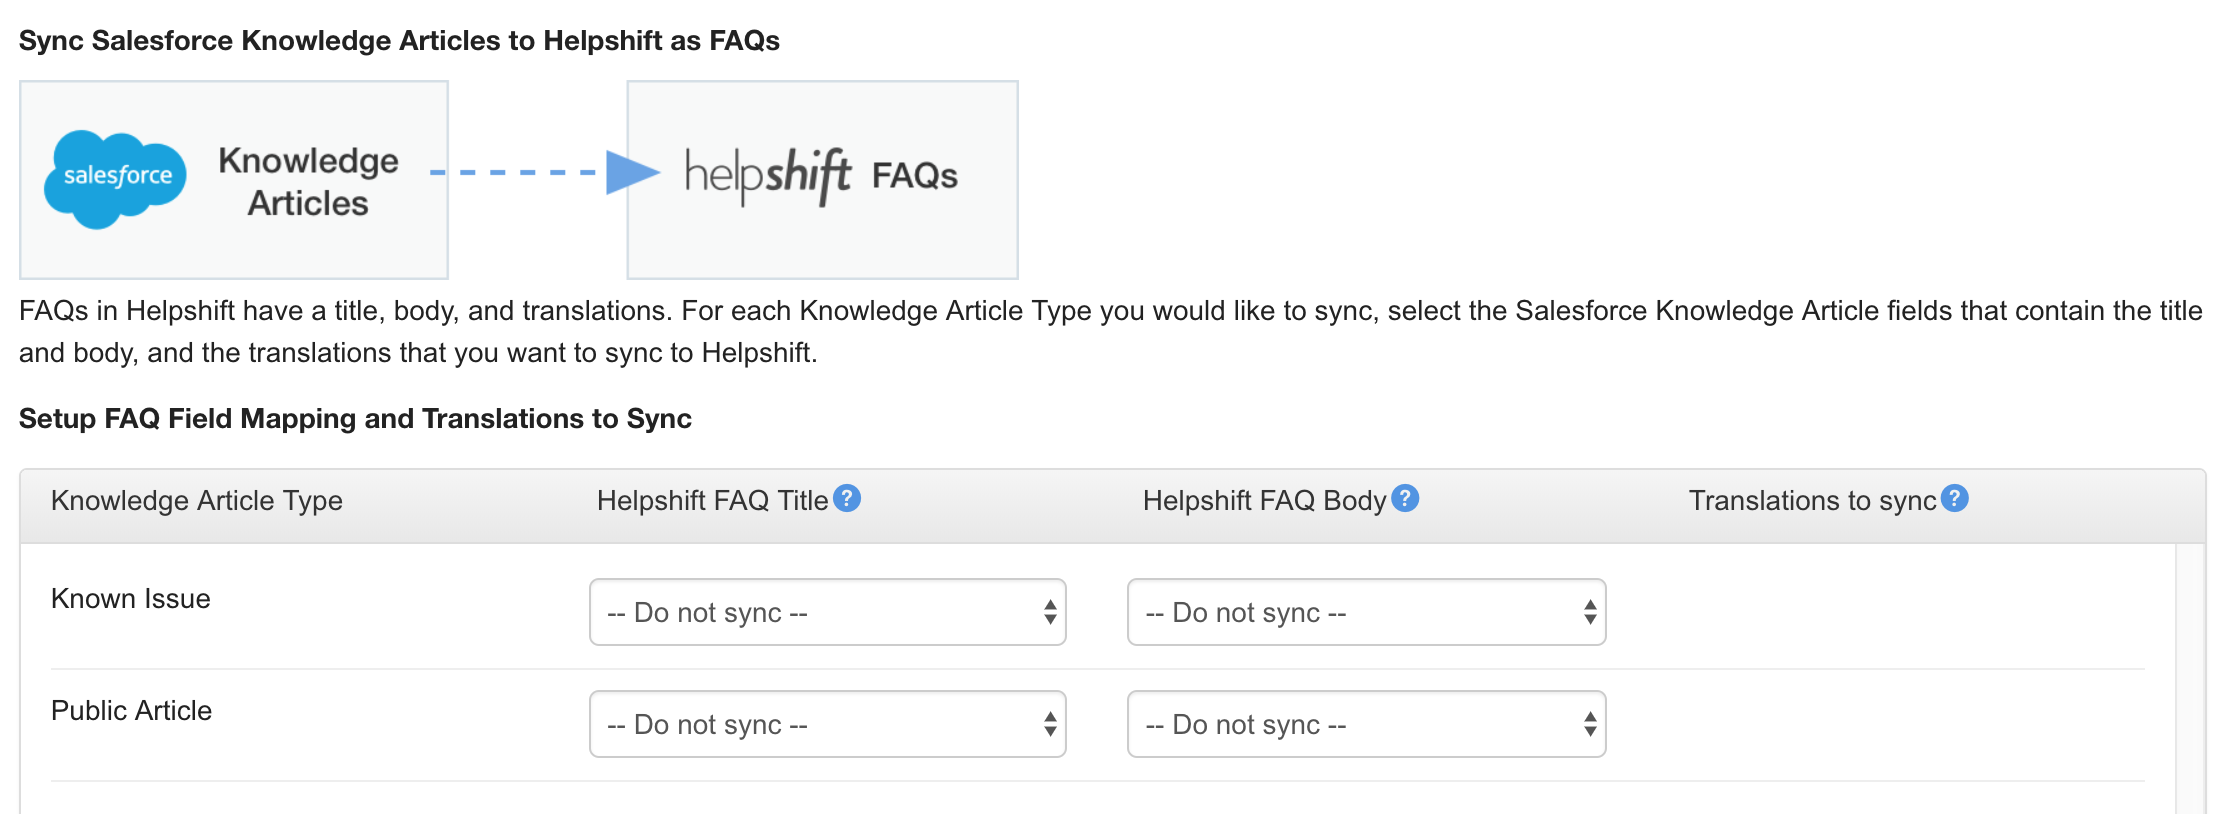
2. You will be prompted to provide the following info for FAQ mapping:
- Article type: select FAQ
- FAQ title: select the Knowledge base article information you’d like have mapped over to be the FAQ title
- FAQ body: select the Knowledge base article information you’d like have mapped over to be the FAQ summary
- Translations to sync: select which translated versions of the Knowledge Base article you’d like to map over
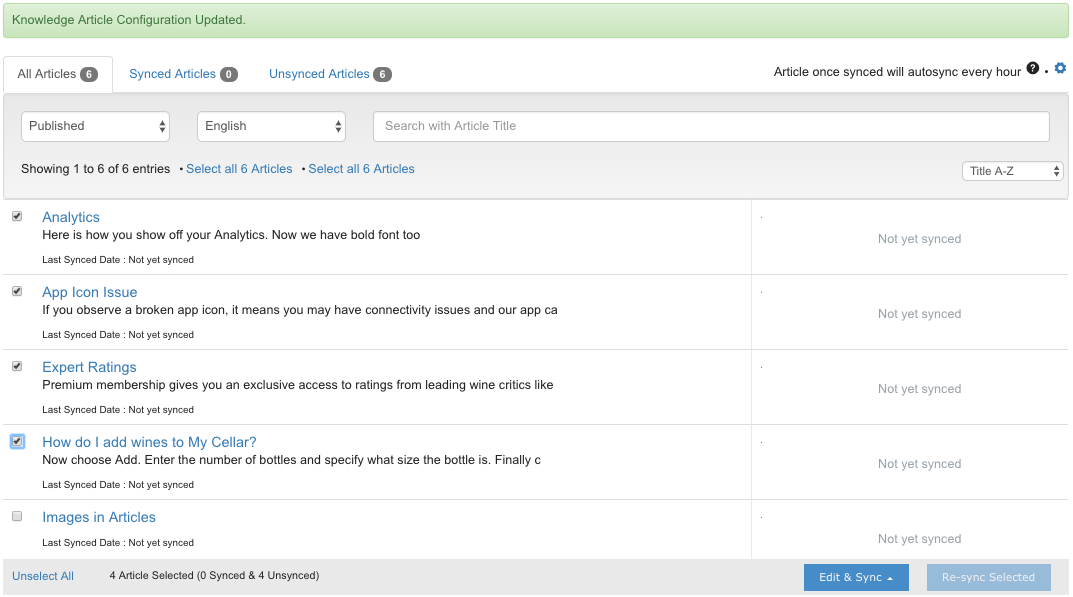
Once you click ‘Save & Continue’ (or if you already have your Knowledge Base mapped) you will see all of your Salesforce Knowledge base articles listed (including unpublished and published), and where they are currently synced to.
Note: Before beginning the content sync, you MUST create FAQ Sections in Helpshift that correspond with the article types set in your Salesforce account. This is to provide the article types a place to map to during the mapping process. Learn how to complete this step in How do I create FAQ Sections & articles?
Once you’ve created corresponding FAQ sections in Helpshift, map the Knowledge articles as follows:
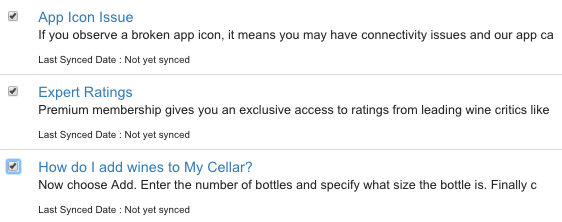
1. Select the articles you wish to map by checking the checkbox next to the article – you can also pull up articles via the search bar at the top of the page
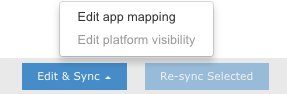
2. Once you’ve selected all the FAQs you wish to sync, click the ‘Edit & Sync’ button at the bottom, then select ‘Edit app mapping’ in the drop-down that appears
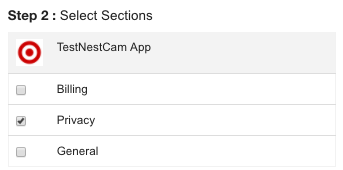
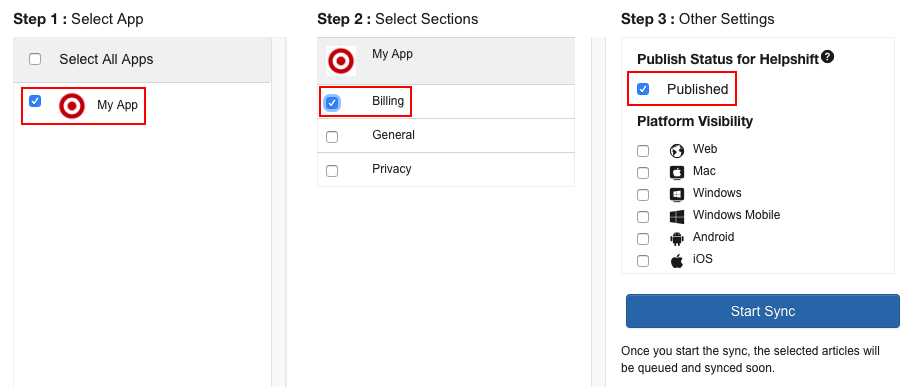
3. On the page that appears, select which app you’d like the FAQs to be present on – you can select multiple apps and sections at once, whether you want them in a published state, and which platforms you’d like to publish them to.

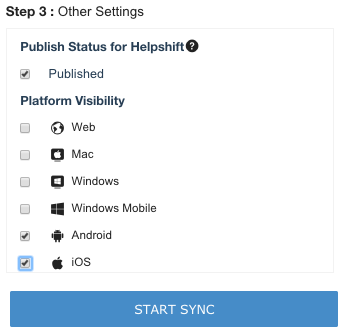
Click the ‘Start Sync’ button. The new FAQs and Sections will become available immediately.
You can also publish and unpublish Helpshift FAQs by selecting the check box next to the FAQ, clicking the ‘Edit & Sync’ button in the bottom-right, then selecting ‘Edit app mapping’.

On the page that appears, click the checkboxes next to the app and FAQ Section, then select or deselect the ‘Published’ checkbox on the right.
When the sync is complete, you’ll notice that the ‘Last synced date’ will update. Additionally, the icons of the mapped app will start appearing in front of the FAQs.

Knowledge articles from Salesforce sync with FAQs in Helpshift every 24 hours. If you need your Helpshift FAQs to be updated immediately, you can do one of the following:
Option 1: Navigate to the ‘Synced article’ tab on the Sync Knowledge article page, search for the FAQ or filter by apps and sections that you want to sync, select the FAQ or section, then click the ‘Re-sync selected’ button.
Option 2: Navigate to the ‘All articles’ tab on the Sync Knowledge article page, then click the ‘Re-sync all articles’ button. This might make unnecessary API calls to Salesforce. Hence Option 1 is most recommended.
Please note: to ensure that images from Knowledge Base articles within Salesforce render correctly in Helpshift, the images must be configured to be public within Salesforce. To learn more, see Salesforce’s documentation on how to set up public in-line images in a Knowledge Base article.
6. Syncing Issue Fields & Statuses
Syncing Salesforce Issue Fields and Statuses allows you to track and organize types of Issues as they come through your Dashboard. This also helps your team members prioritize the types of Issues they should focus on first, such as VIP or escalated Issues.
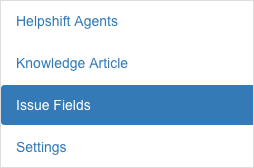
To sync Issue Fields with Custom Issue Fields and tags in Helpshift, navigate to the Issue Fields tab from the Helpshift Admin page.
On this page, you’ll see a list of rows for Helpshift Issue fields and Salesforce Case fields. You can complete those fields as follows:


Please note the following when mapping fields:
- Certain fields are mapped by default. If needed, these mappings can be edited.
- Once mapped, only a few fields can also be synced back to Helpshift from Salesforce. (By default, none of the fields are synced back from Salesforce to Helpshift).
- 1:N mapping between Helpshift & Salesforce is not supported. This means that you can’t map one field from Helpshift to multiple fields in Salesforce.
- The data type for each Salesforce field is automatically populated in the drop-down for the corresponding Helpshift field based on the matching data type. This is to maintain the data quality. Examples of this behavior are as follows:
- Example 1: the ‘Title’ field in Helpshift is the data type ‘string’. Accordingly, the list of Salesforce drop-down fields will be of the string type.
- Example 2: the ‘CSAT rating’ field in Helpshift is the data type ‘Integer (number)’. Accordingly, the list of Salesforce drop-down fields will be of the number type.
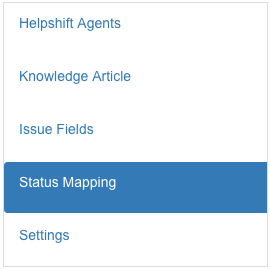
Next, navigate to the Status Mapping tab.
You can map these statuses to your corresponding custom fields as follows:

To learn more about Issue statuses, see What is an ‘Issue Status’ and how do I update it?
7. Adding Salesforce Quick Texts
Agents can add Quick Texts created in Salesforce to Helpshift issues in the Messenger.
To add a Quick Text, click on the highlighted option in the screenshot, below the messenger input text box.
Select the desired Quick Text, it will appear in the input text box for any further editing or can be sent directly.
For package below 3.0:


For package 3.0+:


Note: This feature is available only for the Lightning Experience.
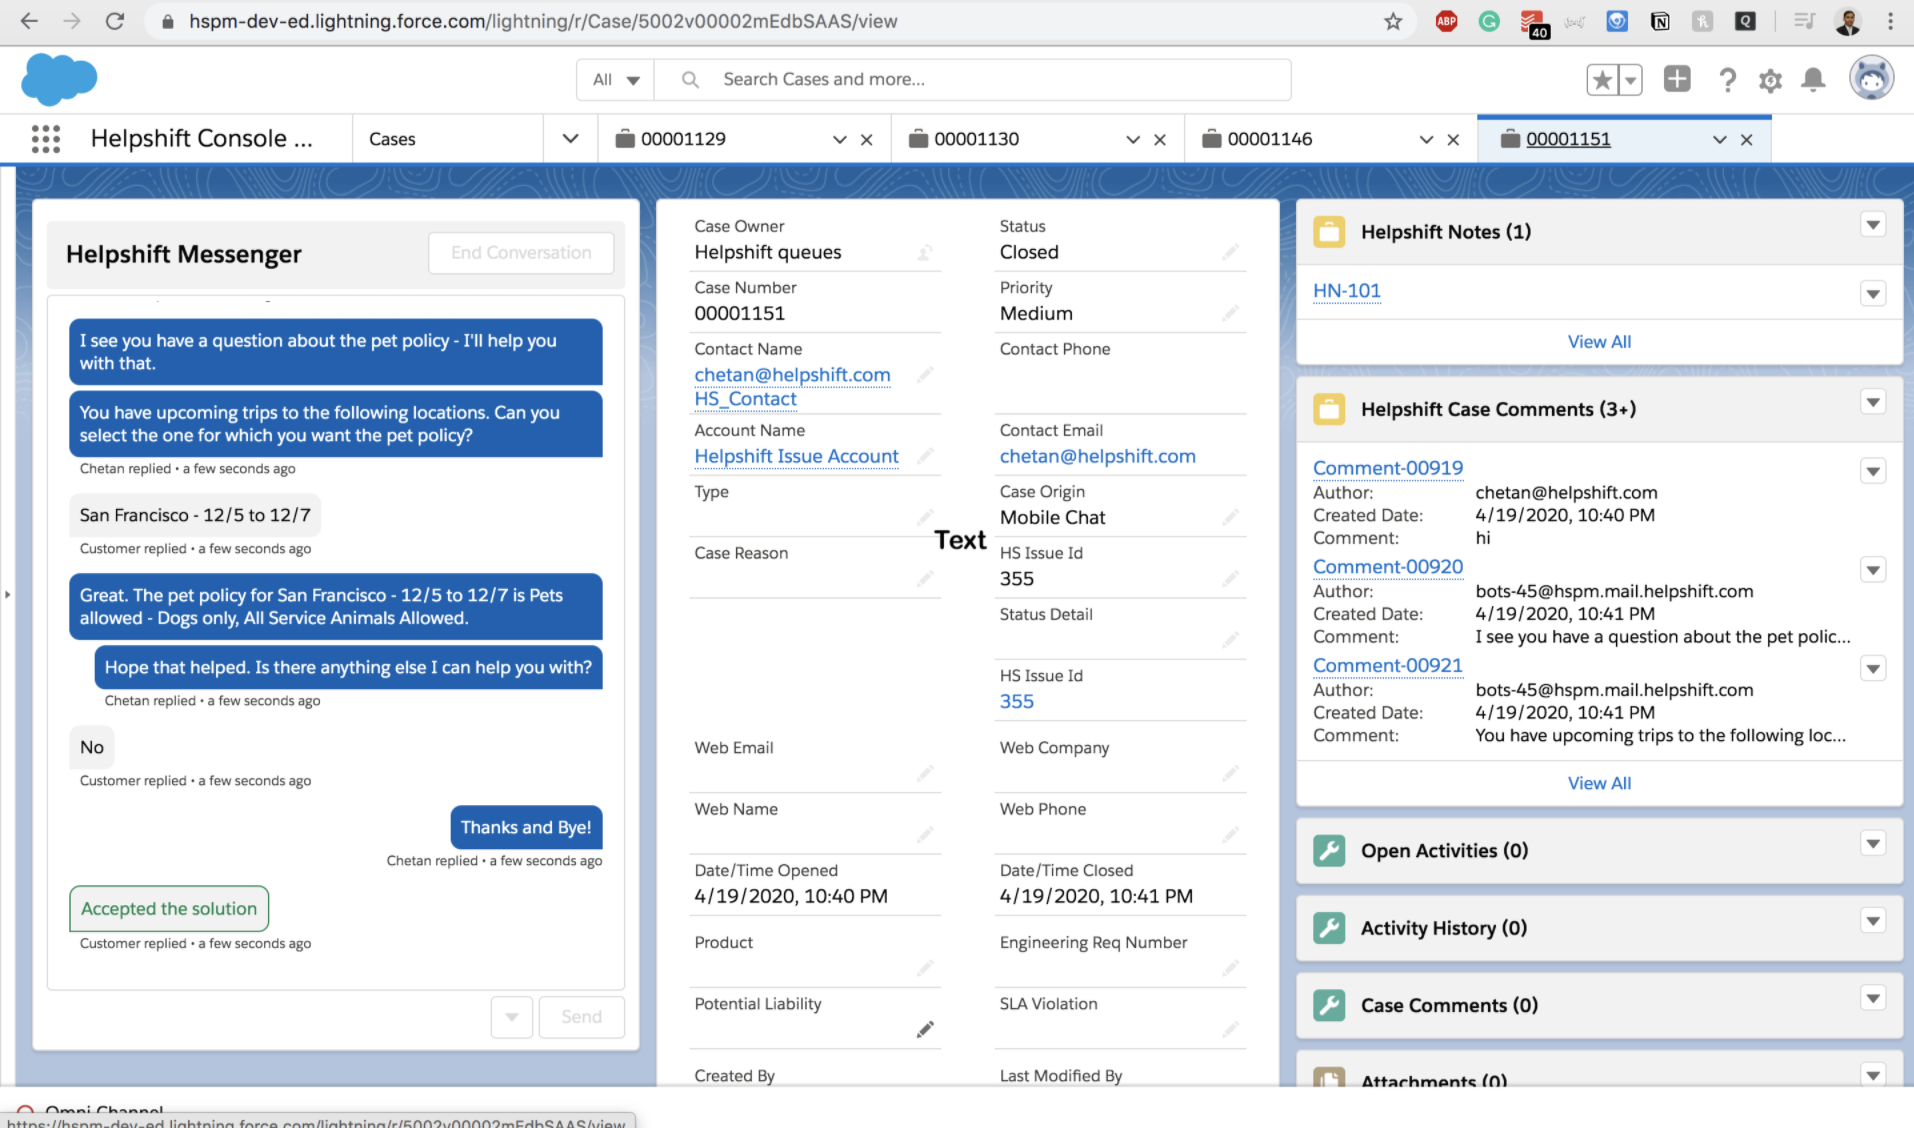
8. Cases handled by Bots
Cases may be assigned to Helpshift Bots by Automations or from the Helpshift Agent Dashboard.
If QuickSearch Bot is enabled, the user will see FAQ suggestions related to the query entered. The Messenger will show the suggestions and the user’s reply to the Agent as well.


The Agent can see the content of the FAQ suggested to the user.

If a case is being handled by a Custom Bot, the Messenger will show the following notification instead of an input text box.

Once the bot is done interacting with the user, the input text box will be shown again for the Agent to continue the conversation. The Messenger will show Bot and Automation messages differently from Agent messages.
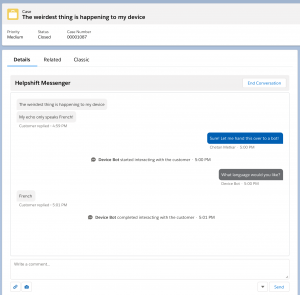
Agents can interrupt the bot and assign the issue to themselves. If the Agent closes the above notification, he will be able to send a message to the user.

Note: The enhanced bot experience is available only on the Lightning Experience.
9. Resolving a Case in Salesforce
Agents can resolve a case in Salesforce from Messenger.
To resolve a Case, click on the highlighted option in the screenshot.
For package below 3.0:

For package 3.0+:

10. Send/Read receipts in Messenger
Agents can now check if their message has been sent and read by the end user.
A single tick mark is shown for messages sent but not read by the end user.
A double tick mark is shown for messages the end-user has read.
For package below 3.0:

For package 3.0+:

11. (Optional) Sync App specific Issues to Salesforce
With this optional feature, you can choose to sync issues from specific apps to Salesforce. This provides flexibility in selecting the apps for which you'd like the issues to be synced.
By default, issues from all apps are synced to Salesforce integration. However, if you want to sync issues only from selected apps, follow these steps:
- Navigate to Integrations > Salesforce Configuration page.
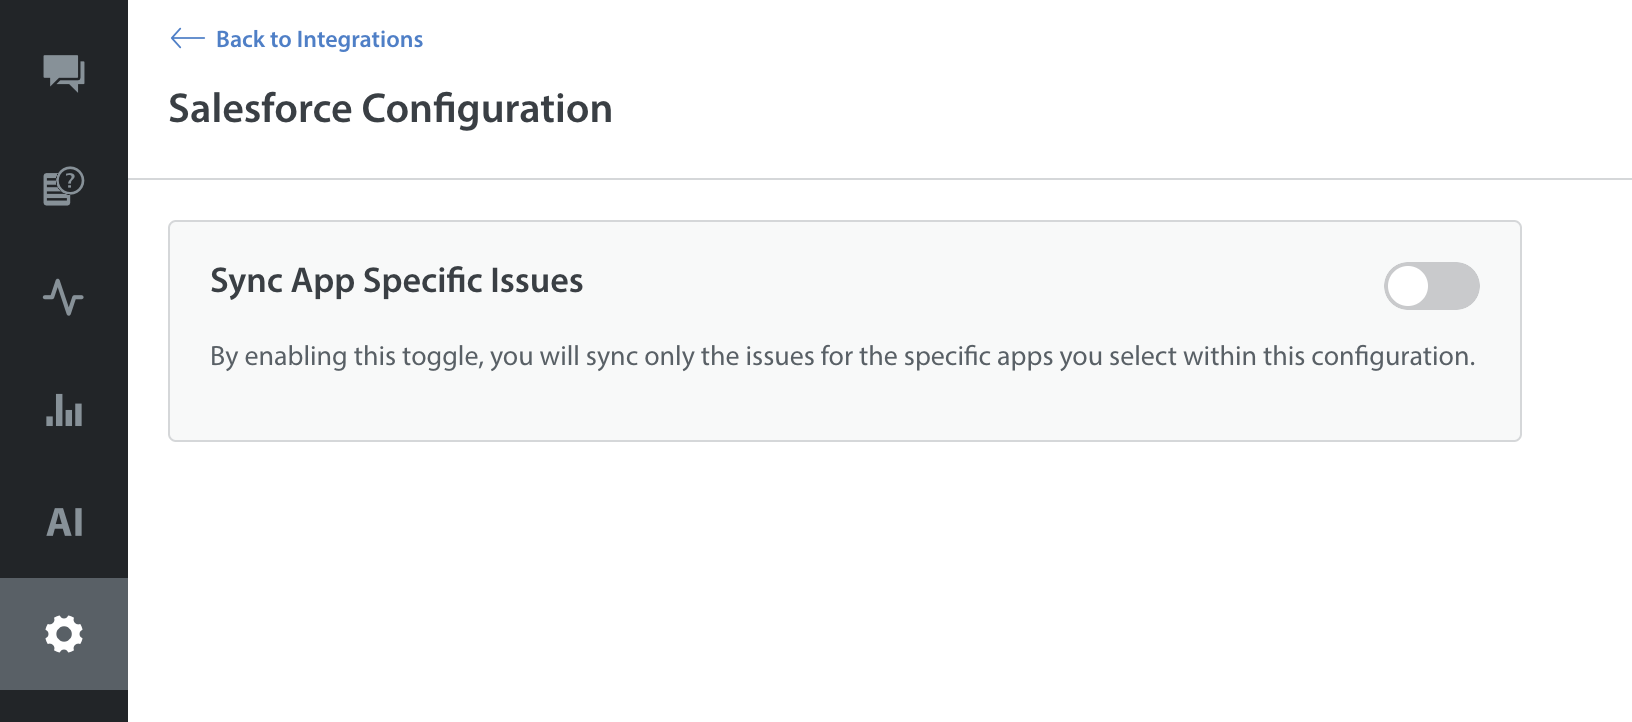
- Enable the toggle for Sync App Specific Issues.
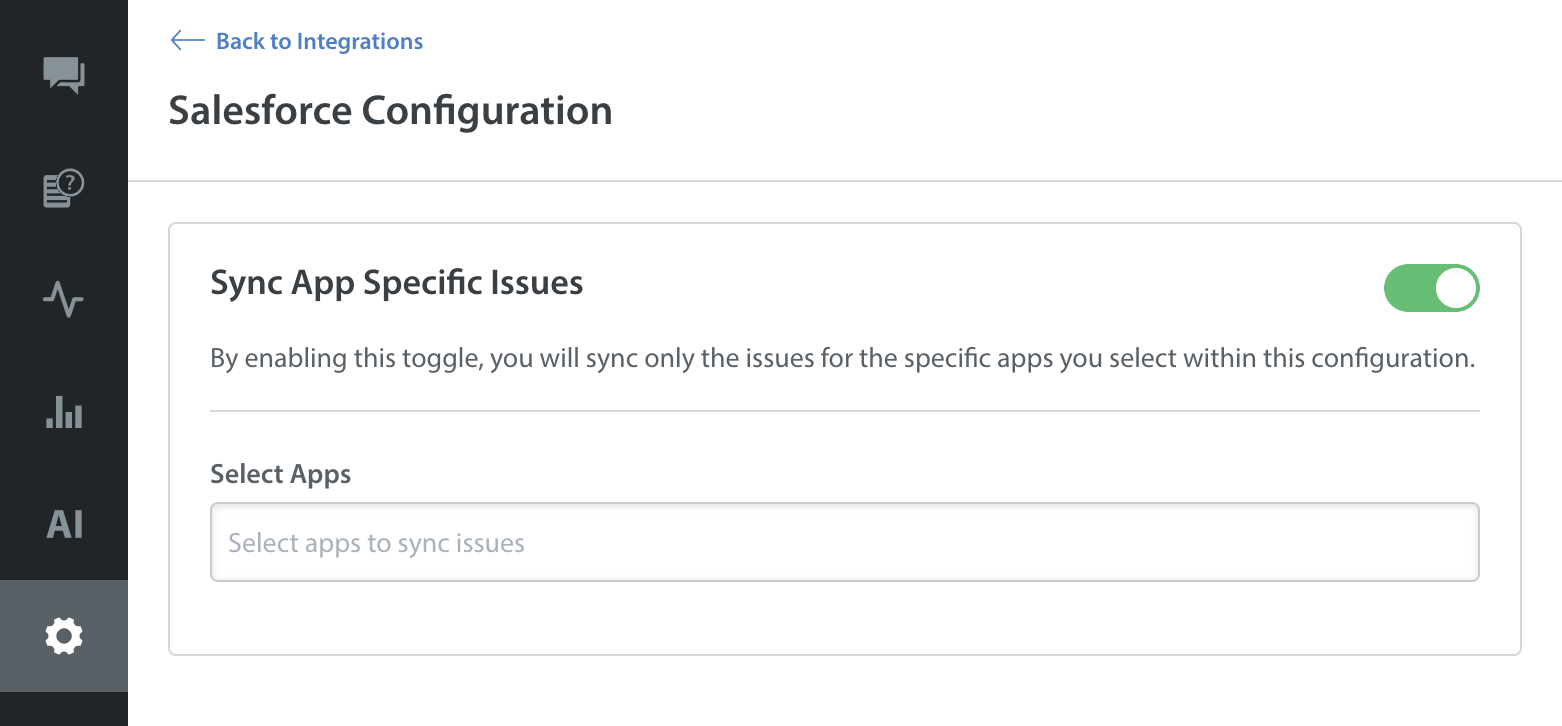
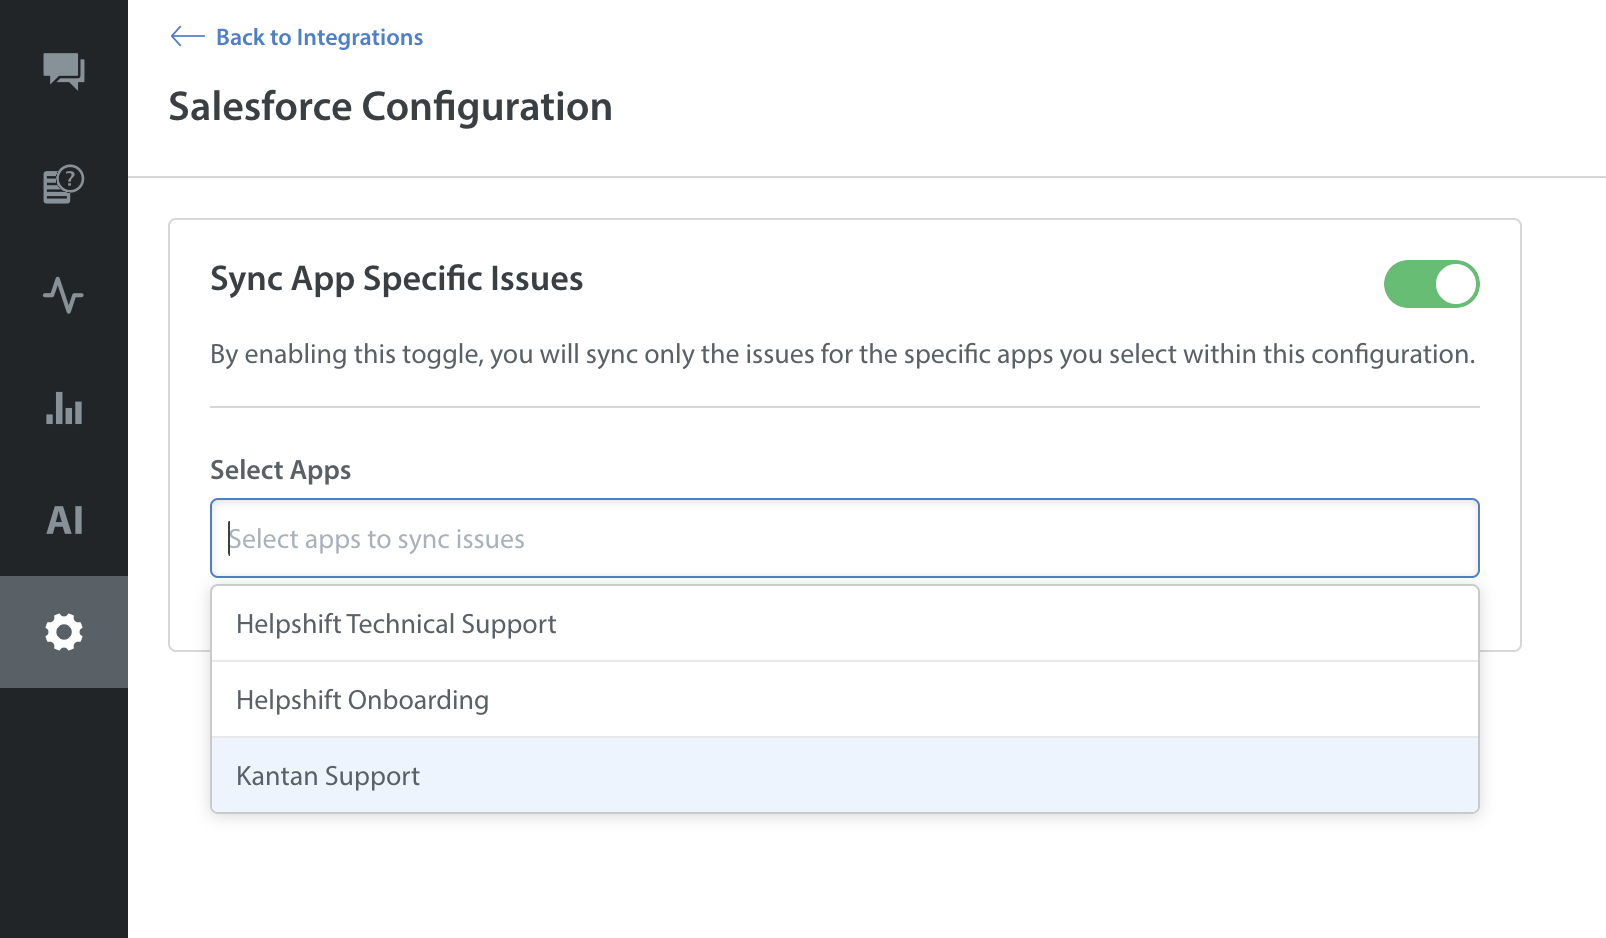
- Select the apps for which you want to sync issues to Salesforce.
- Click SAVE & PUBLISH to save the changes.
Once your configuration is saved, only the selected apps will sync issues to Salesforce.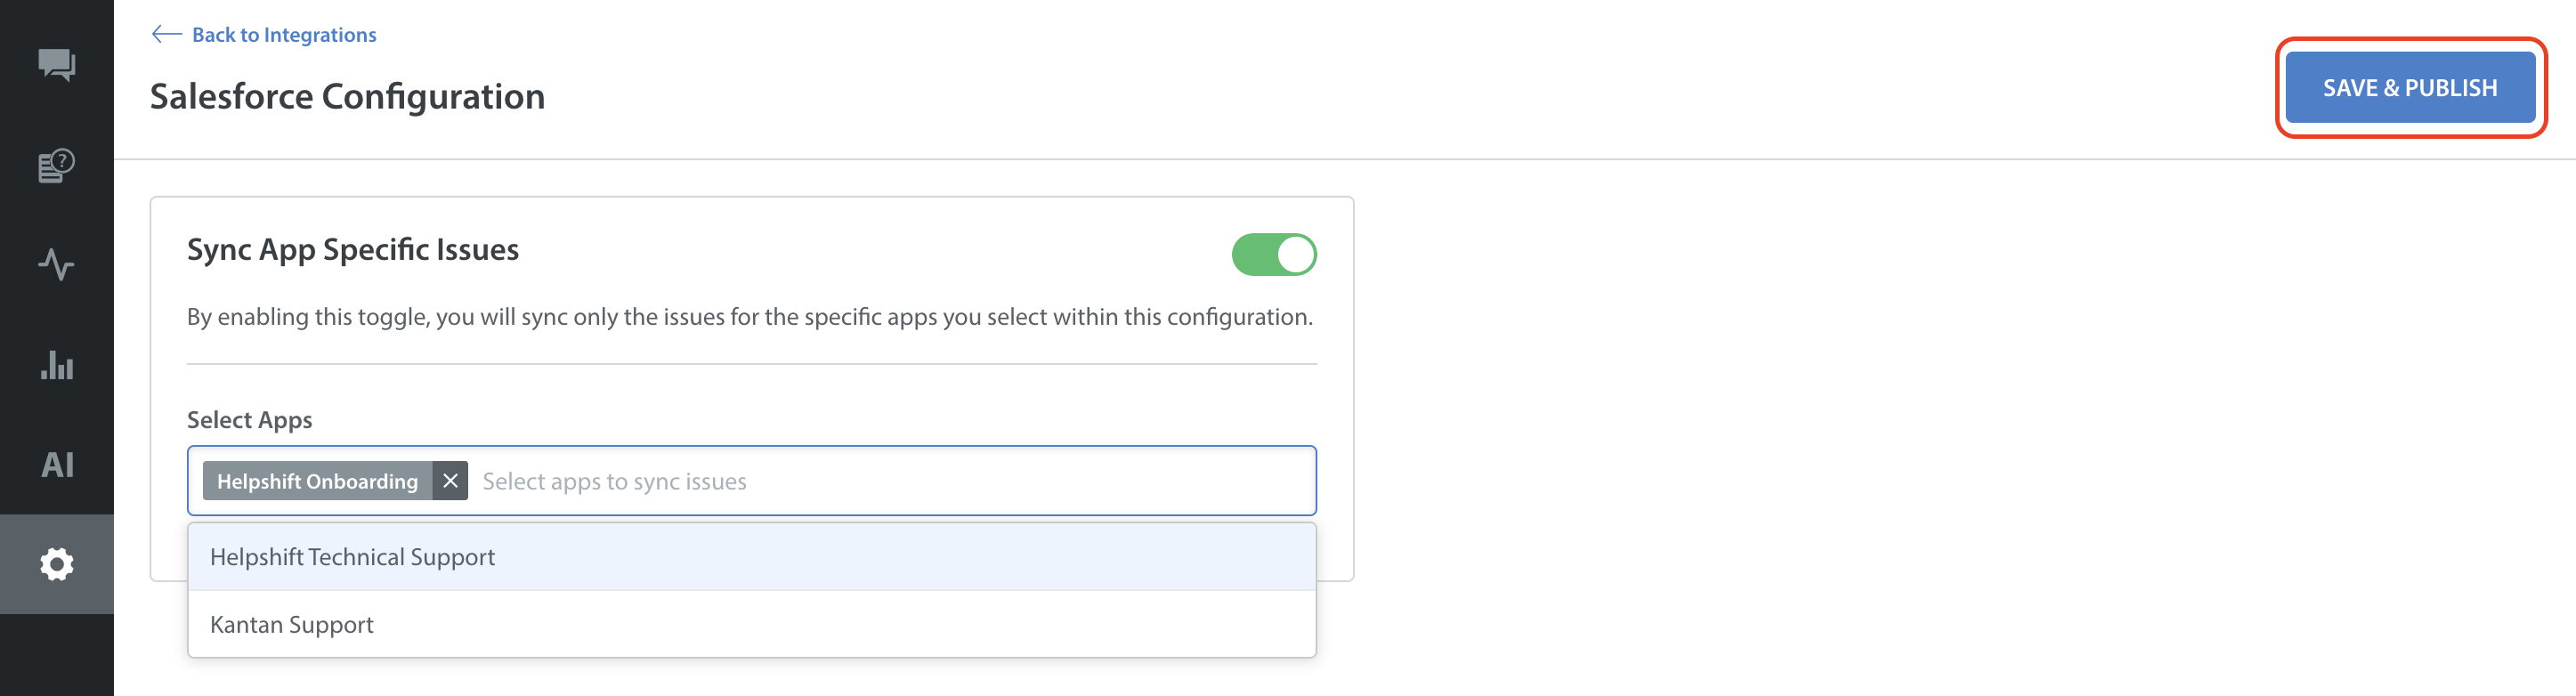
NOTE:
Issues previously synced will remain unaffected.
Agents can still chat for earlier synced open issues until they are resolved or rejected.
Issues from apps not selected will no longer sync to Salesforce.