
Our Okta SSO integration allows you to provide secure identity management for your support team using one of the most popular enterprise access management tools available on the market today. With Okta, SSO, you’ll have the ability to:
- Ease of access: no need to manually type in, renew, or worry about weak login credentials causing security issues
- Prevent common weak points in the authentication experience, including username/password login and password reset requests
- Quickly and easily block credentials for a team member who is no longer part of your support organization
- Integrate Okta’s Active Directory/LDAP infrastructure to coordinate identity and access management policies
- Add multi-factor authentication for that extra layer of security
Prior to completing this guide, you’ll need to have already purchased and signed up for Okta. Please note: you must be an Admin in both your Helpshift Dashboard and in your Okta account to complete the steps in this guide.
Create Custom Web App in Okta
Prior to completing the steps below, you’ll need to set up a custom Helpshift app in Okta. To do so, review Okta’s documentation on Setting Up a SAML Application in Okta.
- Once you’ve set up your Helpshift app, from your Okta account, click ‘Admin’ in the top right corner.

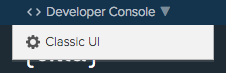
- In the top-left corner, select the ‘<> Developer Console’ drop-down and select ‘Classic UI’.
- On the page that appears, click ‘Applications’.

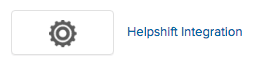
- In the Active Apps area, click on the Helpshift Integration.
- Navigate to the ‘Sign On’ tab.

- In the ‘Settings’ area, under ‘SAML 2.0 is not configured until you complete the setup instructions’, click the ‘View Setup Instructions’ button.
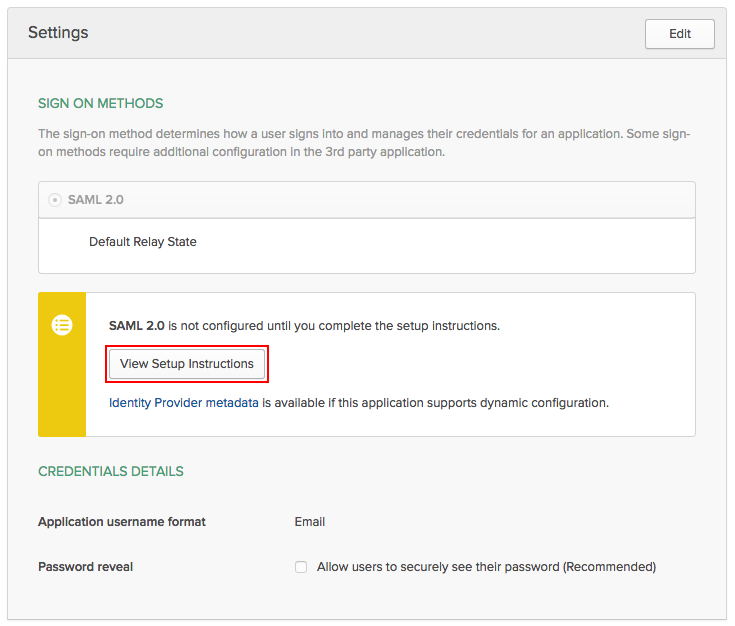
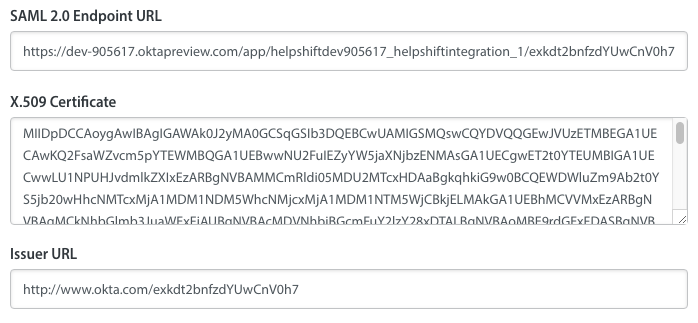
- On the page that appears, scroll down to where the following information is listed:
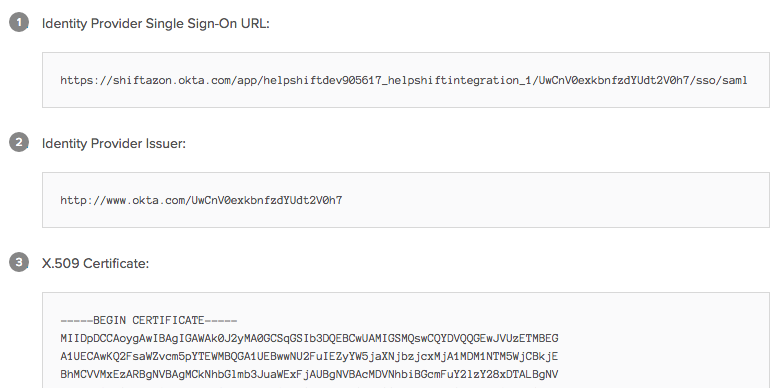
- Identity Provider Single Sign-On URL
- Identity Provider Issuer
- X.509 Certificate
Keep this page open, then in a new tab, open your Helpshift Dashboard to complete step 2.
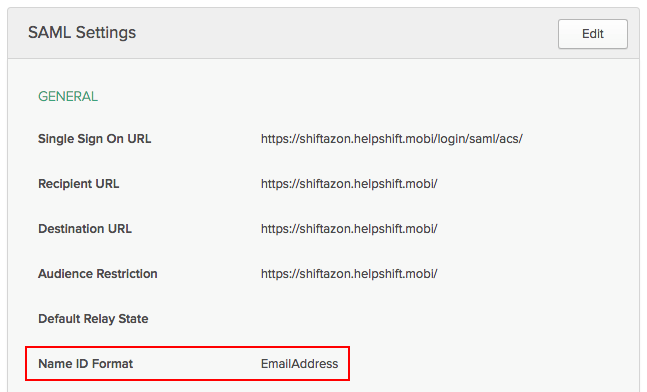
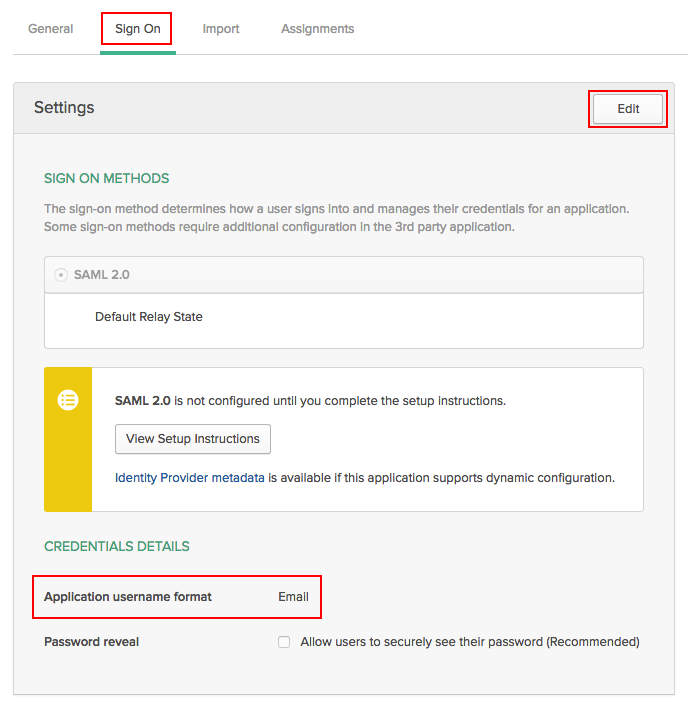
Note: Please double check that you have ‘NameIDFormat’ set to EmailAddress, and ’Application Username’ set to Email. If the NameIdFormat is not set correctly, navigate to the ‘General’ tab, then click the ‘Edit’ button in the top-right to update this setting.
- To update the Application Username, navigate back to the Sign On tab, then click ‘Edit’ to change this. setting.
Enable Okta SSO from the Helpshift Dashboard
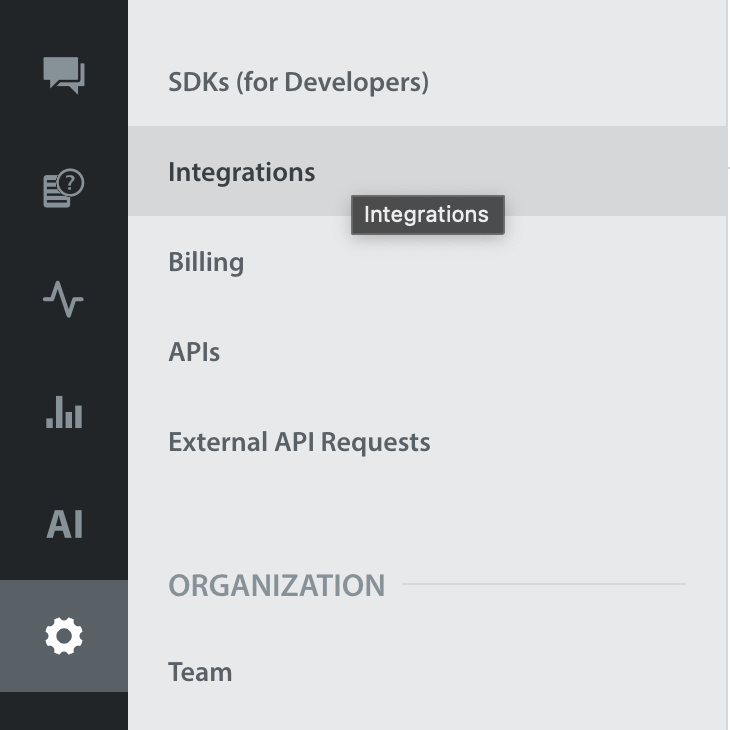
- In your Helpshift Dashboard, navigate to Settings > Integrations.
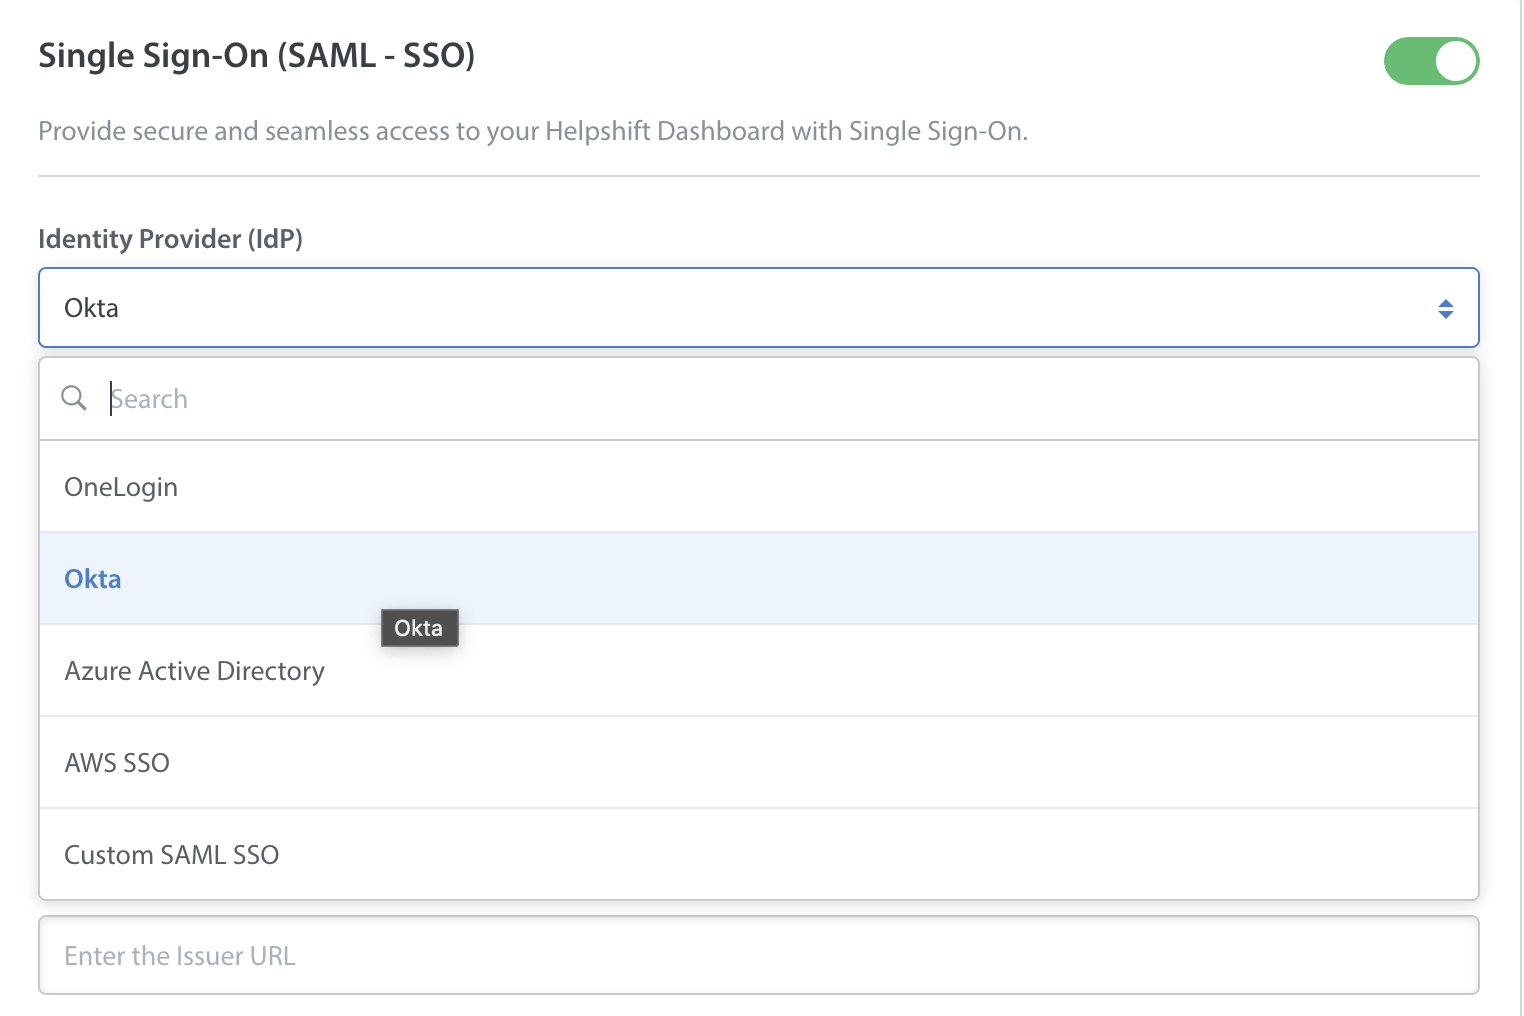
- Scroll down to the Single Sign On (SAML – SSO) section, and click on the toggle to enable it.

- In the ‘Identity Provider’ drop-down, select ‘Okta’.
- Copy-paste the following information from your Okta Dashboard:
- Identity Provider Single Sign-On URL >> SAML 2.0 Endpoint URL
- X.509 Certificate (do not include the ‘Begin Certificate’ and ‘End Certificate’ lines)
- Identity Provider Issuer >> Issuer URL
- Enable the ‘Disable Login through Email and Password’ option for all your agents by clicking on the toggle. It disables the other login methods except for the SSO login.
Note: When you turn on the Disable Login through Email and Password toggle, it deletes all the non-SSO credentials from Helpshift for security purpose. Also, check if SSO login is working properly and then only, turn on the Disable Login through Email and Password toggle.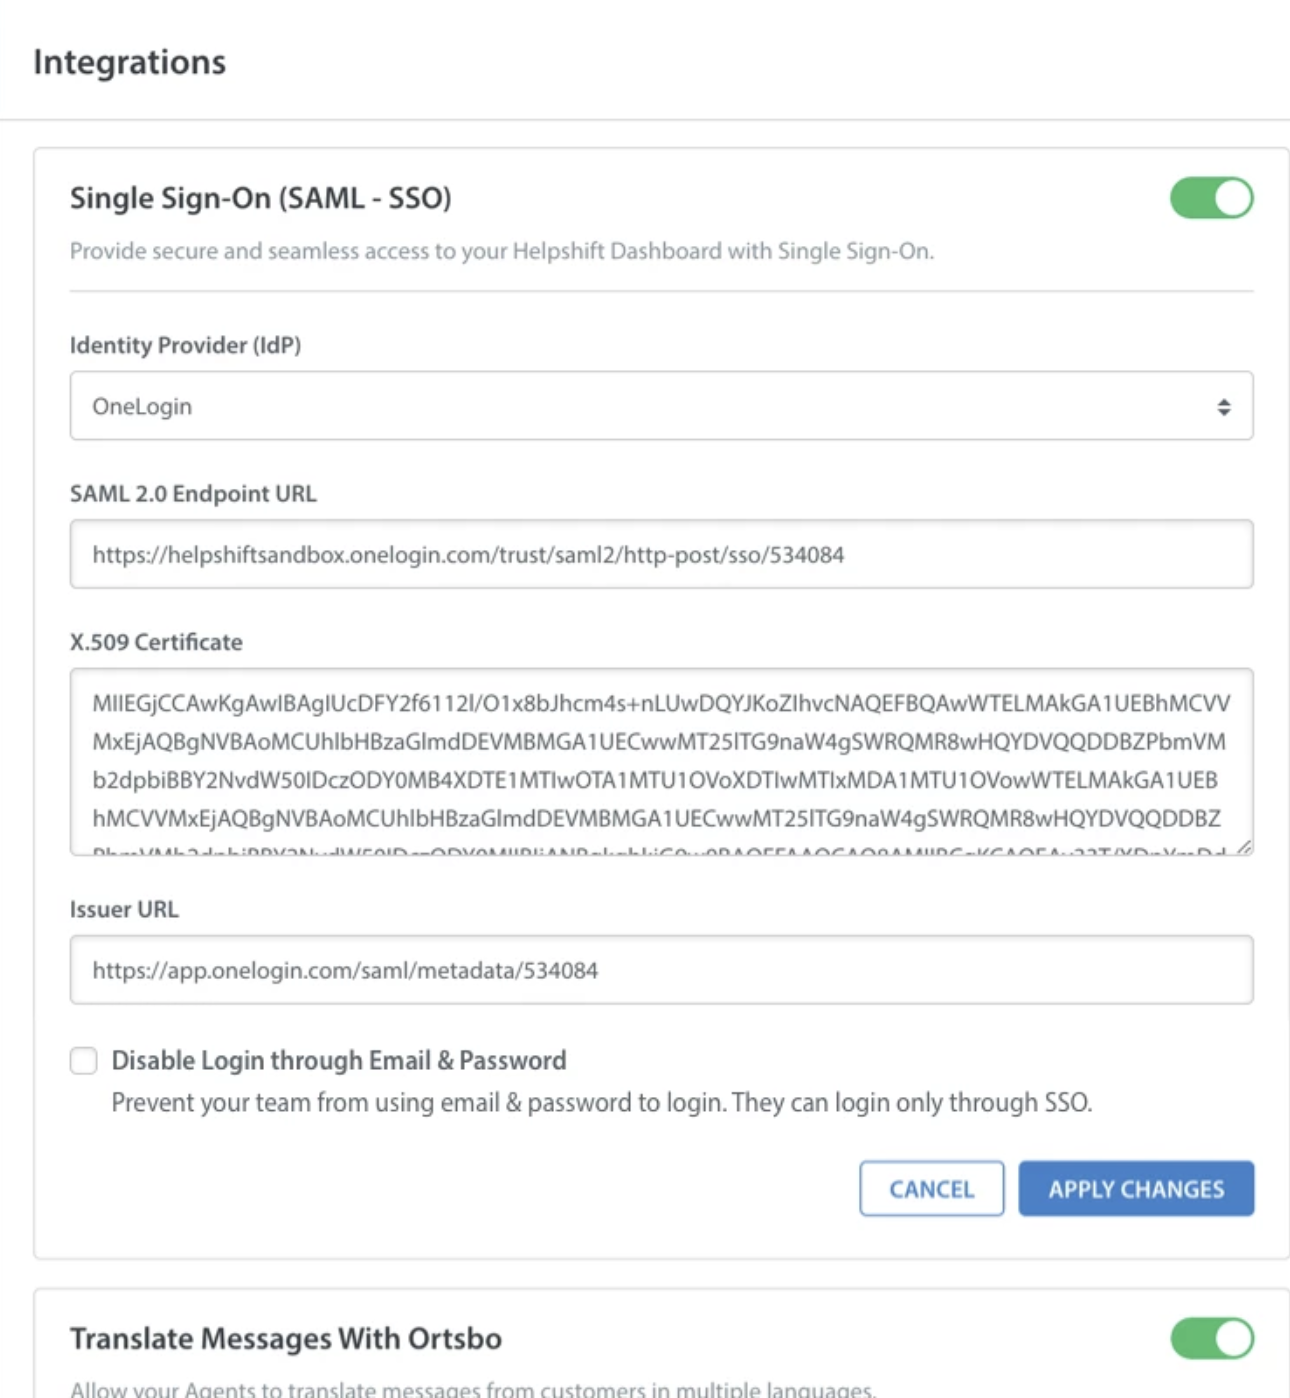
- Enable the toggle in the top right, then click the ‘Apply Changes’ button to save your SSO Configuration. An Okta button will now be visible on the Login Page.
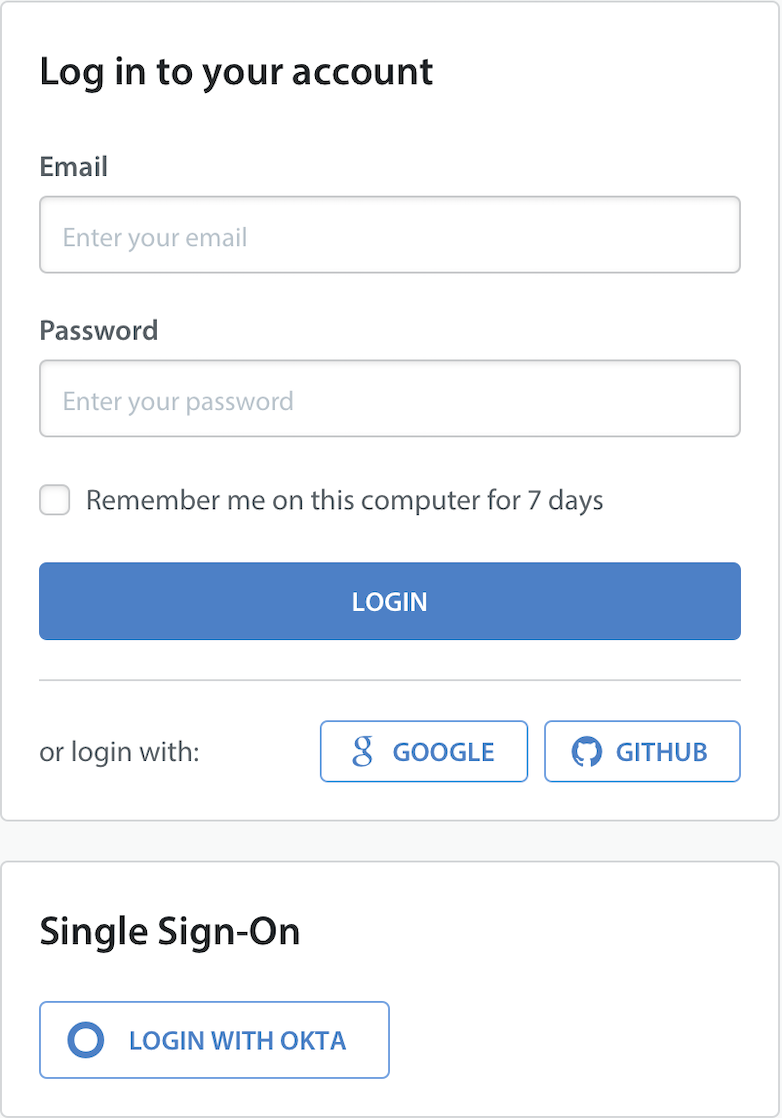
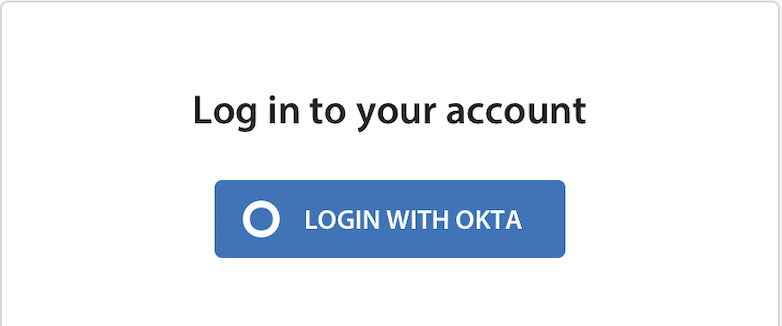
- The following Login Screen appears when you enable the Disable Login through Email and Password option.
To set up additional features and learn more about Helpshift best practices, please review our Knowledge Base.